The Camera Position
In the perspective window Programs and files are shown in so called windows in the operating system of the same name. In CARAT each view (e.g. floor plan, article input, front view, perspective etc.) opens its own window. Multiple windows can be shown simultaneously for processing. If changes are made in one of these windows, this has an automatic effect on all other windows. you can always only see the view of the last set perspective. Using the additional Addition (in Latin: addere) is one of four basic operations in arithmetic. In primary school and in common language it is the expression used for the adding of two or more numbers. available Module 3C you have the possibility to store up to 10 camera positions for each plan, for later use. As soon as you have saved one or more camera positions, you can use these to retrieve one of the saved camera positions quickly. The saved camera position can however also be used to print the resulting perspectives via the batch print Batch print in CARAT is the name for a special type of printing. By means of a batch print you can print several different documents one after another (sequentially) in one step. or to create a PDF The Adobe Portable Document Format (PDF) was developed and perfected in the 80's by Adobe Systems. Adobe PDF files contain data from any application, that can be displayed on every computer, and are suitable thereby to be exchanged with users throughout the world. from them.
For a perspective image, the scene from the view angle of the camera will be calculated once and be saved in an image format The format or formatting (Latin, forma) is designated in word processing as the design of the text document. In this case meaning the selection of character fonts and character style such as bold or italics. (for example BMR, JPEG JPEG or JPG (Joint Photographic Experts Group) is a committee of the International Telecommunications Union (ITU) founded in 1986. In September 1992 the committee developed a standardized procedure for a lossy compression of digital (natural) photographic images, that was subsequently named for them. JPEG is the most common photo format on the Web., TIFF TIFF or TIF (Tagged Image File Format) is a file format for saving image data. The TIFF format was originally developed by Aldus (taken over by Adobe in 1994) and Microsoft for scanned raster graphics for colour separation. or PNG Portable Network Graphics (PNG) is a graphics format for raster graphics with loss less image compression. Besides different colour depths PNG also supports transparency by alpha. It is an universal, from the World Wide Web Consortium (W3C) recognized format and is supported by all modern web browsers.). The saved image can afterwards no longer be changed by using CARAT.
The creation of the perspective in CARAT is a matter of a real-time calculation of the current scene, based on the camera position. The display mode for a scene can be switched at any time in CARAT. Besides a black-white design are several colour designs available. By means of the additional module 3C, you can save up to 10 camera positions, so you can retrieve them quickly again, at any time.
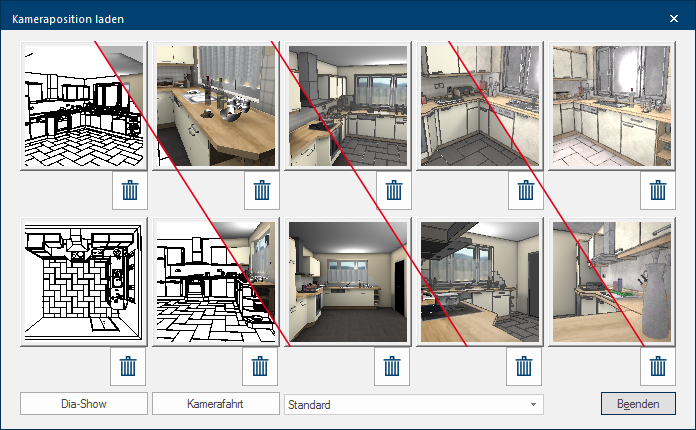
Because of this combination, you can use all 10 camera position for each of the display types. The following view should clarify this. The 10 saved camera positions do not have to be changed. Changing he display type is sufficient to show the preview of the scene already in the selected display type. (In this montage we have combined, from left to right, the display types Black-White, Photo, Photo (contour intensified) and CARAT art.)
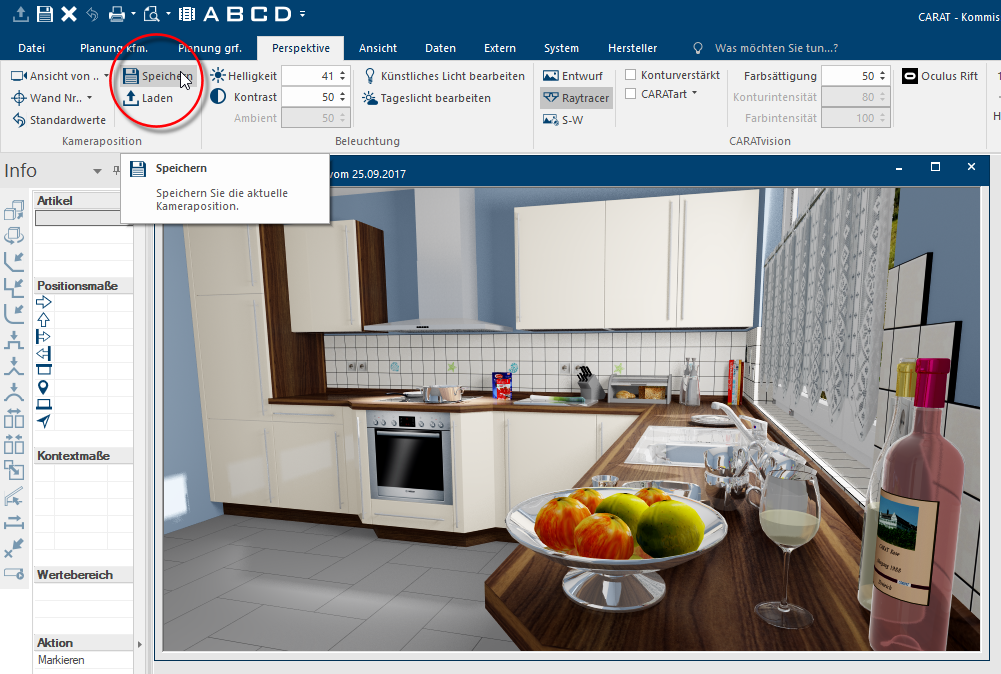
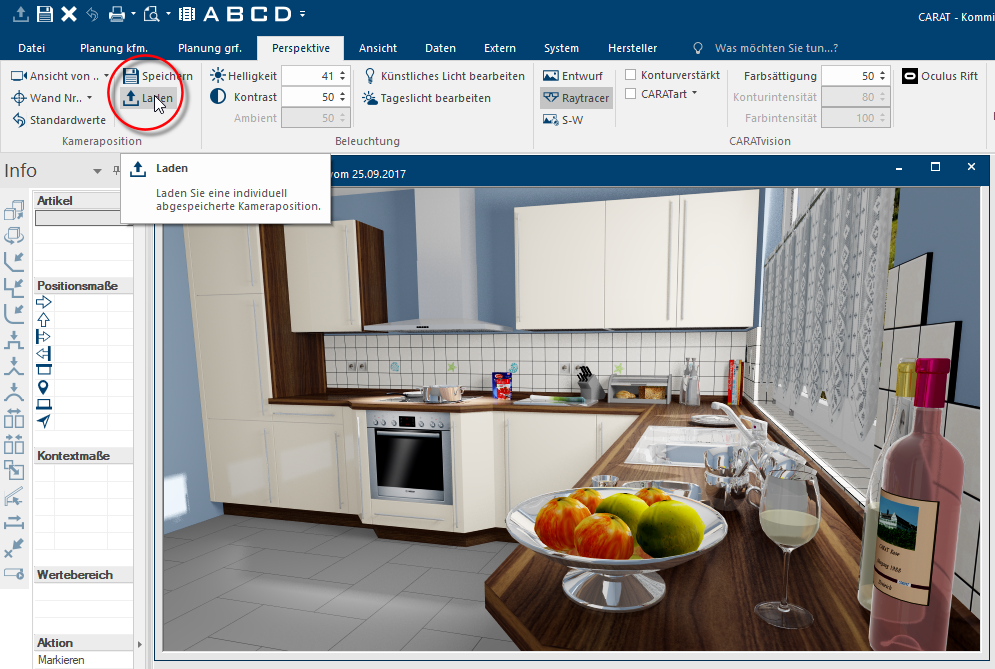
- You should first set the desired picture section in the perspective window, and then selected the Save function from the Camera position area on the Perspective index card Some dialogue windows are too voluminous, therefore the functions are separated into indexed groups. The subgroup names typically appear on the tab of the index card at the top of the dialogue and can be selected by clicking on the appropriate tab..
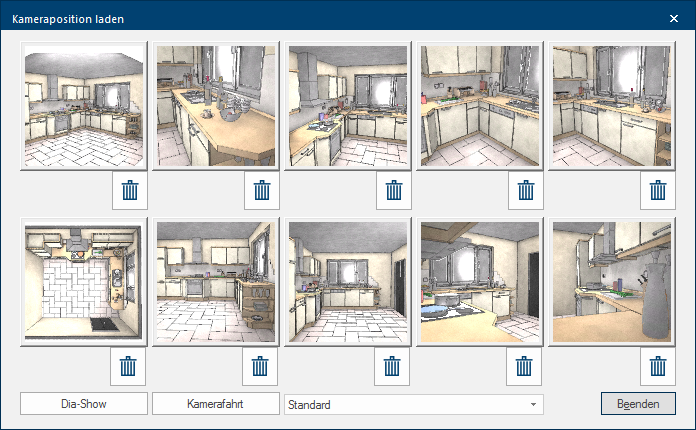
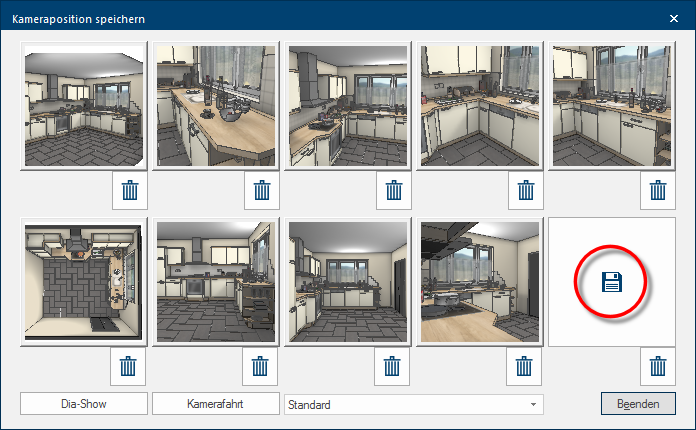
- Thereupon the Save camera position dialogue Dialogue, dialogue windows or dialogue fields are special windows in software applications. Dialogue windows are displayed by application programs in different situations to request input or confirmation from the user. opens. To save the camera position, click Typically the LEFT mouse button is pressed once quickly, if not specified differently. Clicking will either mark an object, or when clicking on a button, the execution of the desired activity (e.g. OK, Cancel, Close). on a free storage space identified by a disk symbol. If no free place is available, you can also click on the symbol with the recycle bin, to remove a no longer needed camera position. Click on the Exit button In dialogue windows you always find one or more buttons that can be activated by clicking on them. Typical functions for buttons are e.g. OK, Cancel, Apply. Buttons are always activated by a single click with the left mouse button. to leave the dialogue again.
- Open first the perspective window to load a saved camera position. Select then the Load function from the Camera position area on the Perspective index card.
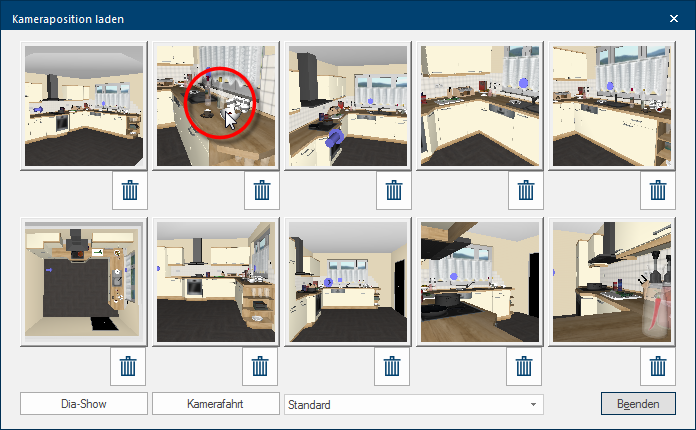
- Thereupon the Load camera position dialogue opens. Click there on the preview of the camera position that you would like to show in the perspective window. Thereupon, the dialogue will close and the perspective will be shown with the new camera position.
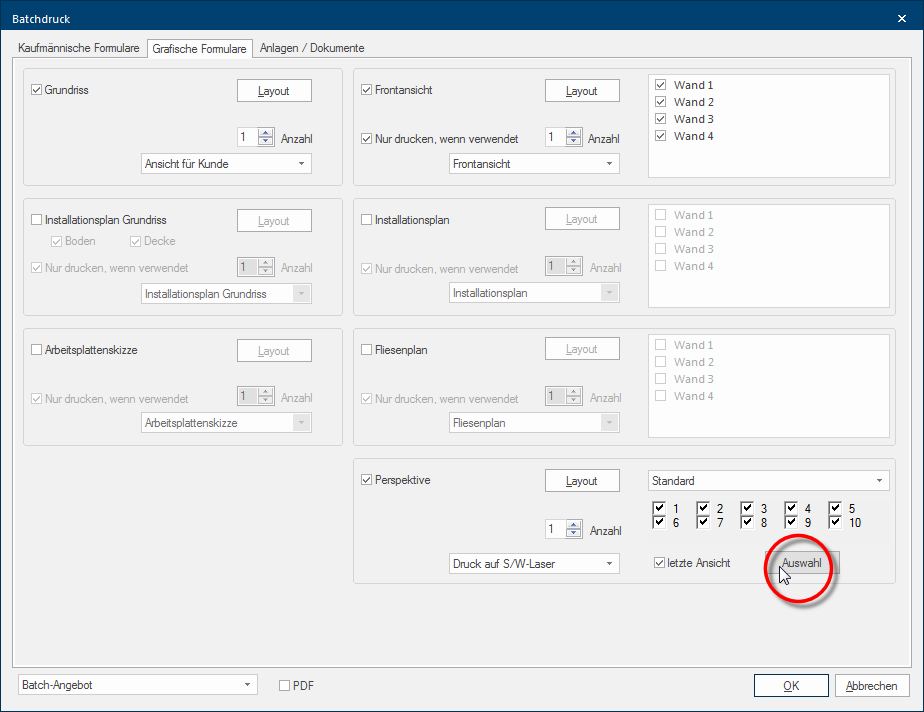
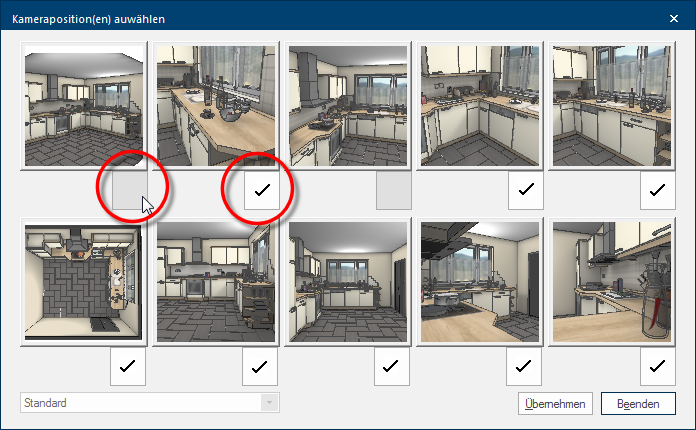
- Normally, only the last engaged perspective can be printed. However, if you have activated Module 3C, you can additionally specify for the batch print, which of the saved camera positions you would like to print. If you are not sure which of the saved camera positions should be printed, you can click on the selection button in the perspective area, and have the stored camera positions displayed.
- To select one of the stored camera positions for the batch print, simply click on the desired preview. A checkmark underneath the preview indicates that it has been selected. To de-select a camera position simply click on the preview again.
- See also: Batch Print / Batch Mail
