The Drawing Mode

For complex designs, that contain many length dependable articles like worktops, cornices, light pelmets or plinth panels besides many corpus articles in the plan, the presentation of the floor plan can become quickly very cluttered, because of the many lines used. When many lines lie on top of each other in individual areas of the floor plan, it is most of the time very useful to shortly blend out the lines and objects you do not need.
With the drawing mode function, you are offered exactly this functionality. By using the setting options The word option (from Latin: optio = free will) used in computing means a choice. In CARAT it is normally used with a list box. of the drawing mode, you can blend out the corpus articles or length dependable articles of an generation layer in the floorplan completely. Thus, you will get a significantly clearer overview of the floor plan and a better control of the articles to be processed.
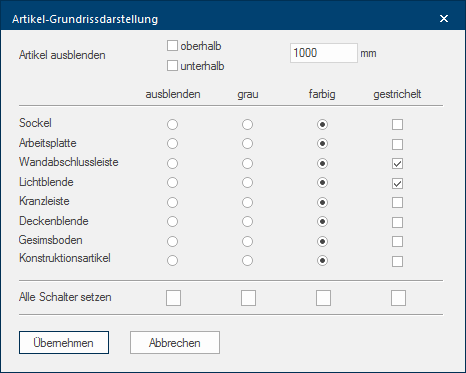
- Klick in the menu ribbon on the Drawing mode option, in the Display group on the Planning graph. index card Some dialogue windows are too voluminous, therefore the functions are separated into indexed groups. The subgroup names typically appear on the tab of the index card at the top of the dialogue and can be selected by clicking on the appropriate tab., to open the dialogue Dialogue, dialogue windows or dialogue fields are special windows in software applications. Dialogue windows are displayed by application programs in different situations to request input or confirmation from the user. for setting the drawing mode options.
- The Article floor plan view dialogue will then open. In this dialogue, you have are several options available for blending out articles and generation layers.
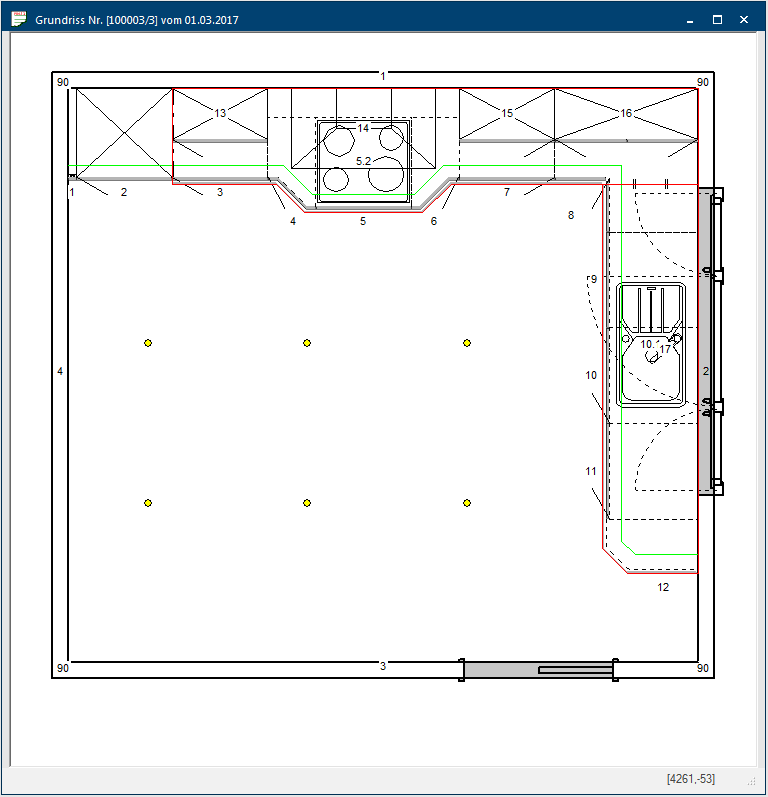
- The following picture shows a plan, for which at first all articles (cabinets, hob, sink and ceiling spots as well as several generated articles) are shown.
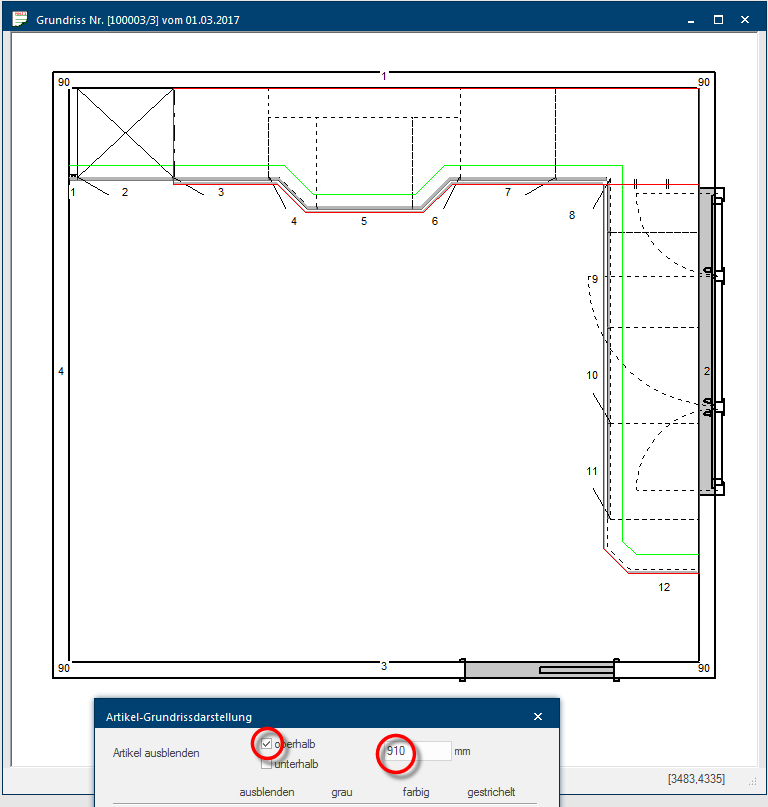
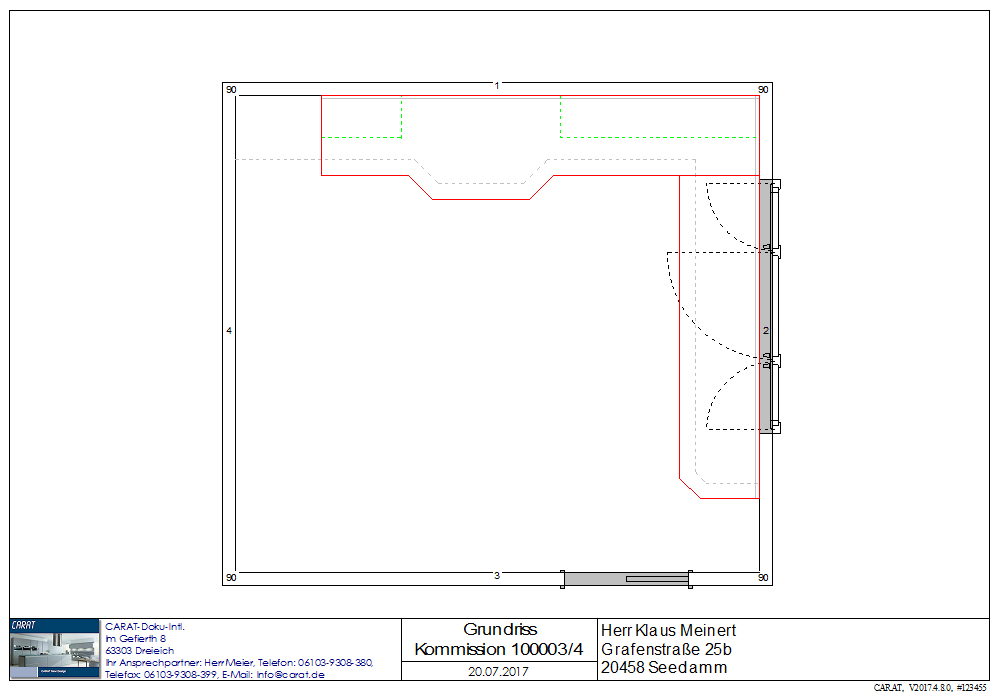
- The following picture represents the case, that for the Hide article function, the option Above has been activated and the height of the upper edge of the worktop has been entered. After the dialogue has been closed with a click Typically the LEFT mouse button is pressed once quickly, if not specified differently. Clicking will either mark an object, or when clicking on a button, the execution of the desired activity (e.g. OK, Cancel, Close). on the Apply button In dialogue windows you always find one or more buttons that can be activated by clicking on them. Typical functions for buttons are e.g. OK, Cancel, Apply. Buttons are always activated by a single click with the left mouse button., all articles, that are placed above the specified height, are hidden.
Please enter the lowermost measure from which all articles above should be hidden, if you would like to hide all cabinets quickly. It usually suffices, to enter a measurement underneath the used plinth height.
The generated articles take up the largest part of the dialogue. Because generated articles only exist of coloured lines per generation layer, you have here several options to influence the design of the generation layers.
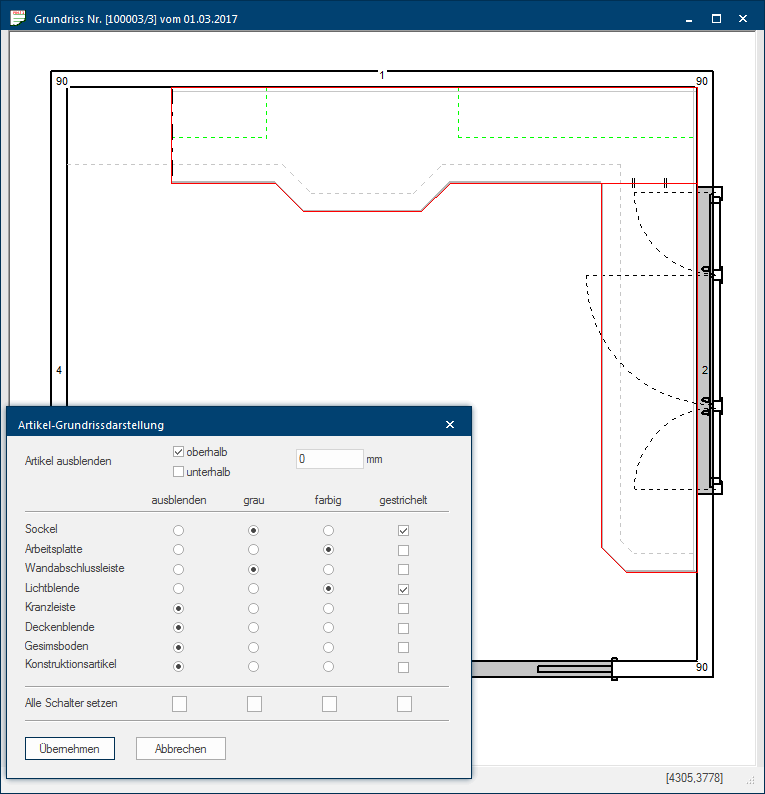
- You can hide generation layers you do not need or let them be drawn in grey, to display single generation layers in the background or display them dashed for better distinction.
- For all generation layers, the standard setting is always coloured.
- Below each column you will find a small checkbox A checkbox is a standard element in a graphic user interface. A checkbox has, in most cases, two states (set or not set). These usually correspond to a yes/no selection. to quickly set the same setting for all generation layers.
Please note that you of course also can print the floor plan with these settings if needed, this for example to create a more easily readable installation sketch for your installers.

