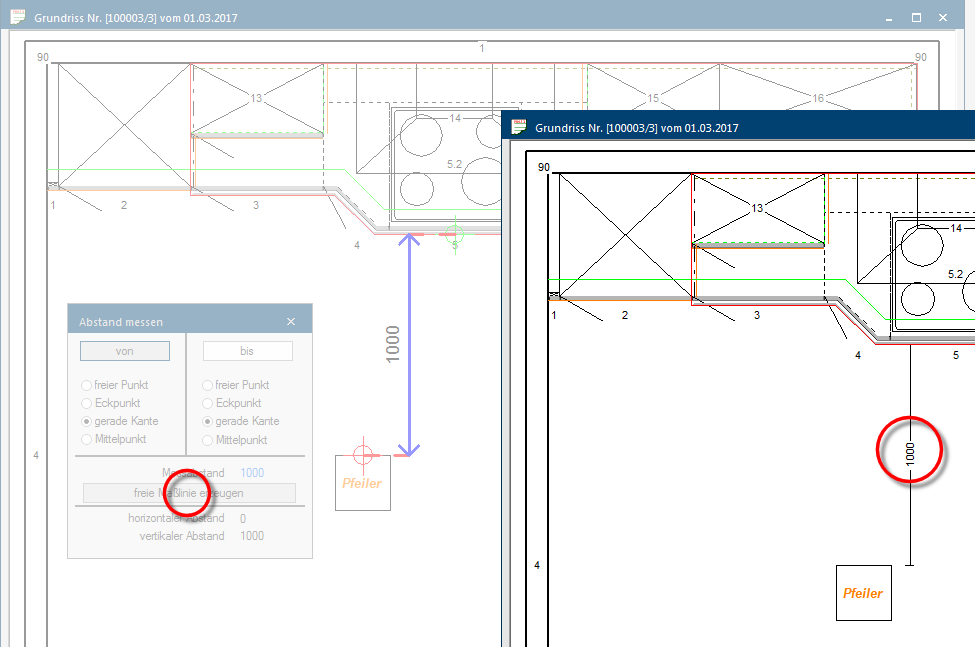
Measure distance

During a planning it can be necessary to be able to measure a distance between two objects or different corner points in a room exactly. Especially with more complex designs, it can furthermore become necessary to supplement the automatically determined dimension lines with your own dimension lines. The Distance functions are used for this.
The Distance functions can be called up directly via the menu ribbon of the Planning graph. index card Some dialogue windows are too voluminous, therefore the functions are separated into indexed groups. The subgroup names typically appear on the tab of the index card at the top of the dialogue and can be selected by clicking on the appropriate tab. in the Measure area.
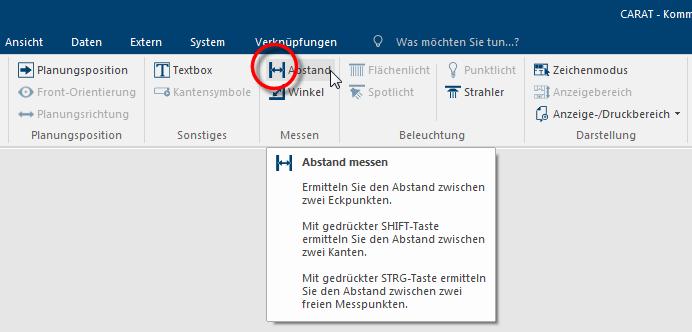
- When you click Typically the LEFT mouse button is pressed once quickly, if not specified differently. Clicking will either mark an object, or when clicking on a button, the execution of the desired activity (e.g. OK, Cancel, Close). on the Distance option The word option (from Latin: optio = free will) used in computing means a choice. In CARAT it is normally used with a list box. and keep the Shift- or the Ctrl-key The Ctrl-key (short for Control Key) is located on the PC keyboard to the far left in the bottom row of keys. The Ctrl-key has a similar function as the Shift-key. Usually this key is used in conjunction with another key or with the mouse to perform a special function. pressed at the same time, you can directly call up two of the most used measure options. The options possible are also shown by the tooltip, as soon as the mouse pointer lingers shortly over the Distance option.
|
|
Function |
Action |
Description |
|---|---|---|---|

|
Distance |
Only left click Left click + Ctrl-key |
Measuring from corner point to corner point Measuring from edge tot edge Measuring from free point to free point |
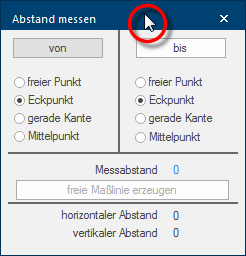
- In case the dialogue Dialogue, dialogue windows or dialogue fields are special windows in software applications. Dialogue windows are displayed by application programs in different situations to request input or confirmation from the user. is in your way, you can move it very easily by pointing the mouse on the title bar of the dialogue and move the mouse while pressing the left mouse button In dialogue windows you always find one or more buttons that can be activated by clicking on them. Typical functions for buttons are e.g. OK, Cancel, Apply. Buttons are always activated by a single click with the left mouse button.. You can close the dialogue at any time by clicking on the red button Close in the title bar.
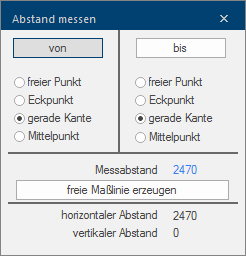
With this dialogue you can determine the distance between two measuring points. For this, the dialogue is divided into two areas. You can set the type of the first measuring point in the left area (from) and the type of the second measuring point in the right area (till). The Create free dimension line button will be available once you have determined a stretch between two measuring points, so you can create a dimension line in the graphic, from the distance measured.
|
Function |
Description |
|---|---|
|
From/Till |
Via the buttons From and Till can be selected which measuring point can be positioned at that moment. You can click on the button for the measuring point desired at any time, to measure the distance to several endpoints (till) always from the same beginning point (from) several time after each other. |
|
free point |
When you select this option, you can create a measuring point at any point in the floor plan or the front view, by clicking the left mouse button. |
|
Corner point |
When you select this option, you can position the measuring point exactly at any point of intersection of two lines. |
|
Straight edge |
When you select this option, you can position a measuring point at a straight line. |
|
Centre point |
When you select this option, you can position a measuring point exactly in the centre of an object. |
|
Measured distance |
At this location, you will see the distance in millimetre between the last two measuring point, as soon as the second measuring point is placed. |
|
Create free dimension line |
After you have placed two measuring points, you can create a dimension line between both measuring points. If necessary, you can move a dimension line created in this way to another position. |
|
Horizontal distance Vertical distance |
You can read off if both measuring points are on one level (one of the two values will be equal to 0), or if they run diagonally (both values will be unequal to 0), from the specification of the horizontal and vertical distance. |
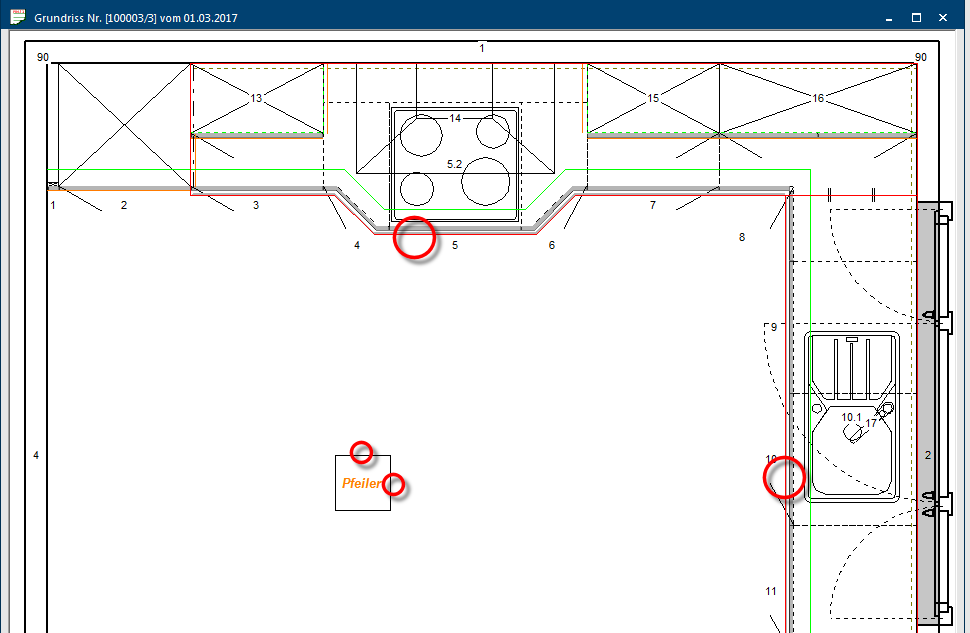
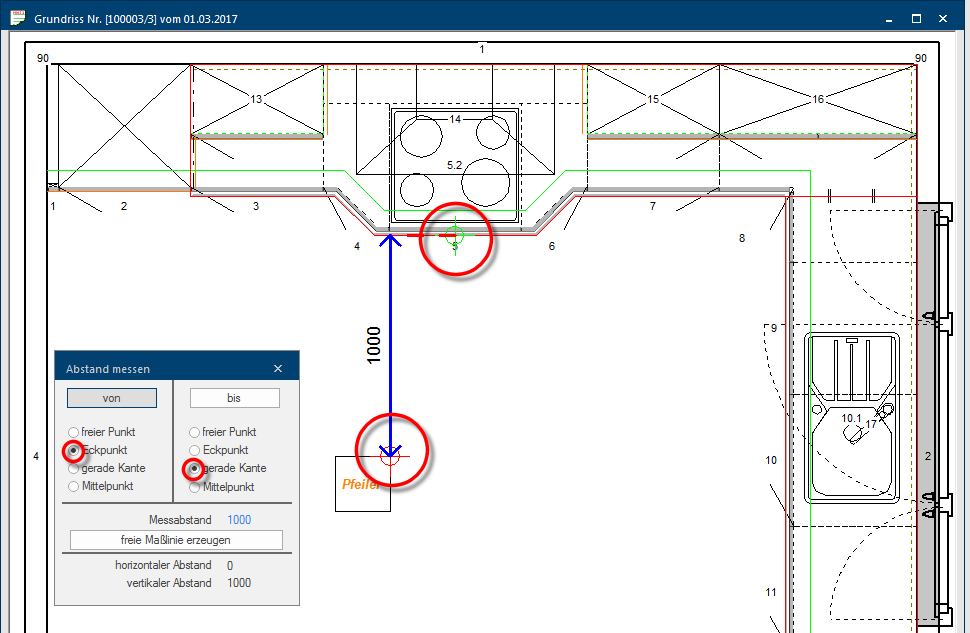
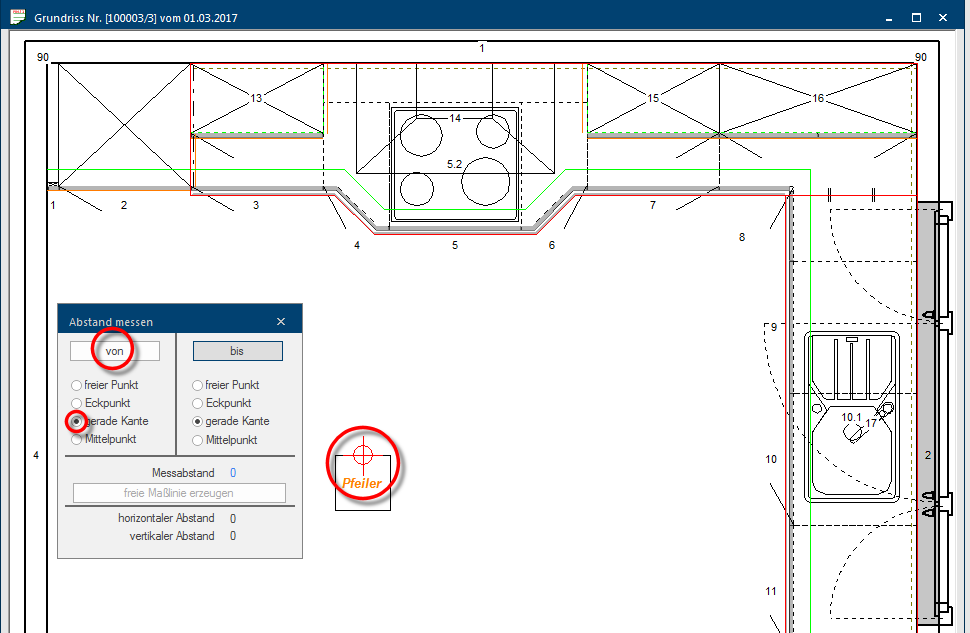
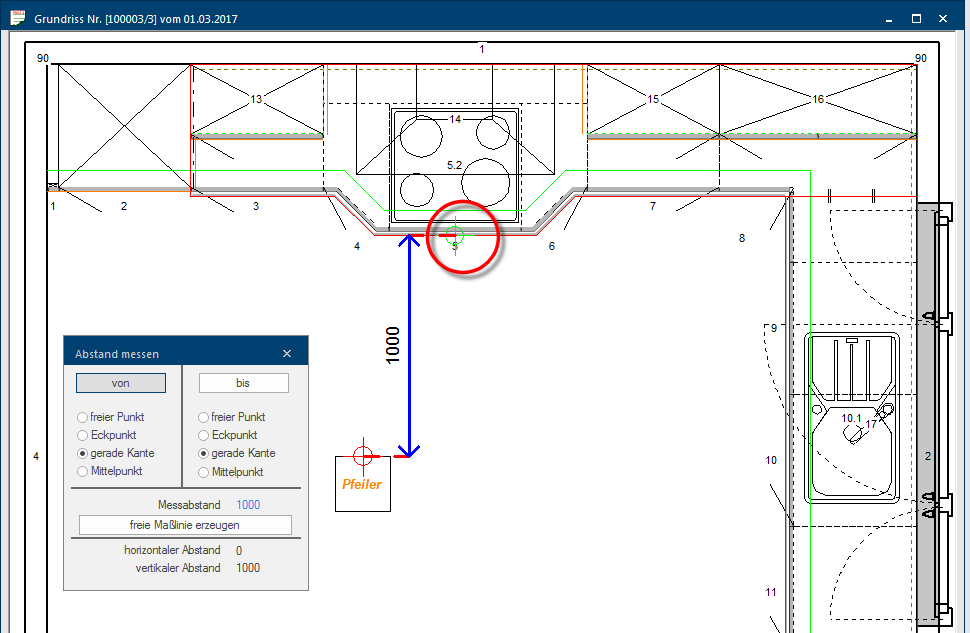
In this example, the distance between a support column and the worktop on the opposite side should be determined. As you can recognise from the following picture, both object have each an edges, that runs parallel to each other, and hence are optimally suitable to determine the distance via the Straight edge option. However, as an alternative the distance can also be determined by a combination of the dimensioning point types Corner point and Straight edge.
- Click on the Distance option, to open the dialogue for measuring the distance.
- The Corner point measuring point type is set for both measuring points (from, till).
- Select for first the measuring point type for the first (from) and second (till) measuring point.
- Then click on the first and subsequently on the second measuring point, in between which you want to determine the distance.
- On demand, you can assume a corresponding dimension line in your graphic, by using the button Create free dimension line. The dimension line will first be plotted at the position where the distance has been measured.
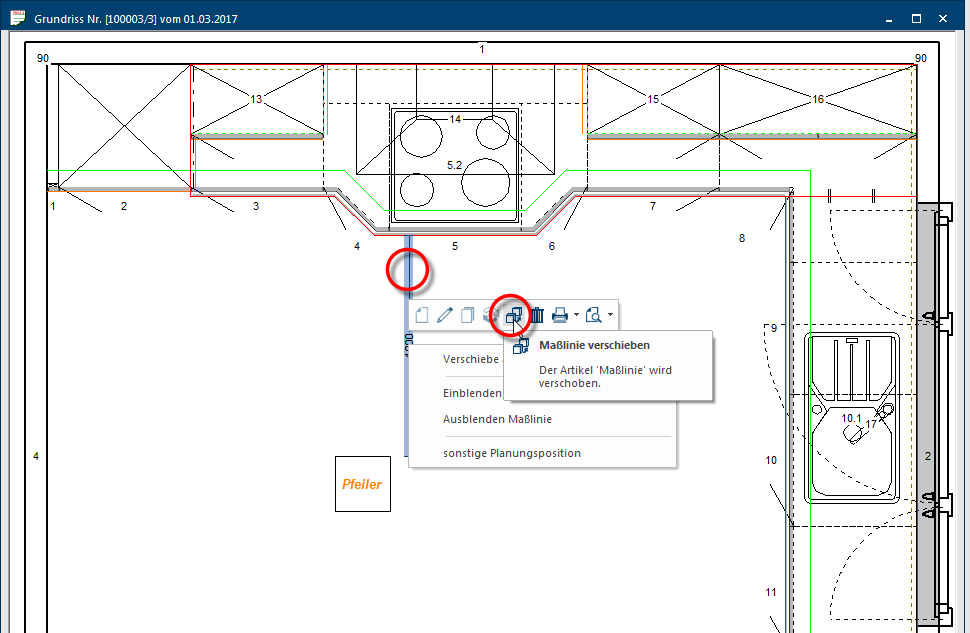
- By using the Move function, the newly plotted dimension line can subsequently be moved to another position in the drawing, similar to an automatically generated dimension line.
- Click on the Distance option while keeping the Shift-key pressed, to open the dialogue and while presetting the measuring point type on Straight edge in the process.
- Click on one of both edges, in between which you want to determine the distance, to set the first measuring point.
- Click on one the edges till which you want to determine the distance, to set the second measuring point. The measured distance will thereupon directly be displayed by a blue dimension line, and the determined distance will be displayed in millimetre.
- Click with the left mouse button on the Distance option, to open the dialogue. In doing so, the measuring point type is already preset to Corner point.
- Click on one of both corner points, in between which you want to determine the distance, to set the first measuring point.
- Click on one the edges till which you want to determine the distance, to set the second measuring point. The measured distance will thereupon directly be displayed by a blue dimension line, and the determined distance will be displayed in millimetre.
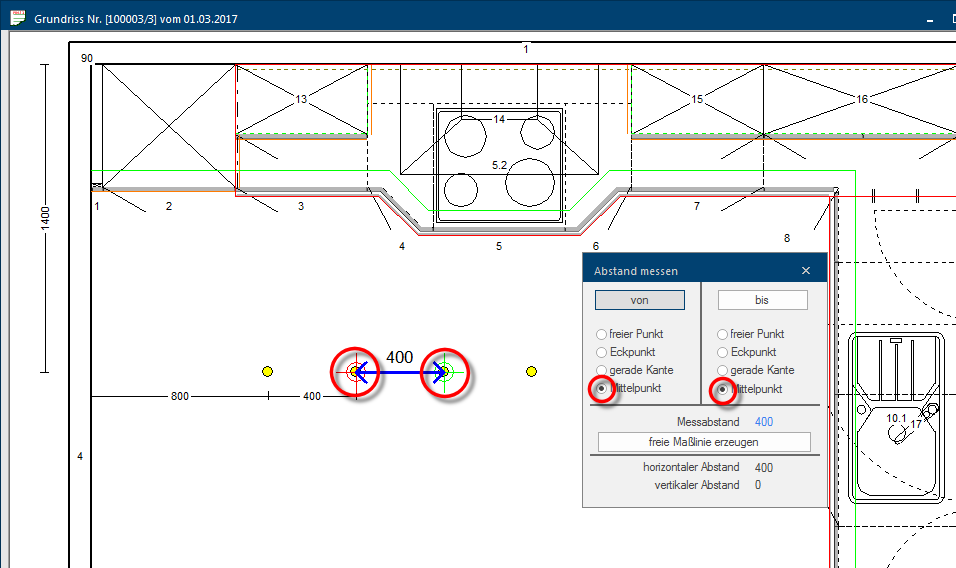
For many objects, like for example cabinets, decoration articles, illuminations and installation symbols, you can also use it's centre point instead of an edge or a corner as measuring point. Dimensioning up to the centre of an object is useful for illumination or installation symbols.
In the following picture is for the first ceiling spot the distance from the centre to each of the two straight walls measured, to determine the position in the room. It suffices for the other ceiling spots to measure the distances from centre point to centre point.

