Module niche
Some few suppliers offer you module concepts, so that you can custom assemble the cabinet segmentation to your own individual wishes, in case the already available standard types are not sufficient. By means of a module concept you can equip an empty cabinet with individual front elements and thus vary the front segmentation almost at will.
The possibilities to change the front segmentation are even enhanced with more functions by the Module niche function. The Module niche function makes a very flexible way of planning module elements possible, and is furthermore very easy to operate. The Module niche function can be retrieved via the Edit front segmentation dialogue Dialogue, dialogue windows or dialogue fields are special windows in software applications. Dialogue windows are displayed by application programs in different situations to request input or confirmation from the user., if the article is also a suitable module element.
See also:
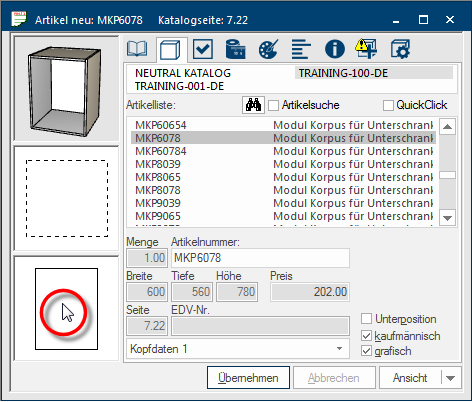
- First enter the article number of the module cabinet, via the article input dialogue on the Article index card Some dialogue windows are too voluminous, therefore the functions are separated into indexed groups. The subgroup names typically appear on the tab of the index card at the top of the dialogue and can be selected by clicking on the appropriate tab..
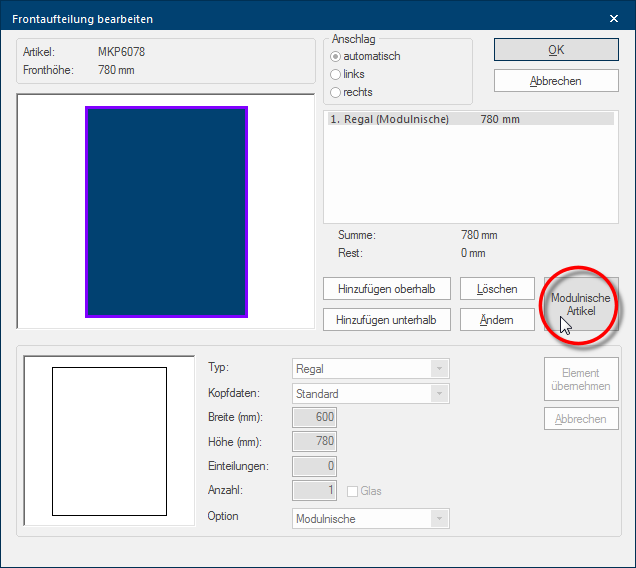
- Open then the Edit front segmentation dialogue by double clicking A double click is, amongst other things, needed to open files and programs or to activate an operation or a command. If the mouse cursor points to the desired symbol, you should click the left mouse button twice in quick frequency. The mouse pointer should not be moved between these two clicks. on the preview of the 2D-view in the article entry dialogue.
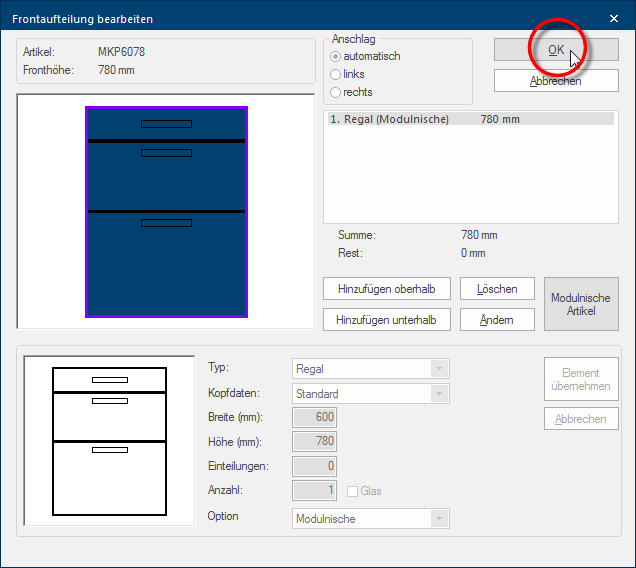
- Click Typically the LEFT mouse button is pressed once quickly, if not specified differently. Clicking will either mark an object, or when clicking on a button, the execution of the desired activity (e.g. OK, Cancel, Close). subsequently on the button In dialogue windows you always find one or more buttons that can be activated by clicking on them. Typical functions for buttons are e.g. OK, Cancel, Apply. Buttons are always activated by a single click with the left mouse button. Module niche article to be able to equip the module cabinet with front elements.
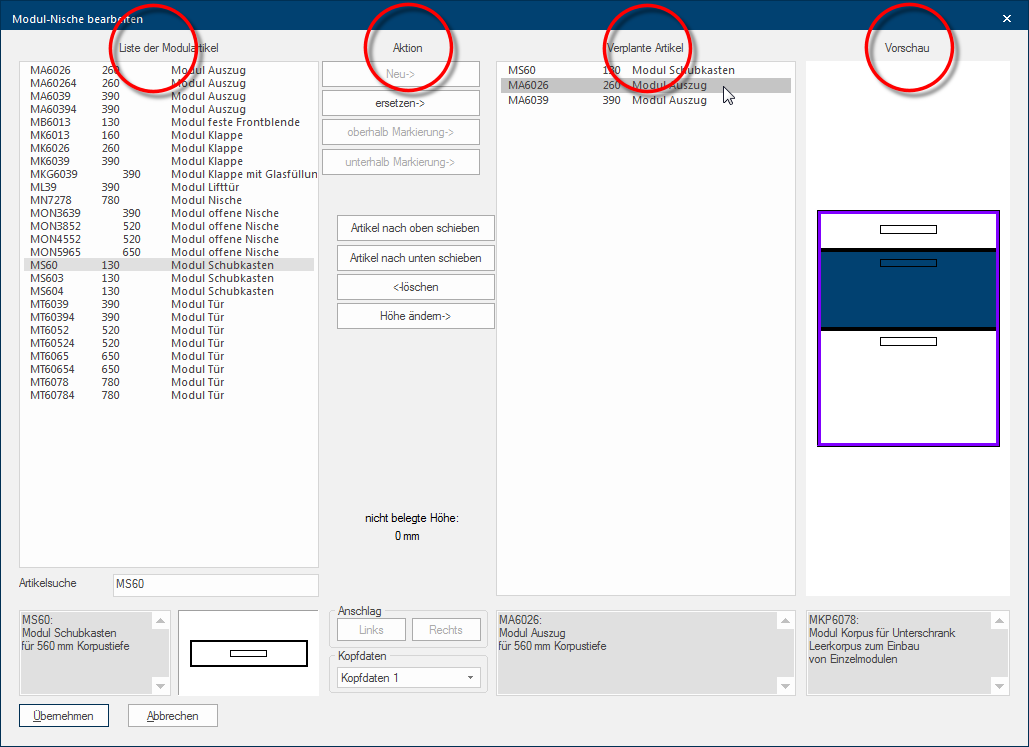
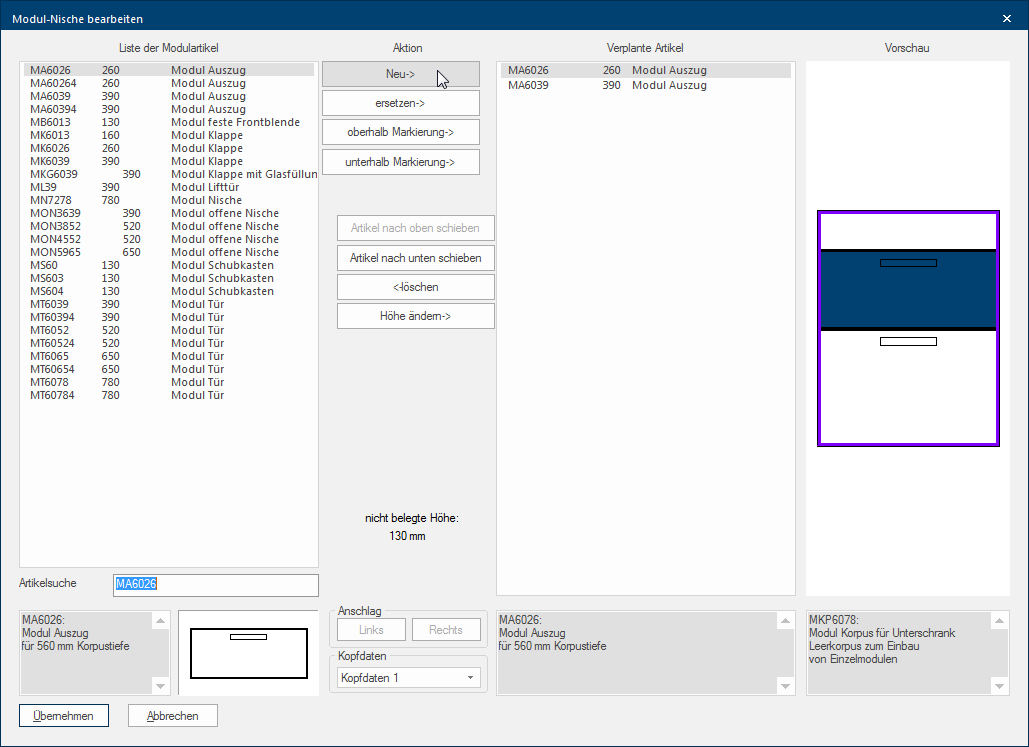
After the dialogue for editing the module niche is opened, you can recognise the four main area's for the creation of the front segmentation.
|
Area: |
Description: |
|---|---|
|
List of module articles |
In this area are all front elements listed, that you can use with the selected cabinet. A relevant description will be displayed beneath the list as soon as you mark an article in this list. In the middle column of the list are also the niche heights of the individual front elements displayed in mm, for a better differentiation. |
|
Action |
In this area are several buttons, which you can use to plan in, move, edit or also delete the front elements. |
|
Planned articles |
In this area are all planned front elements listed, according the sequence in which they are arranged in the cabinet. If you mark an article in this list, a relevant description will be displayed underneath the listing, as check. |
|
Preview |
You can check the current segmentation of the front elements graphically via the preview. This is especially very useful for door handing's. Underneath the preview you will always find the description of the module cabinet in use. |
- You select the required front element via the list of module articles.
- Subsequently you can assume the selected front element with one of the top four buttons in the area Action in the planned article list. When planning in the front elements by using the New button, the corpus is always filled with front elements from bottom to top.
- If necessary, you can change assumed front elements in height, assign different head data, select a suitable handing for doors or change the position within the list of the planned articles.
- The new front segmentation will be displayed accordingly in the Preview area.
- The dialogue can be closed with one click on the button Apply as soon as the cabinet is completely filled with front elements.
- You will subsequently first change to the Edit front segmentation dialogue, and click here on the OK button, to get back to the article input dialogue again.
- The article can then be inserted in the design with a click on the button Apply.
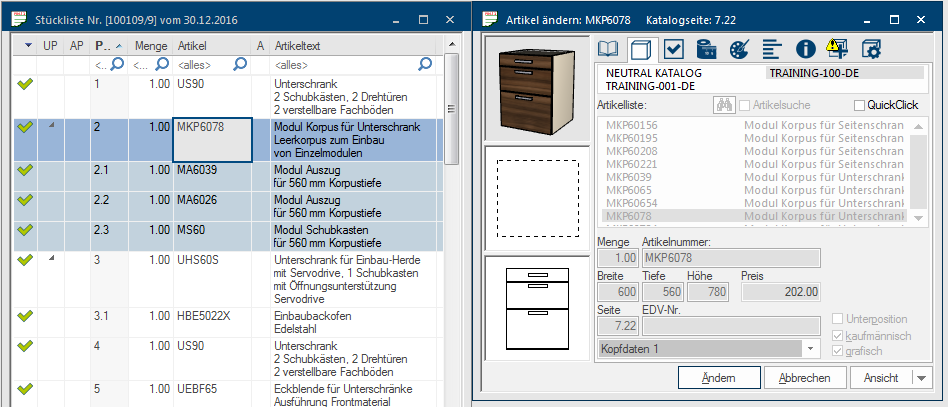
The article will be listed in the commercial quotation in several positions. The cabinet as main article and the front elements as sub-positions. Because the cabinet is always filled from bottom to top, the first sub-position refers to the bottom front element, and the last sub-position to the top one.
Overview of the buttons in the action area
|
Button: |
Description: |
|---|---|
|
New |
By using the New button, you can assume a front element in the list of planned in articles. Please note that new articles are always planned in in the list, and hence also in the available niche, from bottom to top. |
|
Replace |
By using the Replace button you can replace an already planned in article by another article. For this, please first mark the front element that you want to replace in the list of planned in articles, subsequently select the new article from the list of module articles and click then on the Replace button. |
|
Above marking |
If you would like to plan in a new front element above an already planned in front element you first mark the front element above which you want insert the new front element in the planned in article list. Then plan in the new front element by using the Above marking button. |
|
Underneath marking |
If you would like to plan in a new front element underneath an already planned in front element you first mark the front element underneath which you want insert the new front element in the planned in article list. Then plan in the new front element by using the Underneath marking button. |
|
Move article up |
With each click on this button you can move up a marked front element in the list of planned in articles by one position. |
|
Move article down |
With each click on this button you can move down a marked front element in the list of planned in articles by one position. |
|
Delete |
By using this button you can delete a marked front element from the list of planned in articles. |
|
Change height |
By using this button you can change the height of a marked front element in the list of Planned in articles. The different module concepts are in general based on the grid dimensions of the respective supplier. Therefore, should a change of height only be necessary in rare cases and be conducted preferably only after consulting your supplier. |
|
Height not used |
You will always see the rest height of the still to be planned in niche underneath the Change height button. If you want to assume a module cabinet in your planning, which niche is not completely filled with front elements, you will be made aware of this. |
|
Handing |
You can change the handing of a marked door element by using the Left and Right buttons. |
|
You can set differing Head data for a marked front element by using the Master data list box If several options are provides for one function provides, are these often shown in a list. Please click on the little black triangle in the right margin to select the desired option.. |
