The Sidebars
Additional Addition (in Latin: addere) is one of four basic operations in arithmetic. In primary school and in common language it is the expression used for the adding of two or more numbers. function areas, the so called dockable sidebars, are shown underneath the menu ribbon, after you have opened CARAT. These are the sidebars Info, Planning values, Gallery, Front changes, Graphic effects and Notifications.
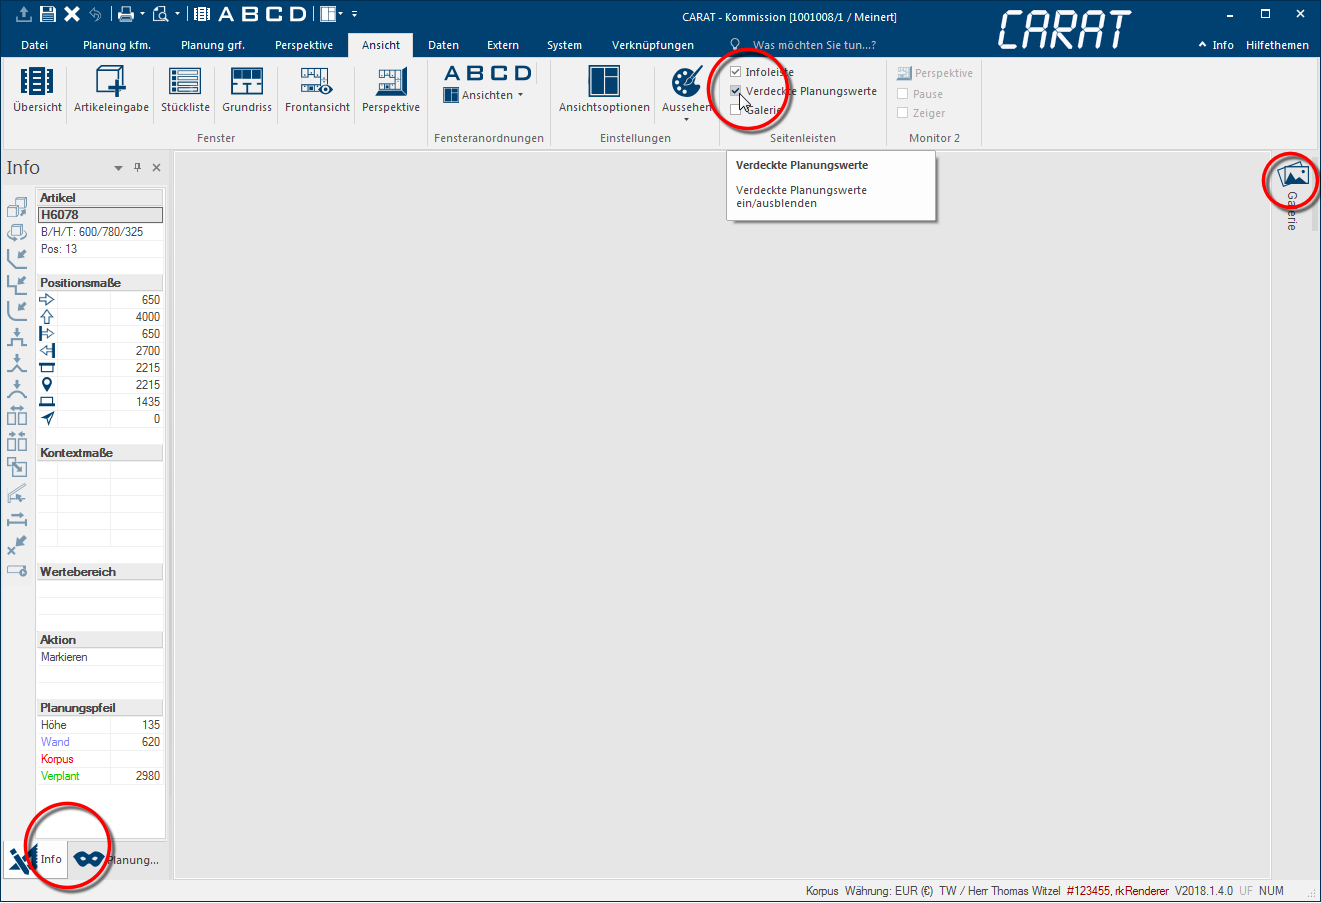
The sidebars contain several operating controls and give you additional information. Further more is it possible to set the dockable sidebars in size and position quickly and flexible. As an alternative, you an also hide the sidebars by using the View index card Some dialogue windows are too voluminous, therefore the functions are separated into indexed groups. The subgroup names typically appear on the tab of the index card at the top of the dialogue and can be selected by clicking on the appropriate tab. in the menu ribbon. You can do this by deselecting the sidebars not required, after you have opened the drop down menu of the sidebars group.
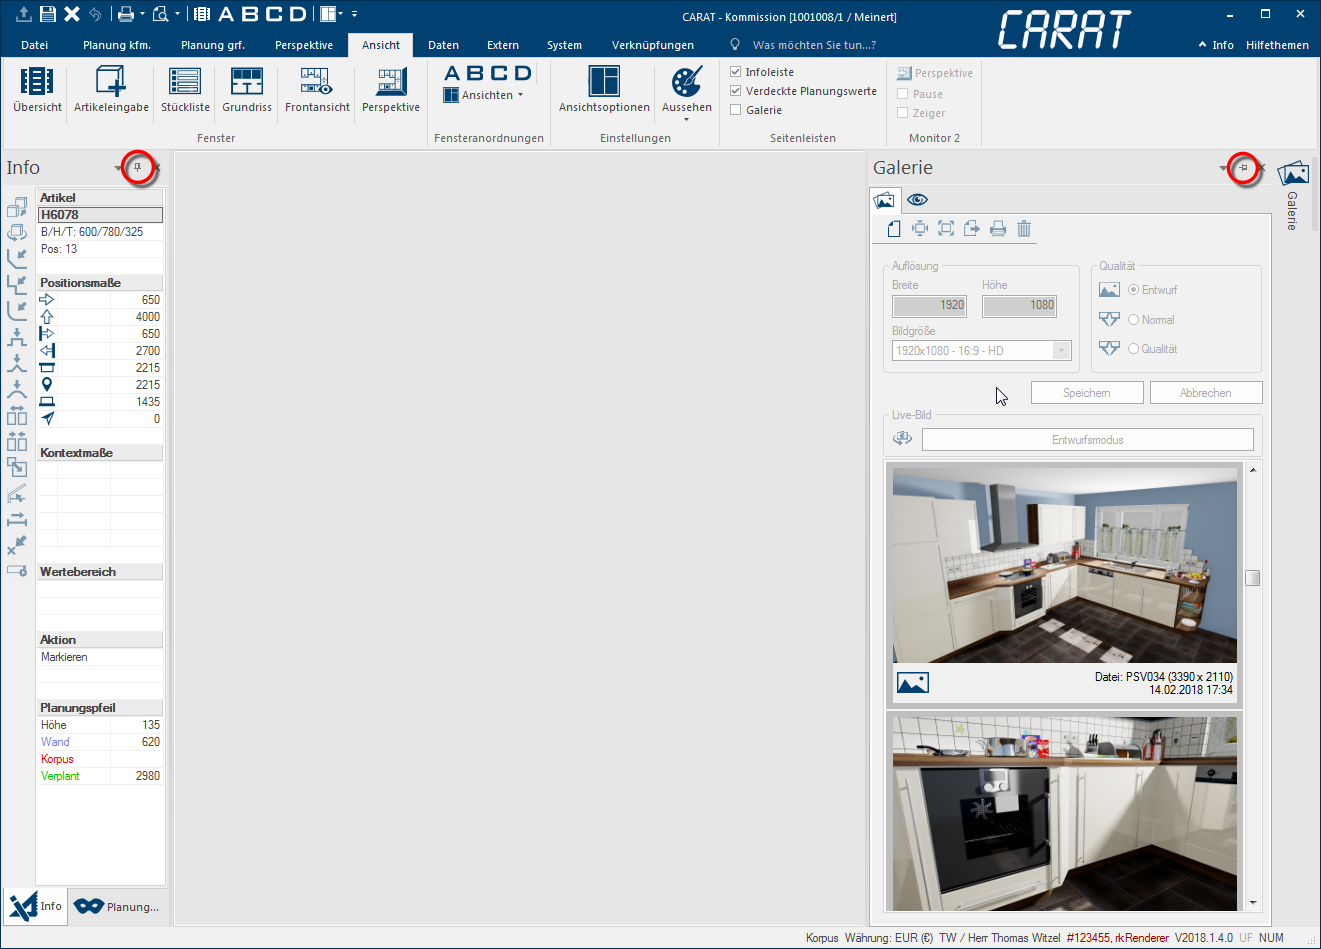
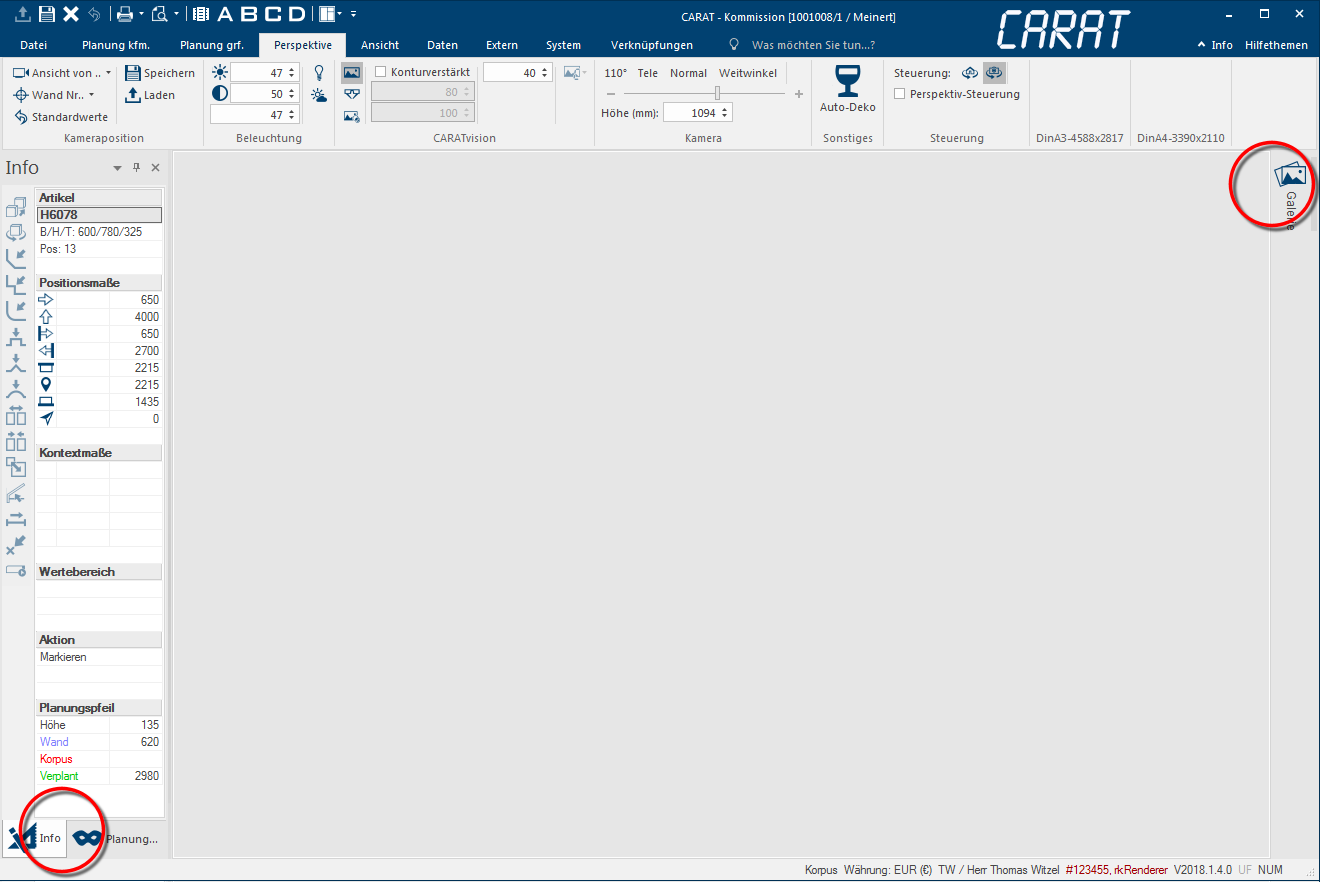
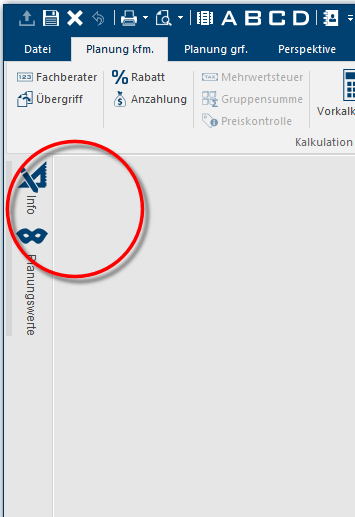
As you can learn from the description of sidebars, the sidebar can be displayed in two conditions: permanently folded or unfolded. You could also call the unfolded condition as docked, which is shown by the vertical pin symbol. Please click Typically the LEFT mouse button is pressed once quickly, if not specified differently. Clicking will either mark an object, or when clicking on a button, the execution of the desired activity (e.g. OK, Cancel, Close). in the sidebar one time on the Pin symbol if you do not want a sidebars to be docked, meaning do not want to show it permanently. The alignment of the pin changes thereby, and shows thus if the sidebar stay's unfolded or will collapse automatically.
- Pin vertically = The sidebar is docked and will be shown permanently.
- Pin horizontally = The sidebar will collapse automatically when the mouse pointer moves out of the area.
If you no longer need a sidebar, you can hide that sidebar long-lasting by using the x next to the pin symbol. You can show a hidden sidebar again by putting a checkmark for the respective sidebar in the Sidebars area on the View index card. The check mark in a checkbox A checkbox is a standard element in a graphic user interface. A checkbox has, in most cases, two states (set or not set). These usually correspond to a yes/no selection. shows that the respective sidebar will be shown unfolded, in other words docked. Sidebars that are not labelled with a checkmark are either hidden or are currently only shown collapsed.
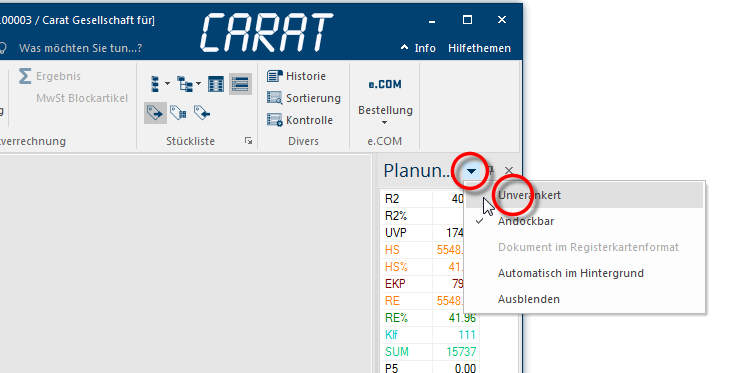
Also the position of the sidebars is not fixed and can therefore be changed if desired. The sidebar first has to be in an unfolded condition before it can be repositioned. Following, you can select the command Floating via the small triangle in the sidebar.
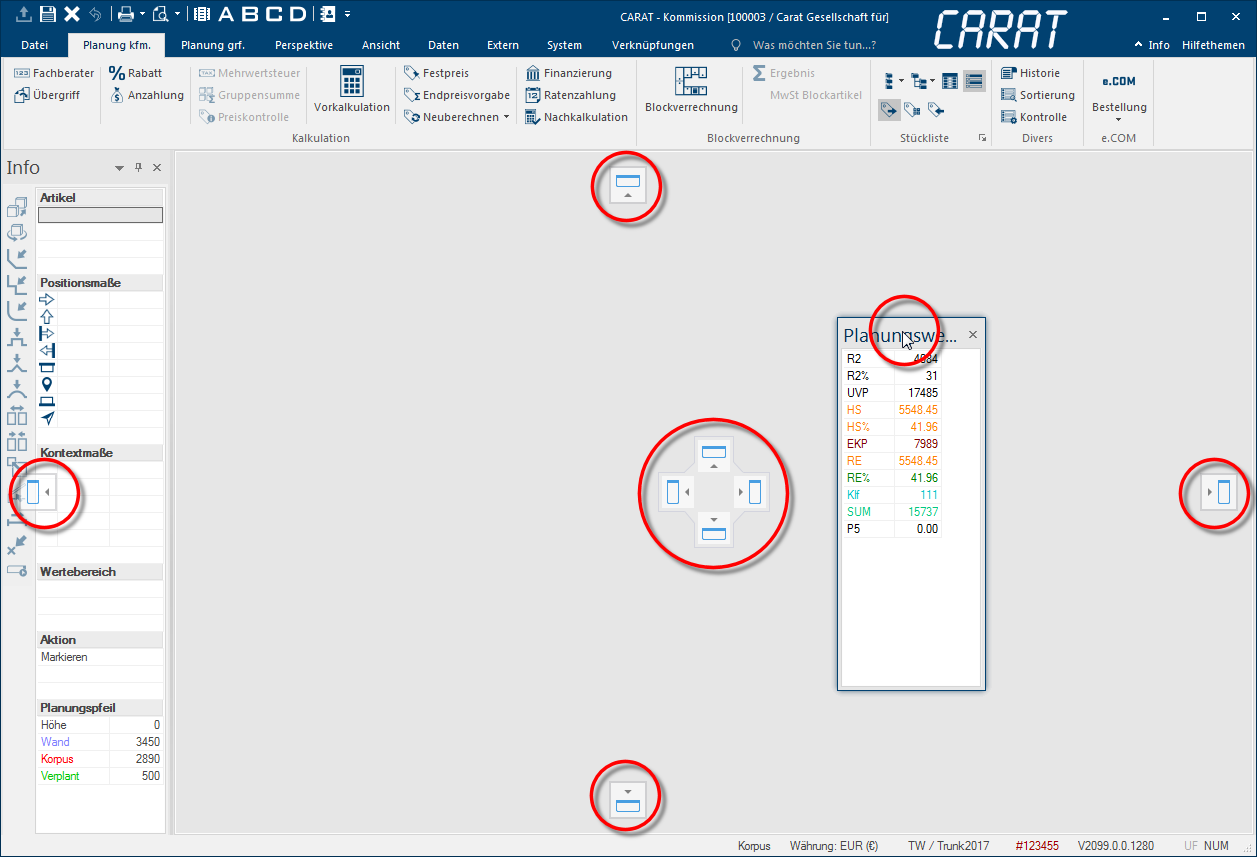
Now, the sidebar floats as a dialogue Dialogue, dialogue windows or dialogue fields are special windows in software applications. Dialogue windows are displayed by application programs in different situations to request input or confirmation from the user. over the program windows. You can move the sidebar as soon as you click with the mouse is the title bar and hold the left mouse button In dialogue windows you always find one or more buttons that can be activated by clicking on them. Typical functions for buttons are e.g. OK, Cancel, Apply. Buttons are always activated by a single click with the left mouse button.. Though are additional positions offered where the sidebar can be docked again.
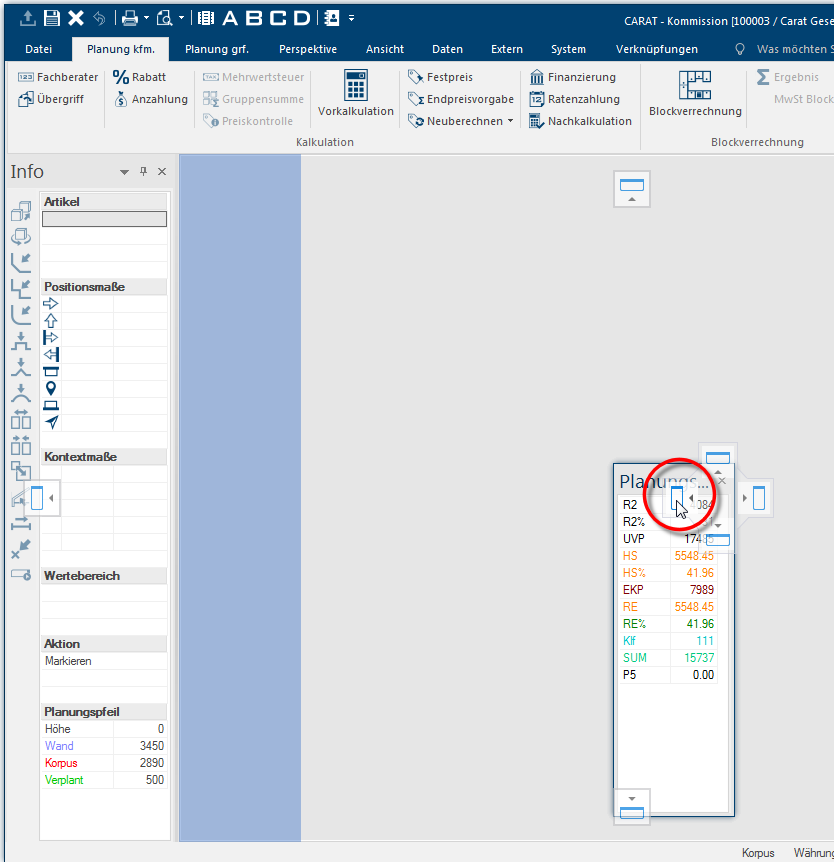
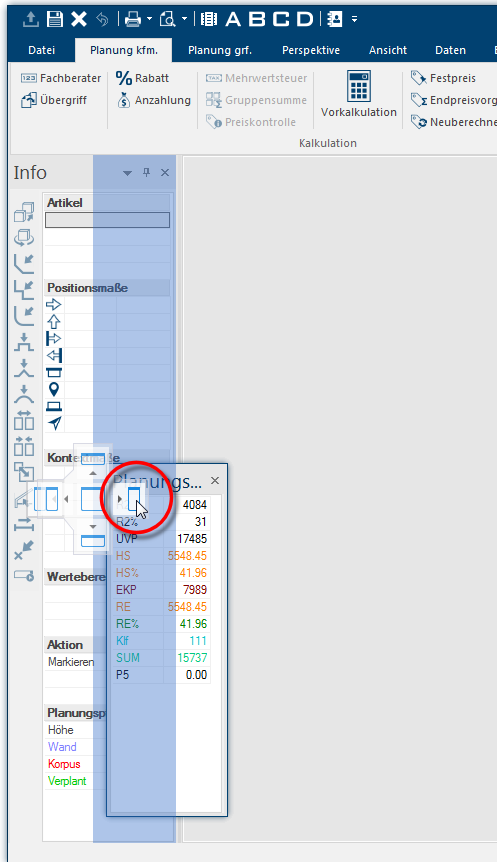
If you, for example, move the mouse pointer to the position at the far right of the program window Programs and files are shown in so called windows in the operating system of the same name. In CARAT each view (e.g. floor plan, article input, front view, perspective etc.) opens its own window. Multiple windows can be shown simultaneously for processing. If changes are made in one of these windows, this has an automatic effect on all other windows., you will be offered area's where the sidebar can be docked again after releasing the mouse button. If you move the mouse pointer with the sidebar on the left sidebar you will be offered more positions there. Thus, you can also place the sidebars directly next to each other or on top of each other.
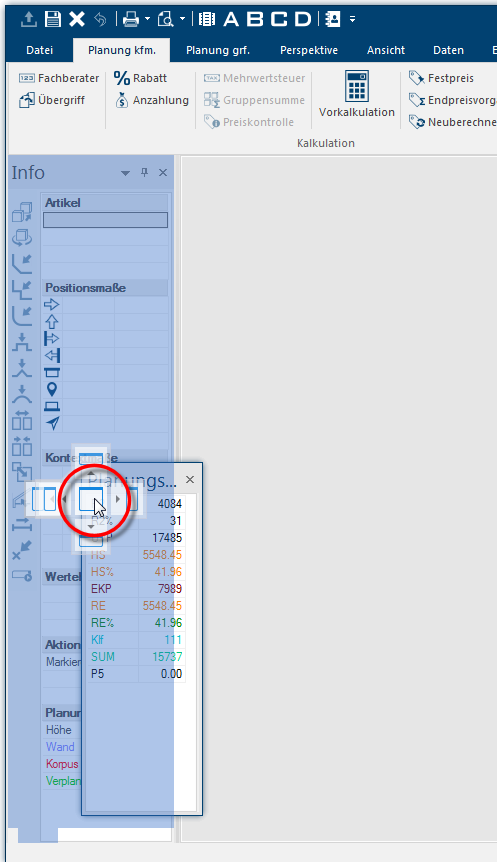
If you, for example, choose for the third alternative as described before, are the sidebars now on top of each other. You have subsequently the possibility to switch between both sidebars by using the tabs at the bottom of the sidebar. In this case you can of course also permanently fold the sidebars again by using the pin symbol to get a very compact arrangement of the sidebars.

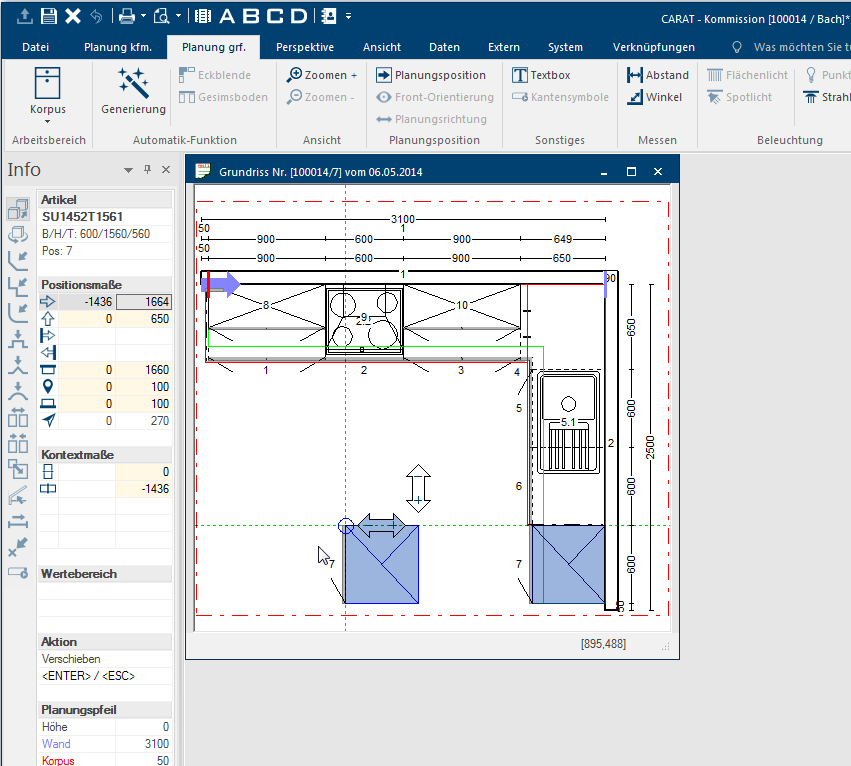
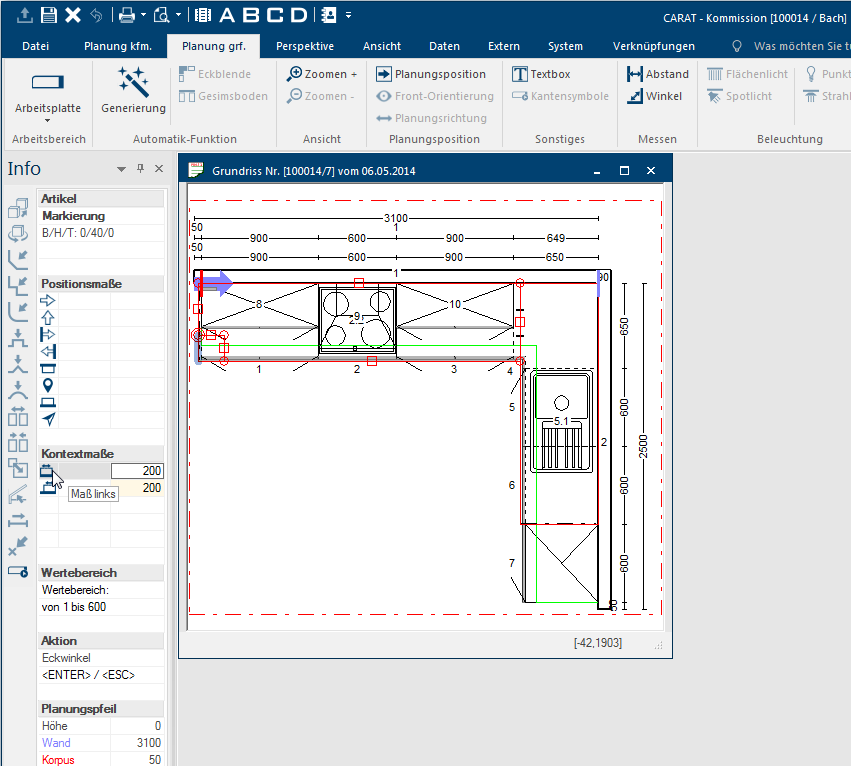
The sidebar Info always shows you all information necessary for the graphical modification. In the standard stetting is this sidebar always unfolded, so that you can see the information at any time during the planning. Furthermore are the tools, which are frequently needed during a planning, made available in this info bar. Please note that always only those tools are activate, that can be used in the current planning situation.
The info bar is subdivided into several area's.
- All tools are situated as symbols at the left edge. A short explanation of the respective symbol will be shown when you pause shortly with the mouse pointer on the symbol.
- A table, divided in several area's, is situated to the right of the symbols.
- Information about the marked article is shown in the Item area.
- All measurement information of the marked article is displayed in the Position measures area. This area contains two columns with input fields, that are released for input as soon as a corresponding function is selected from the standard toolbar. Relative input, so how much an article should be moved, can be entered in the left column. Absolute measures, so where exactly in the room the article should be, can be entered in the right column.
- After opening special modification functions from the standard toolbar, the input fields for editing articles are displayed in the Context measures area. These input options The word option (from Latin: optio = free will) used in computing means a choice. In CARAT it is normally used with a list box. are always dependent on the selected article and the modification function, thus from the respective context.
- Information about possibly to consider minimum or maximum values is displayed in the Value range, dependant on which input fields are shown in the context measures.
- Which actions are currently in process or which actions would be possible at the moment is displayed in the Action area.
- Reference data about the position of the planning arrow is displayed in the Planning arrow area.

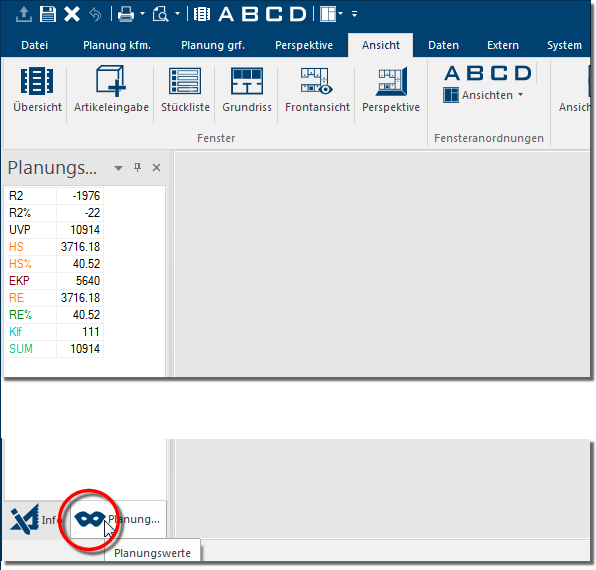
The sidebar Planning value shows you the for you most important commercial information of the current planning. These values are usually necessary for an optimal pricing. Because these values are sensitive is this sidebar at first always displayed folded. A precondition is that you have configured A configuration designates the specific program settings or hardware components in a computer. the blind planning values via the system options. See also: Blind Planning Values
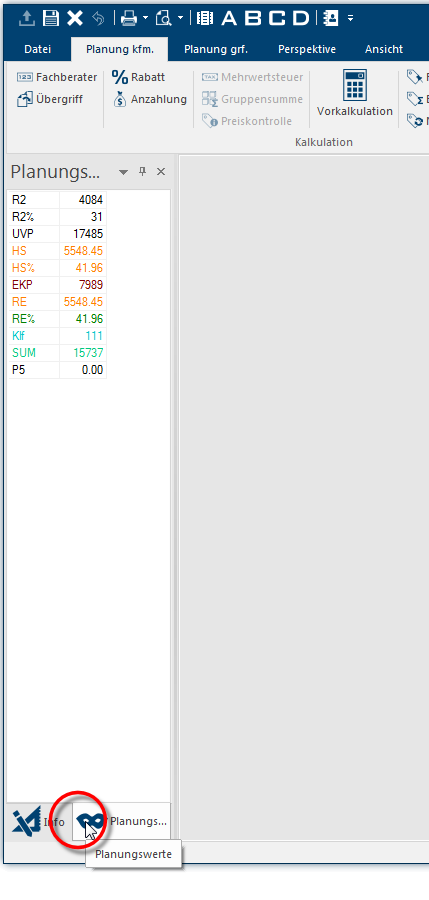
The planning values sidebar lies under the info sidebar. You can click on the relevant index card at the bottom of the sidebars to quickly change between the info and planning values sidebars.

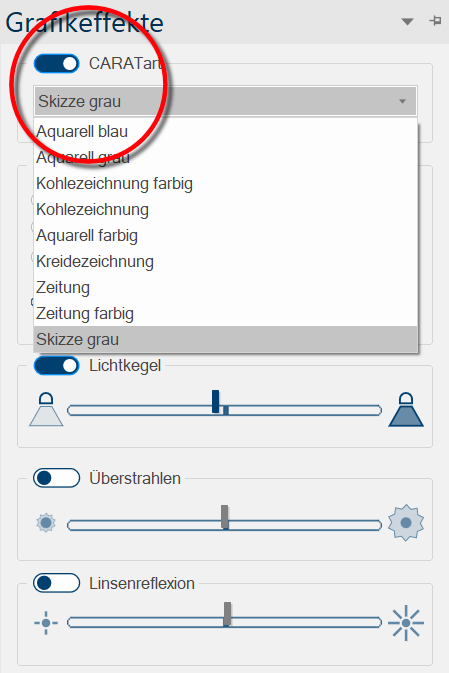
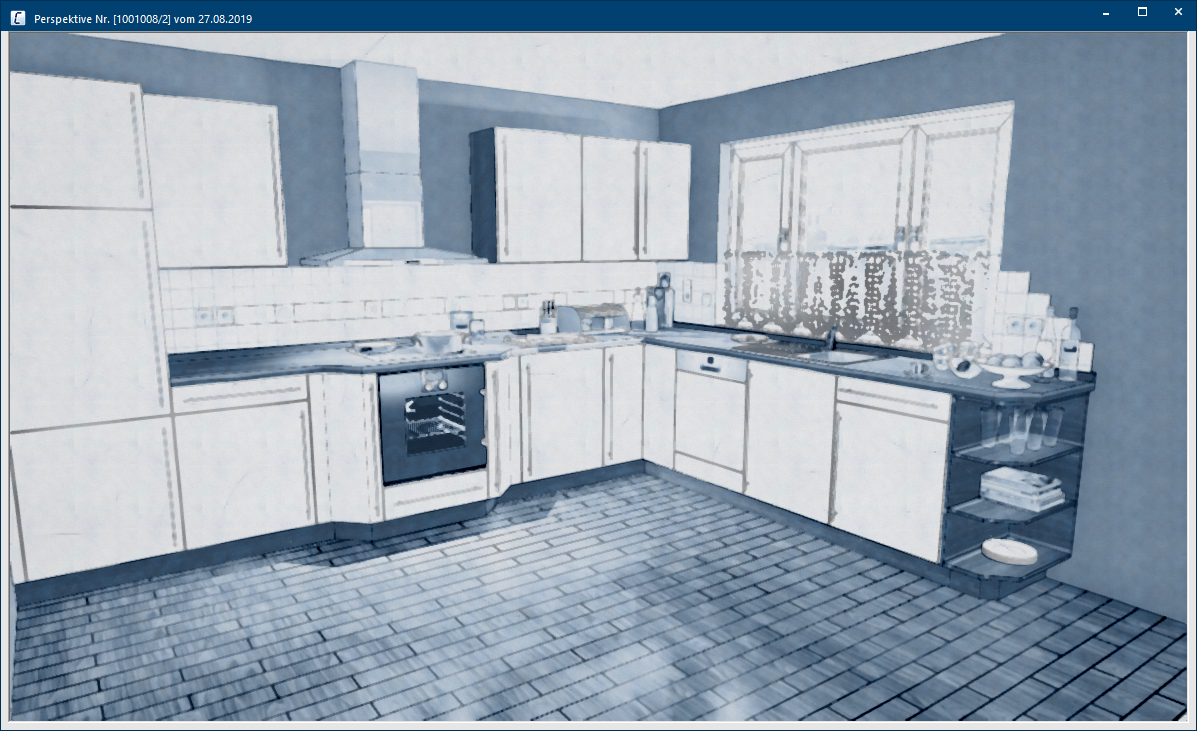
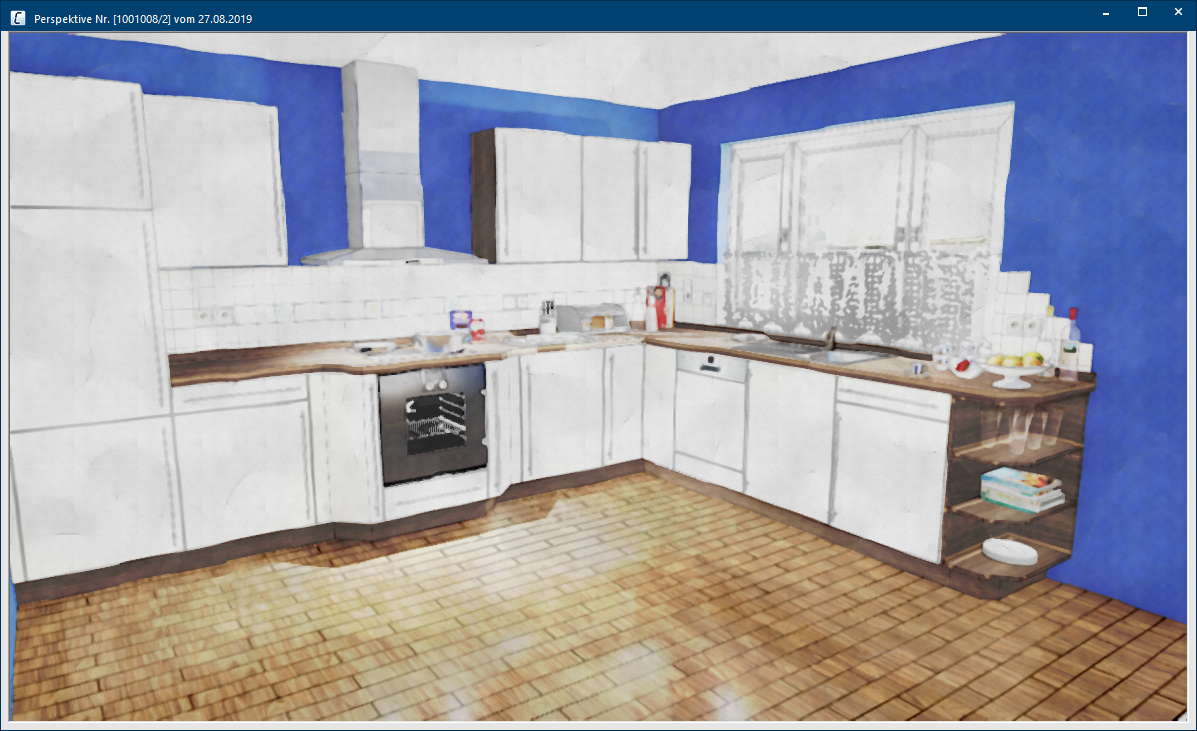
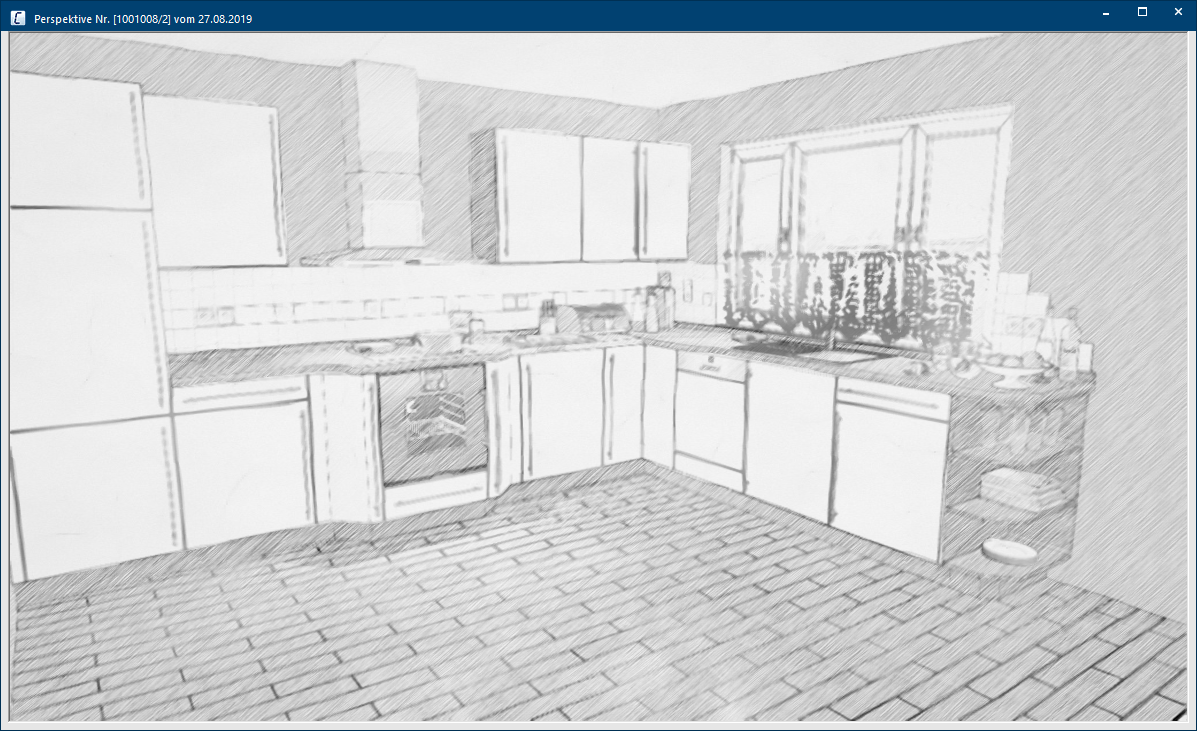
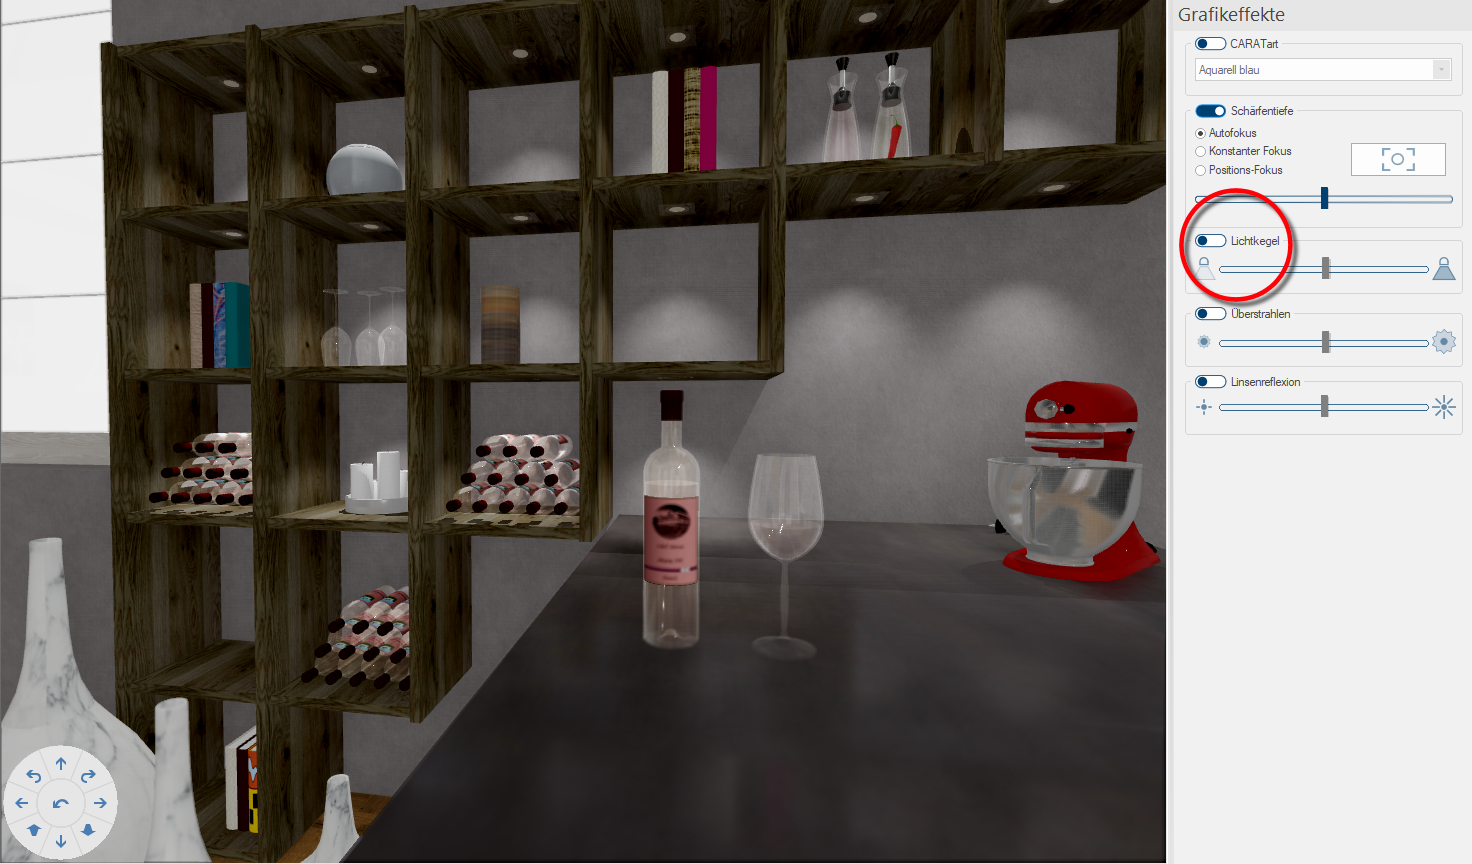
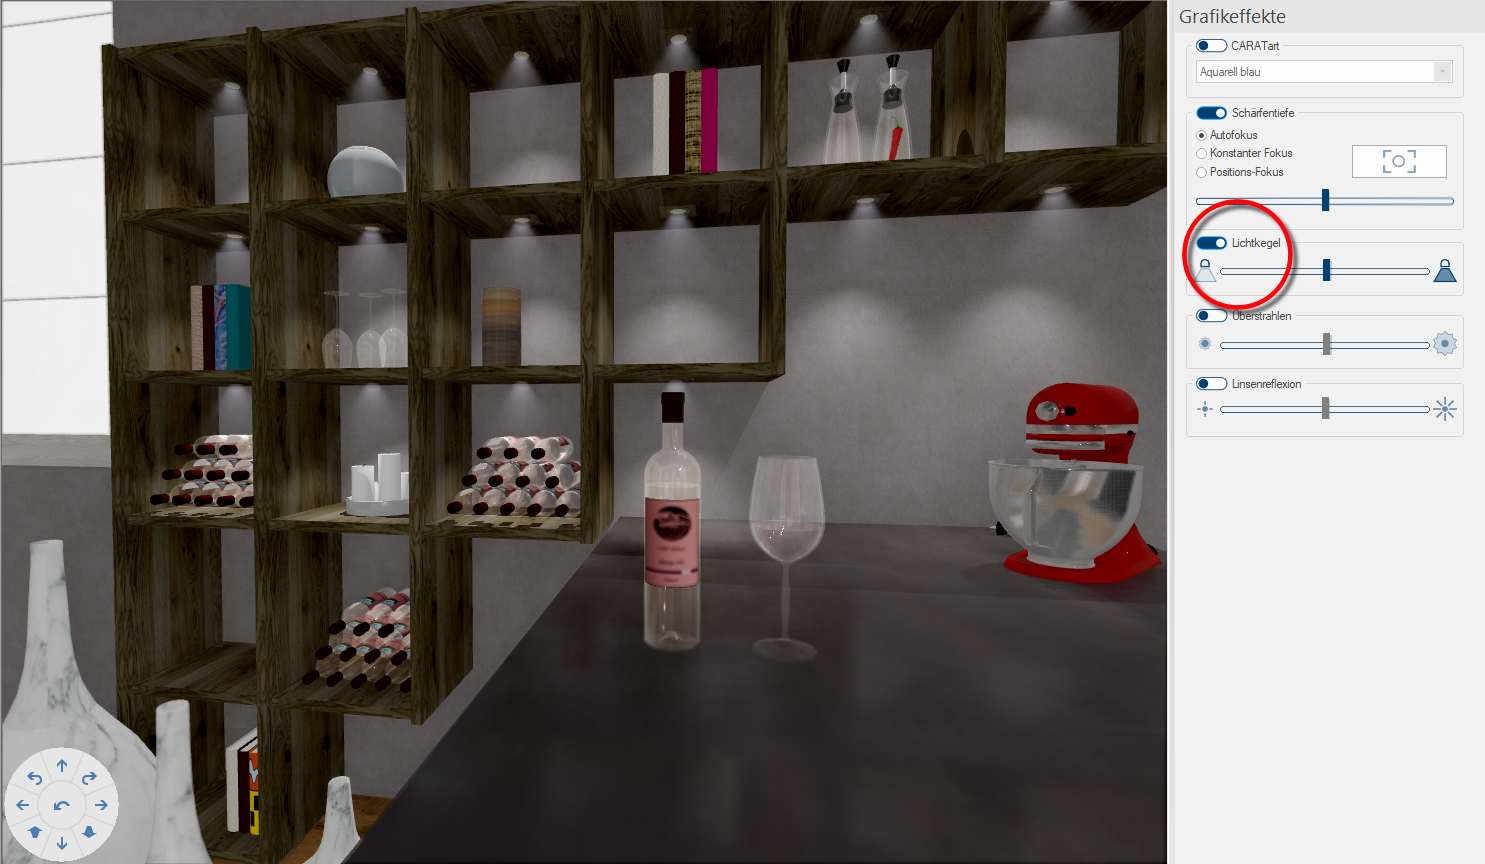
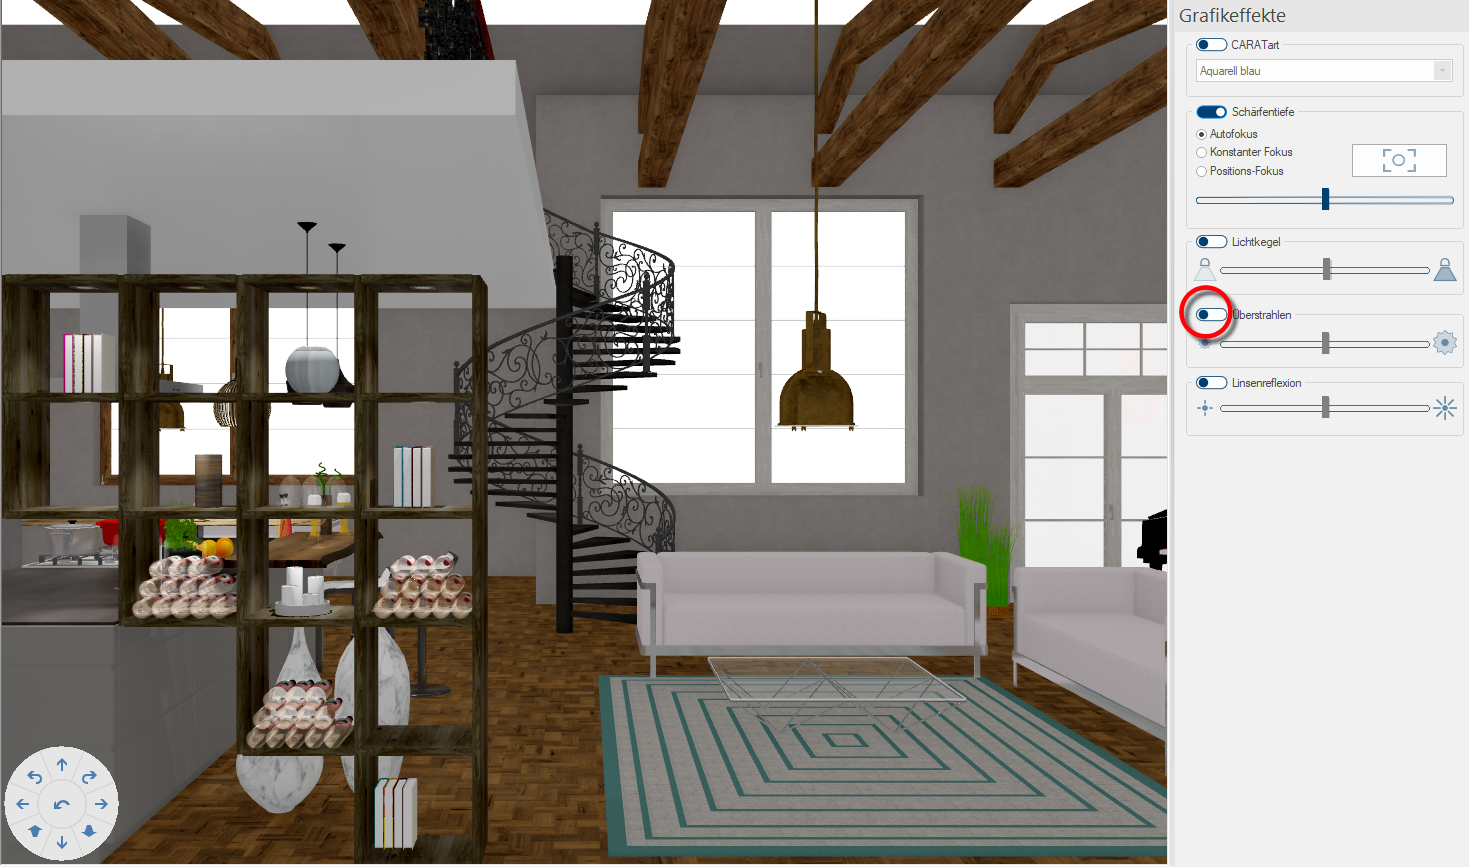
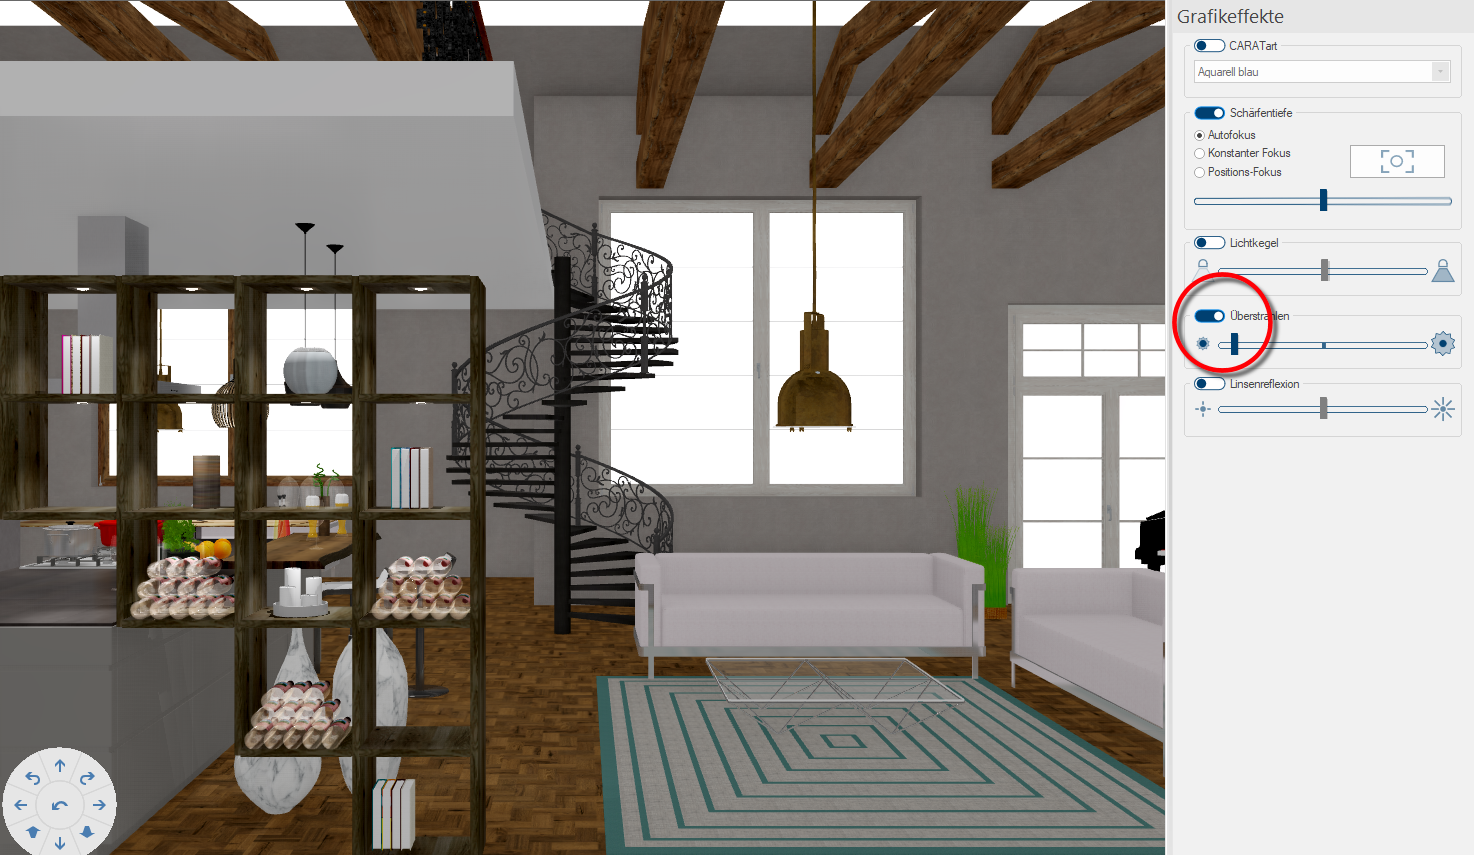
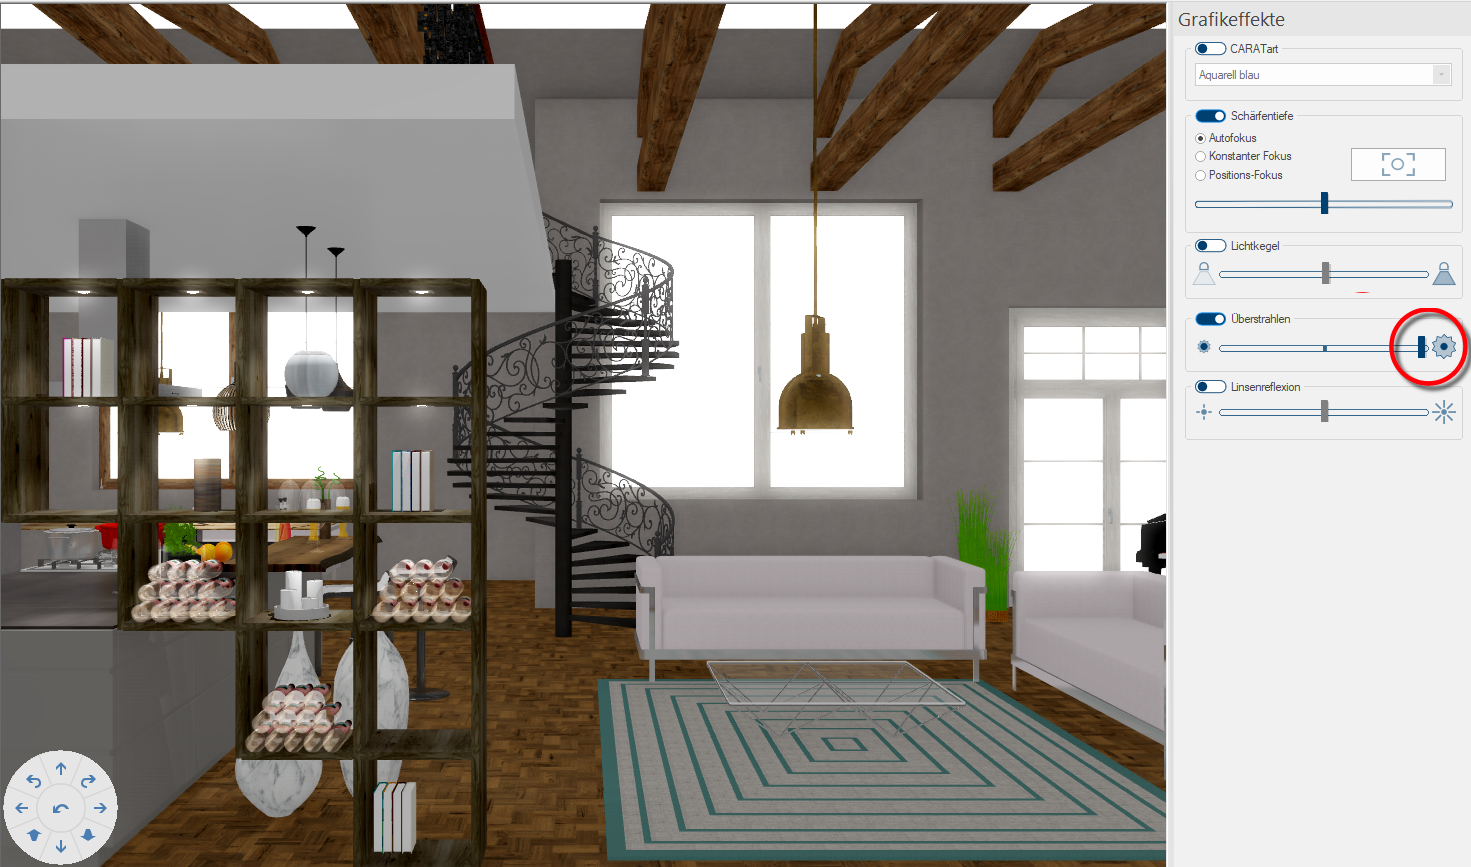
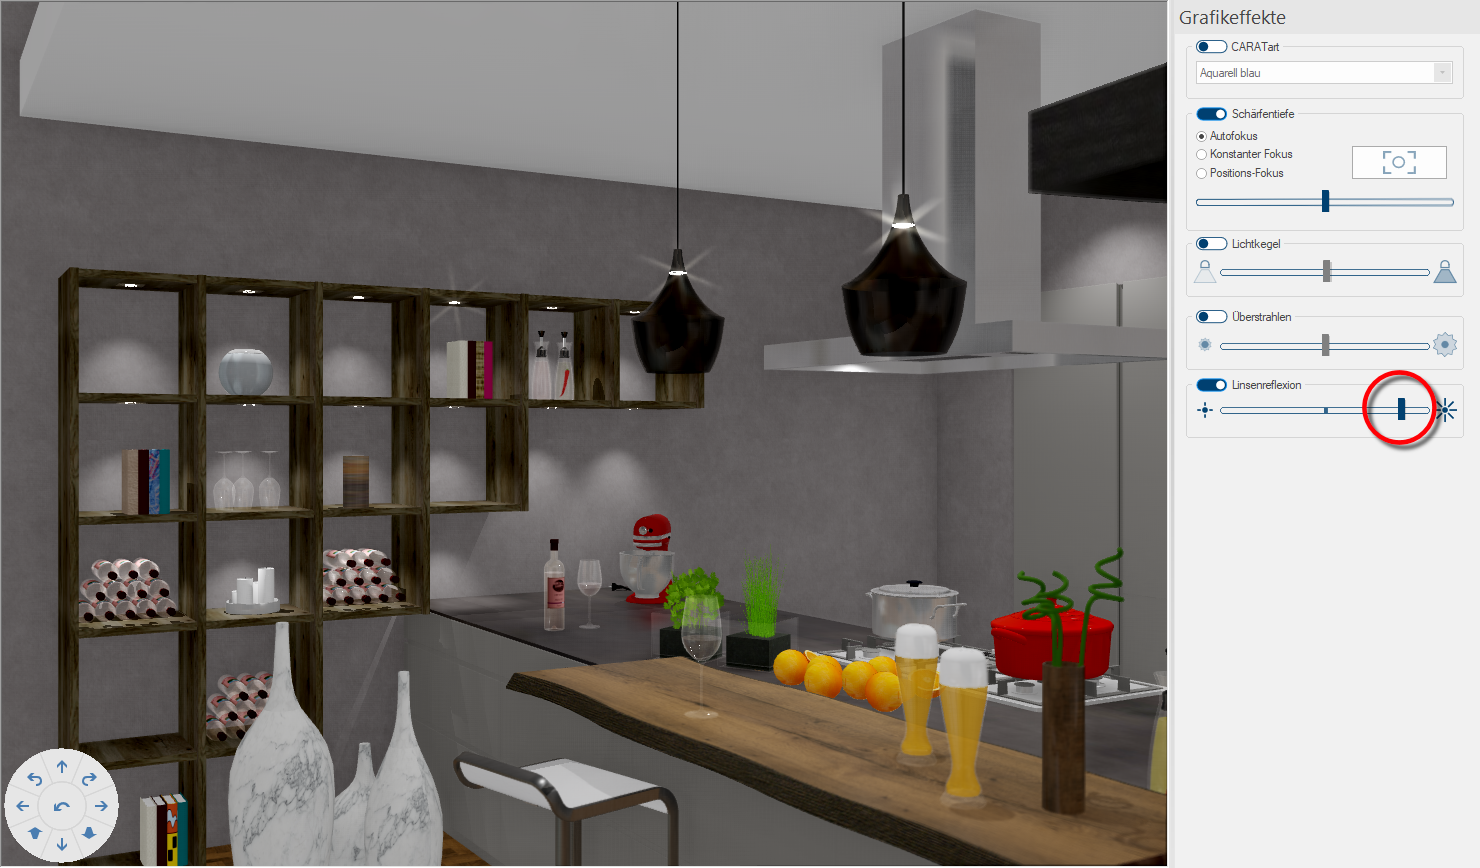
In order to be able to create an even more interesting kitchen design there are now several focus, light and colour effects available in the Graphic effects sidebar of CARAT.
Open your planning in the perspective view and unfold the Graphic effects sidebar to start editing the graphic effects.
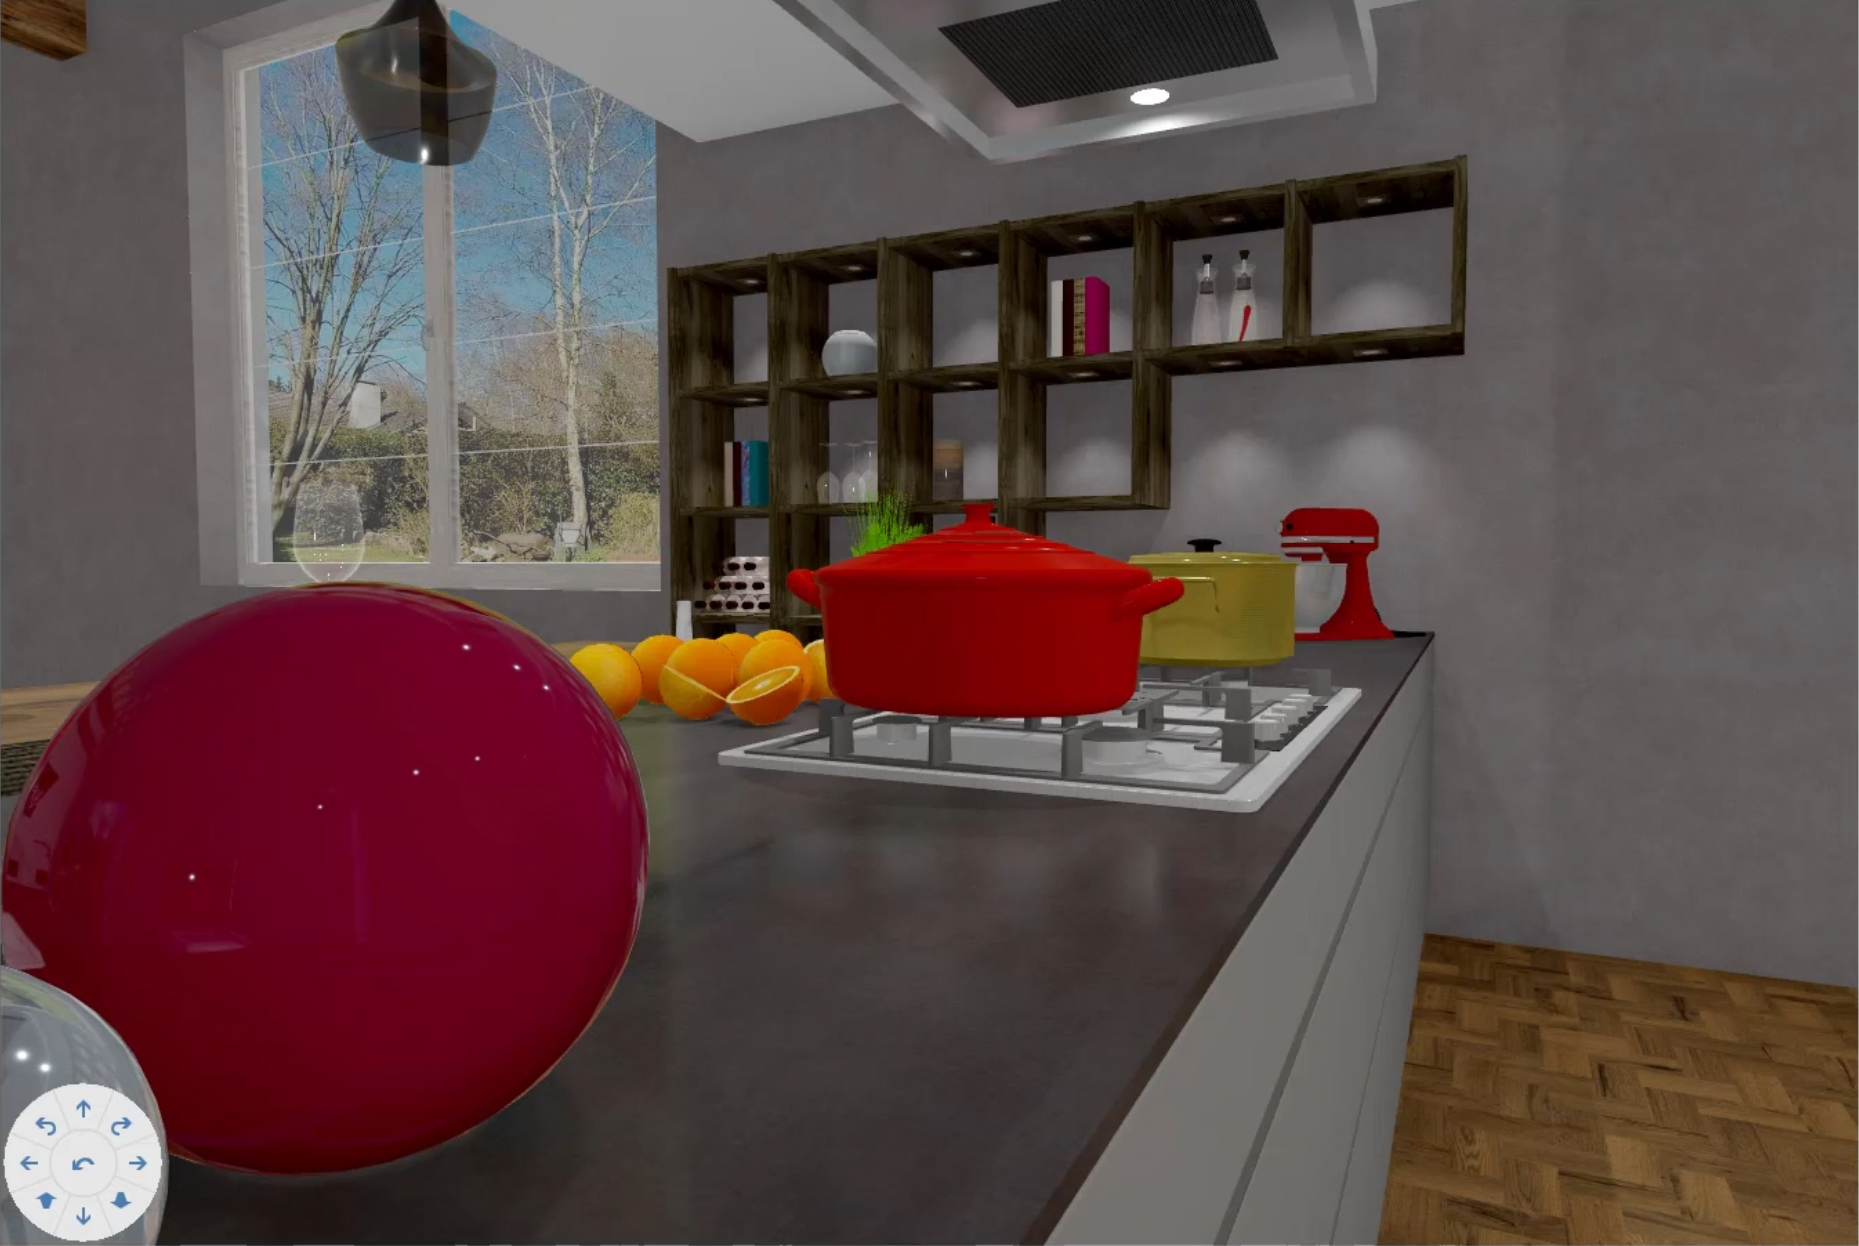
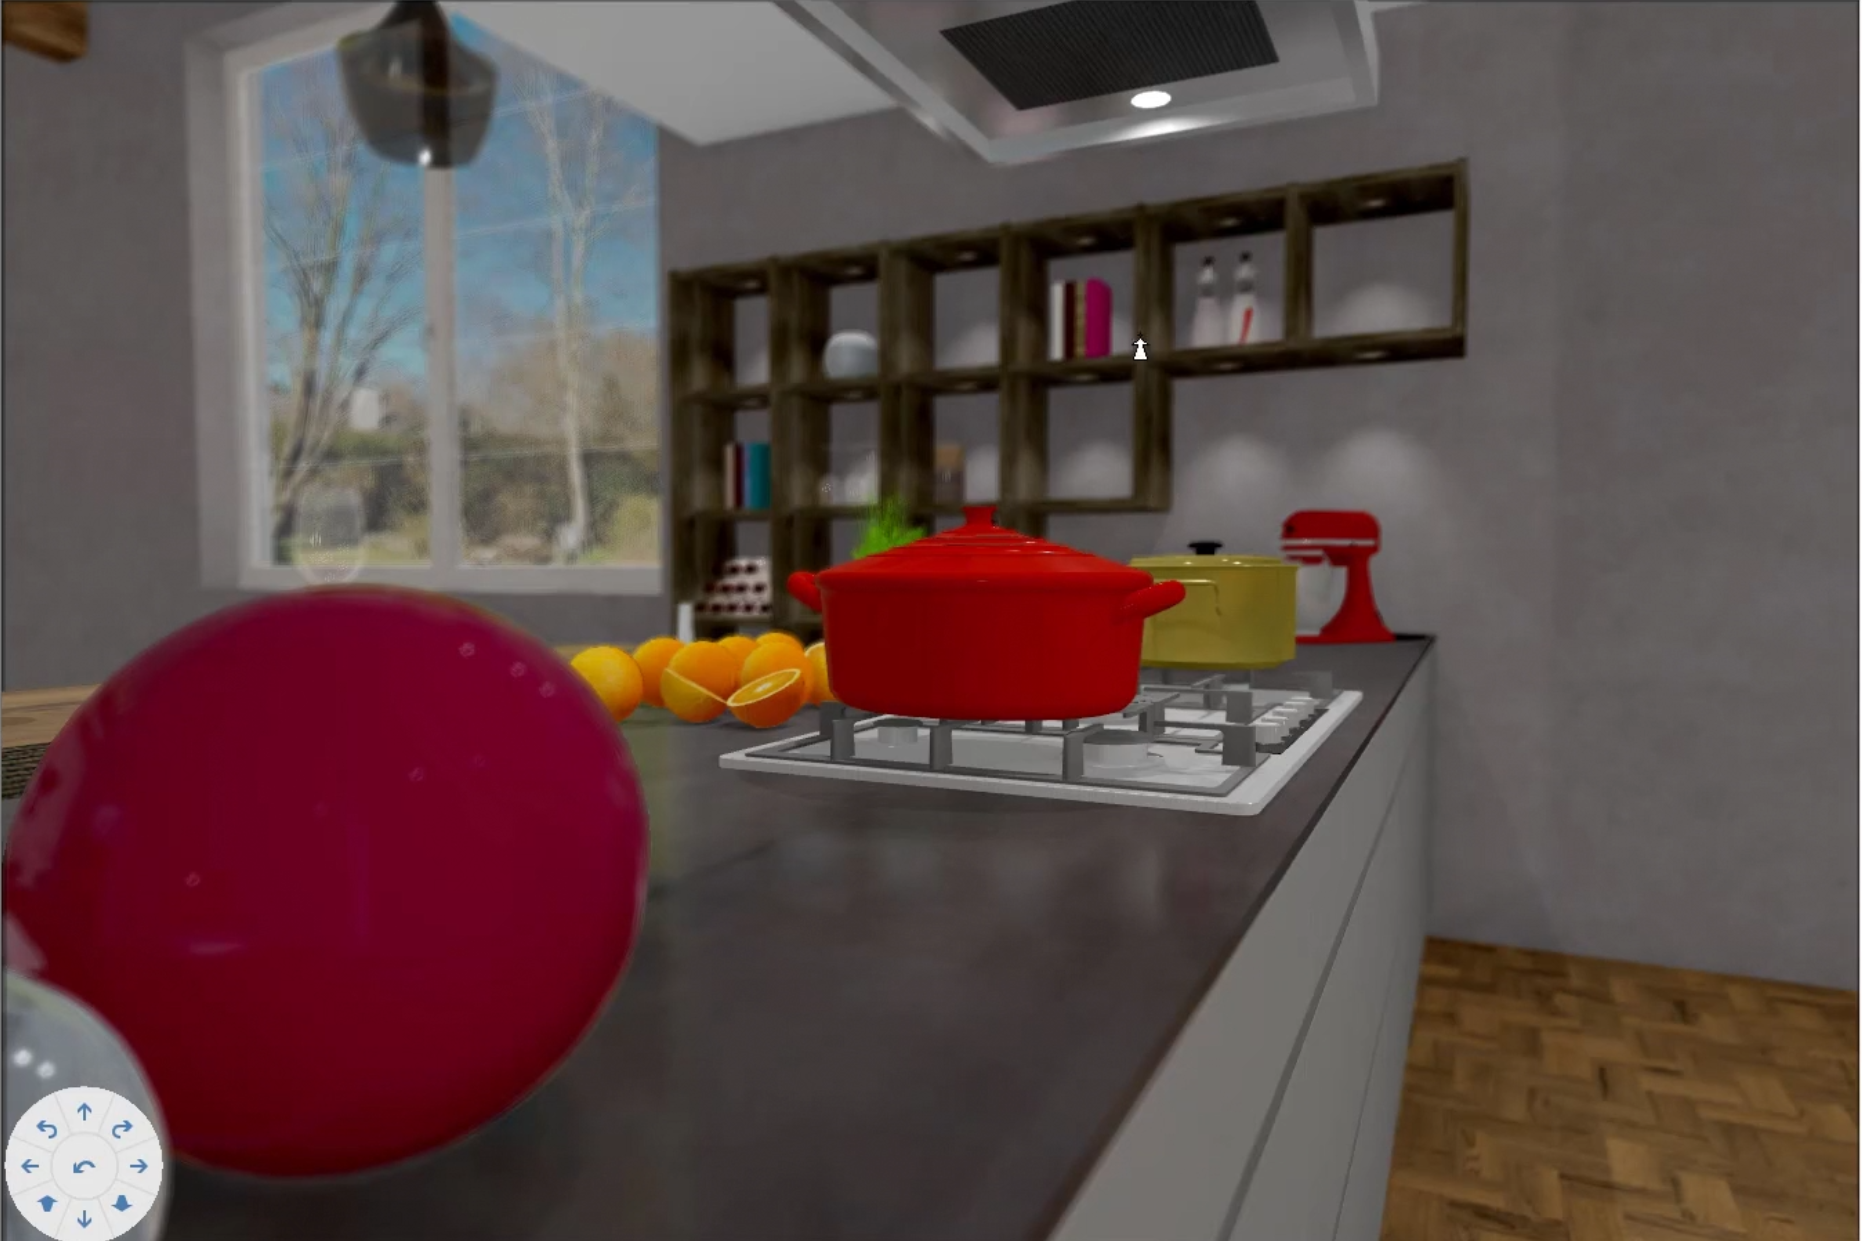
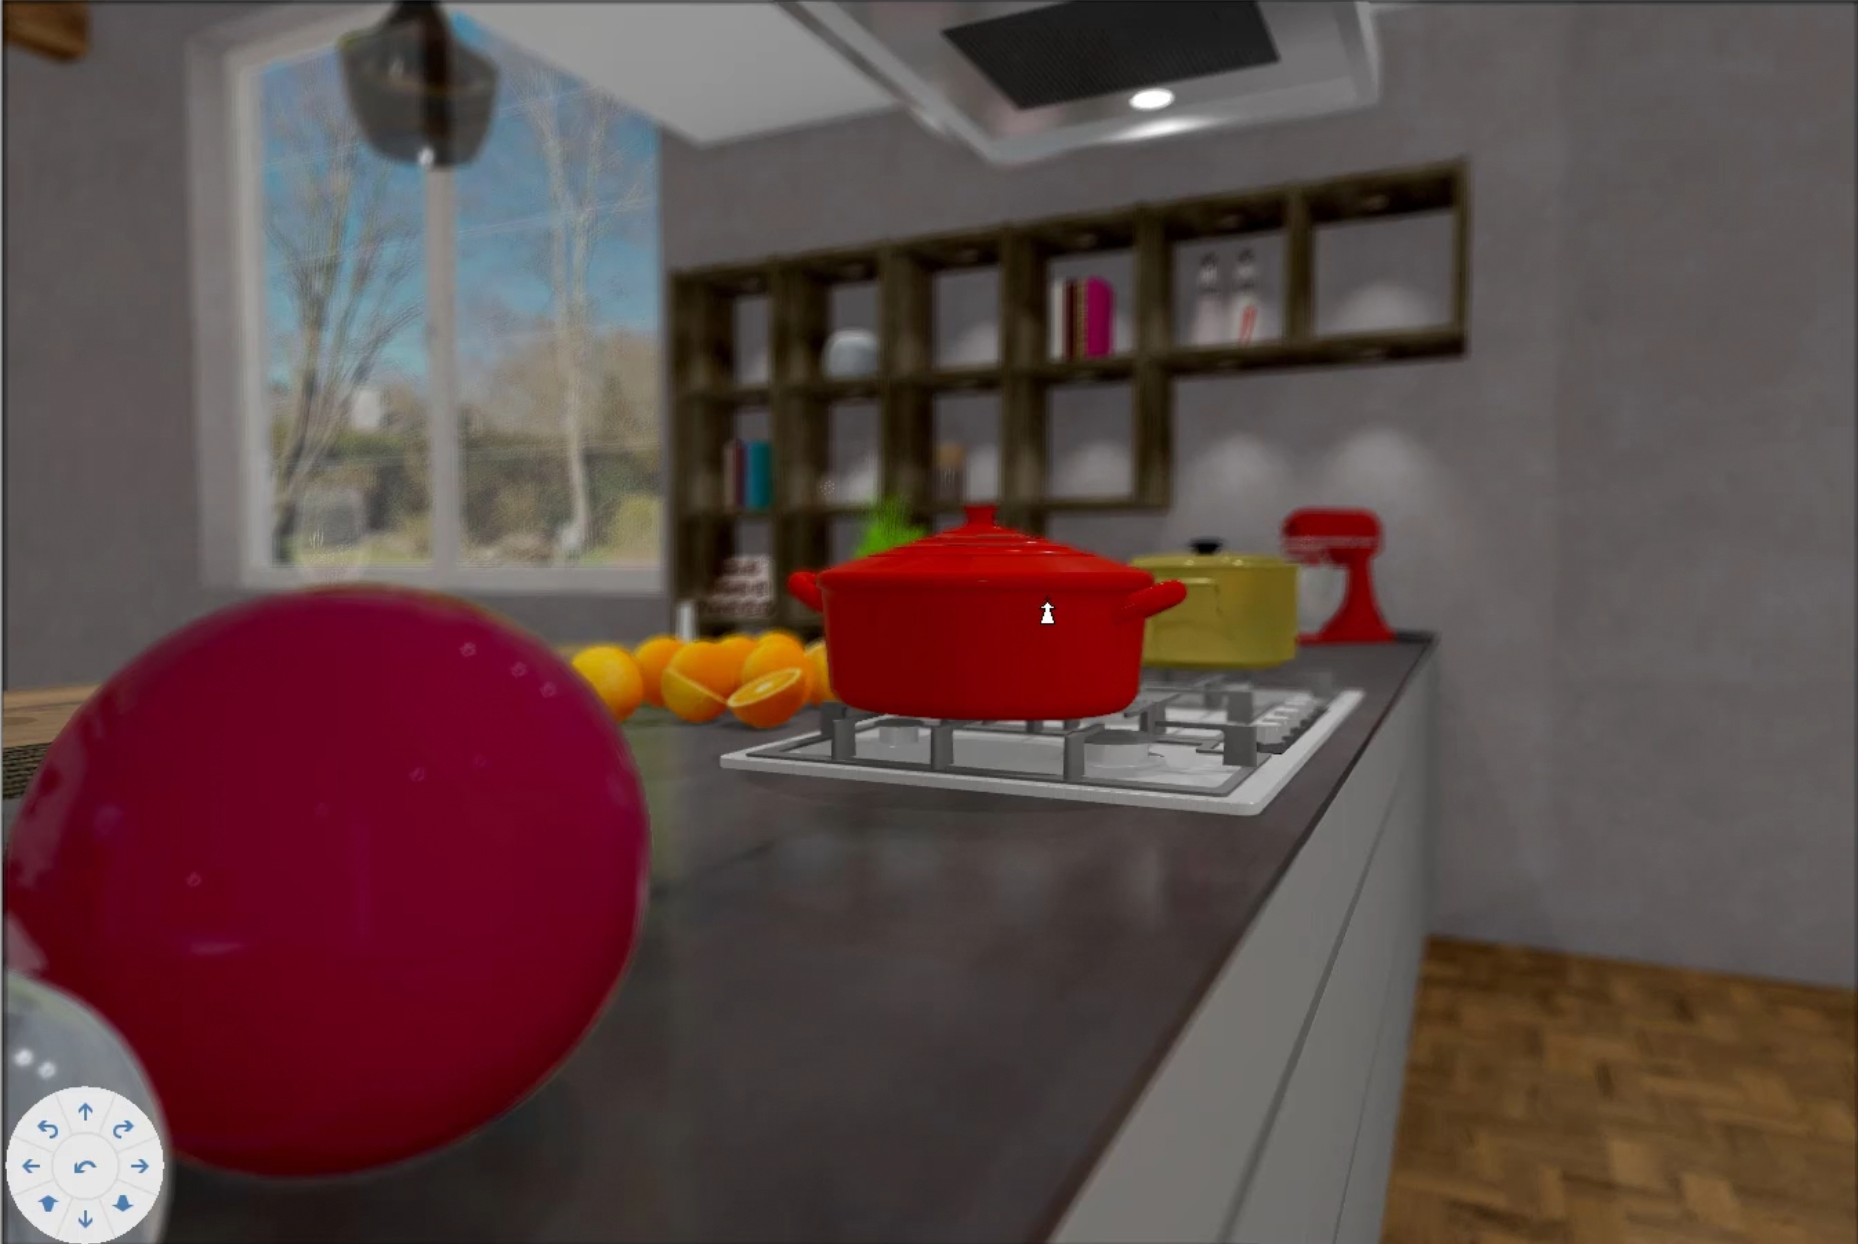
Up to now, a perspective has always been focused over the entire image area. With the focus effects, you have the possibility of accentuating only certain areas of an image, in order to steer the customer's gaze to a particular picture section.
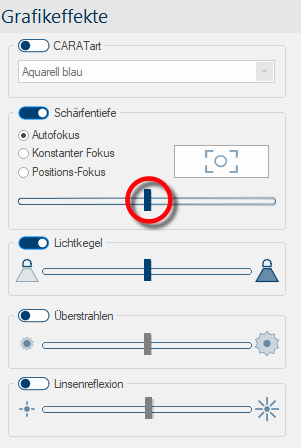
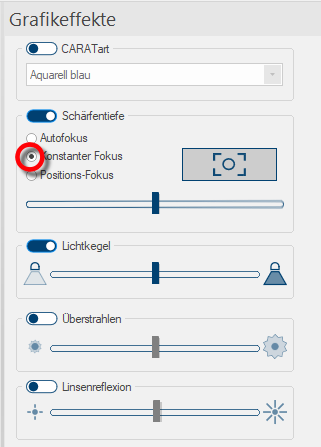
With the activation of the depth of field, this area first starts in Autofocus, thus the middle section of the perspective window is focused. If you move the slider below it to the left, the image becomes sharp over the entire image area, the further to the right the slider is moved, the more blurred everything around the centre of the image becomes.
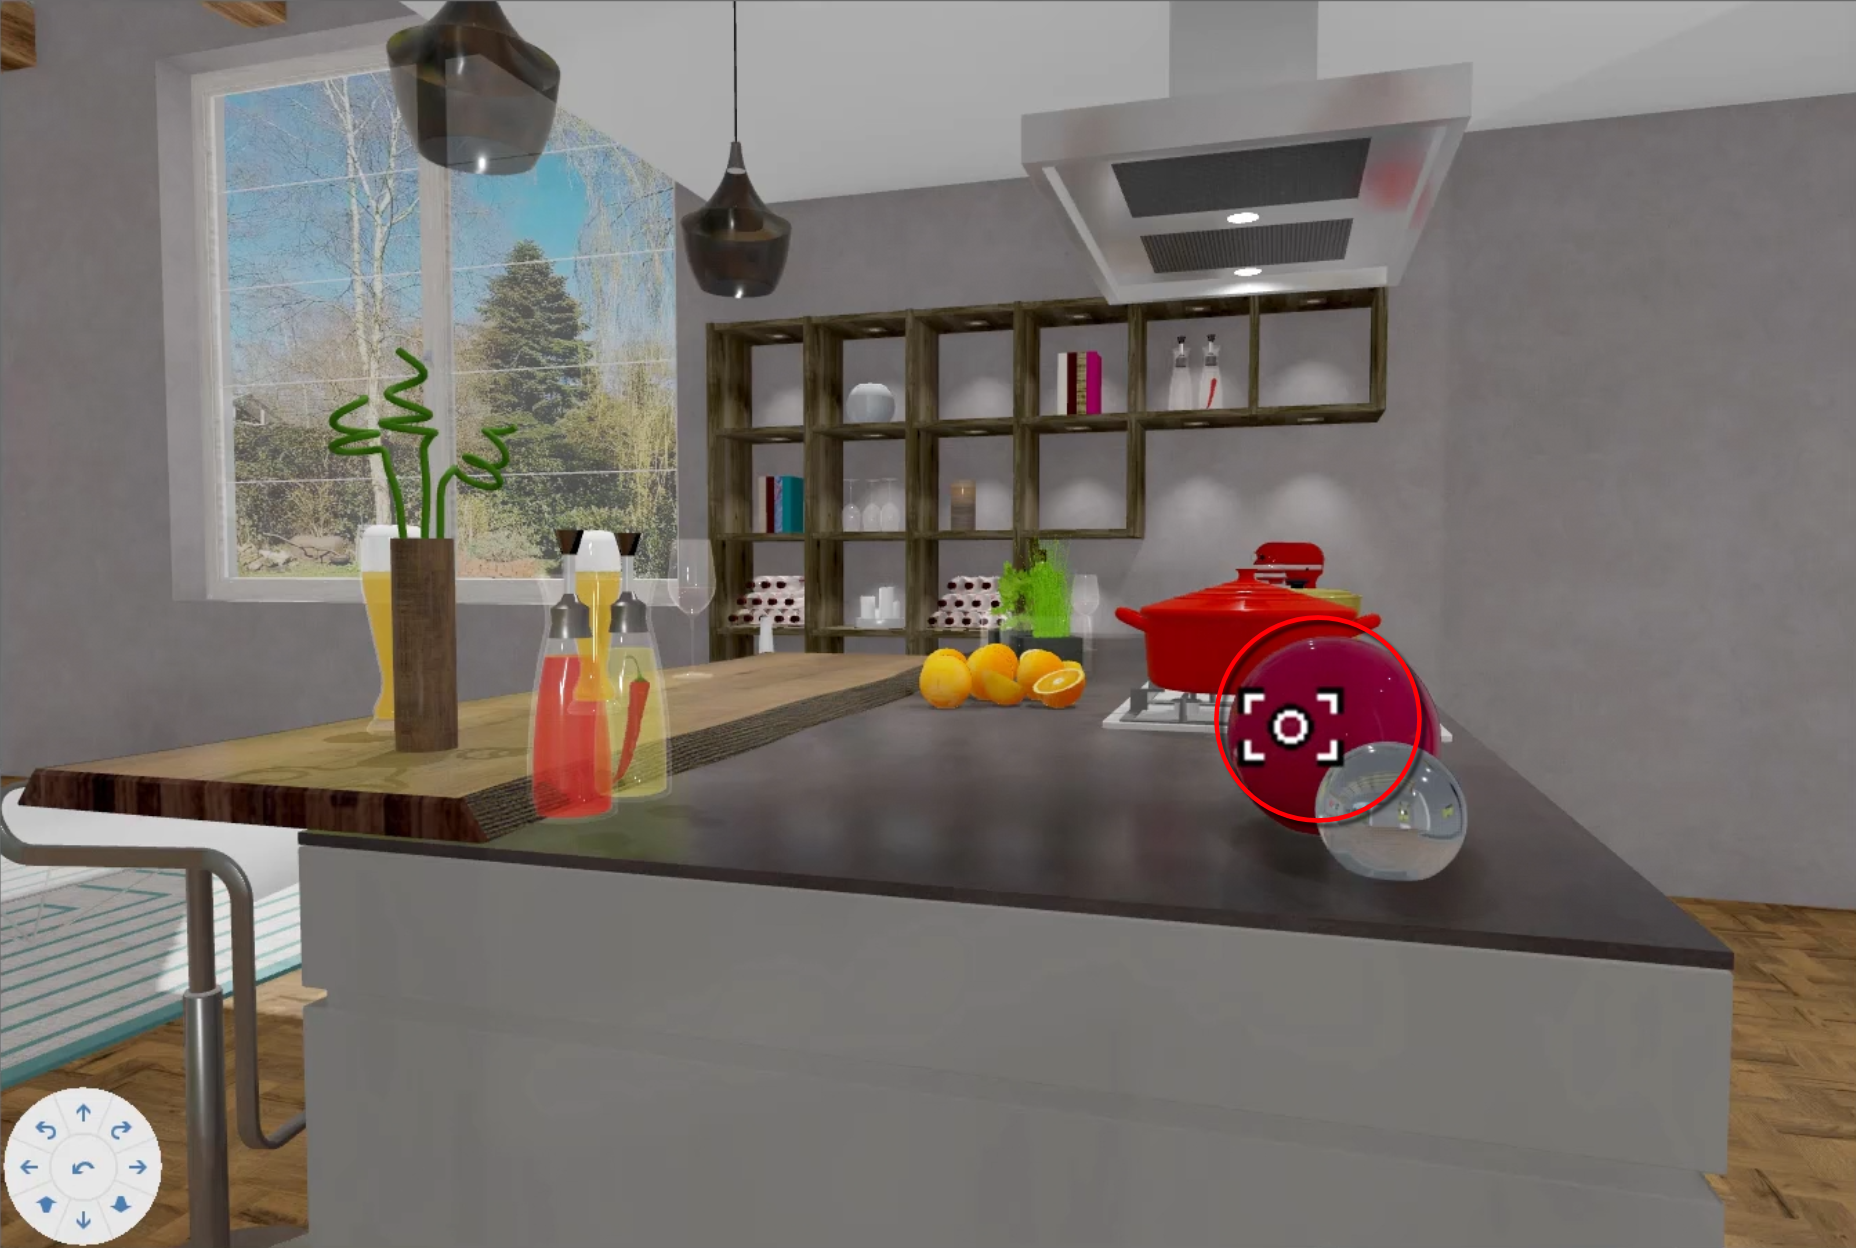
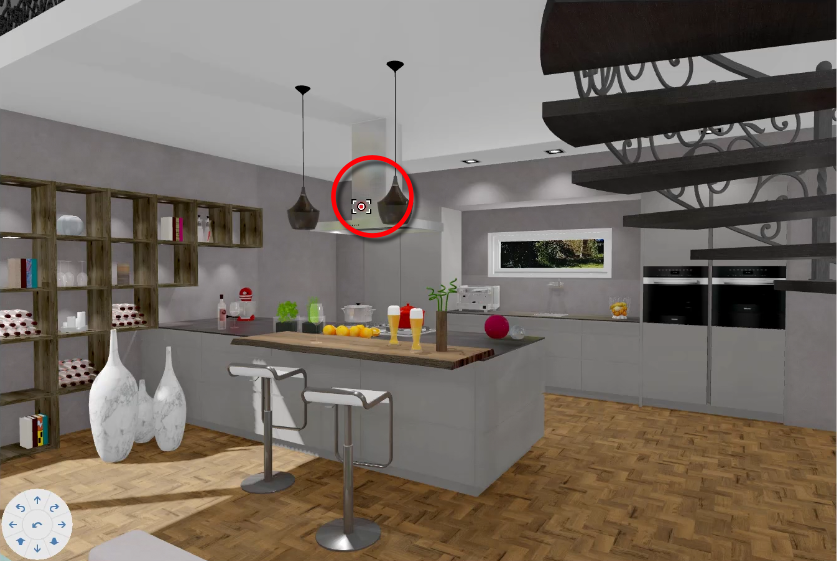
If you activate the Continuous focus, your mouse pointer will change into a focus indicator, as soon as you move it in the perspective window.
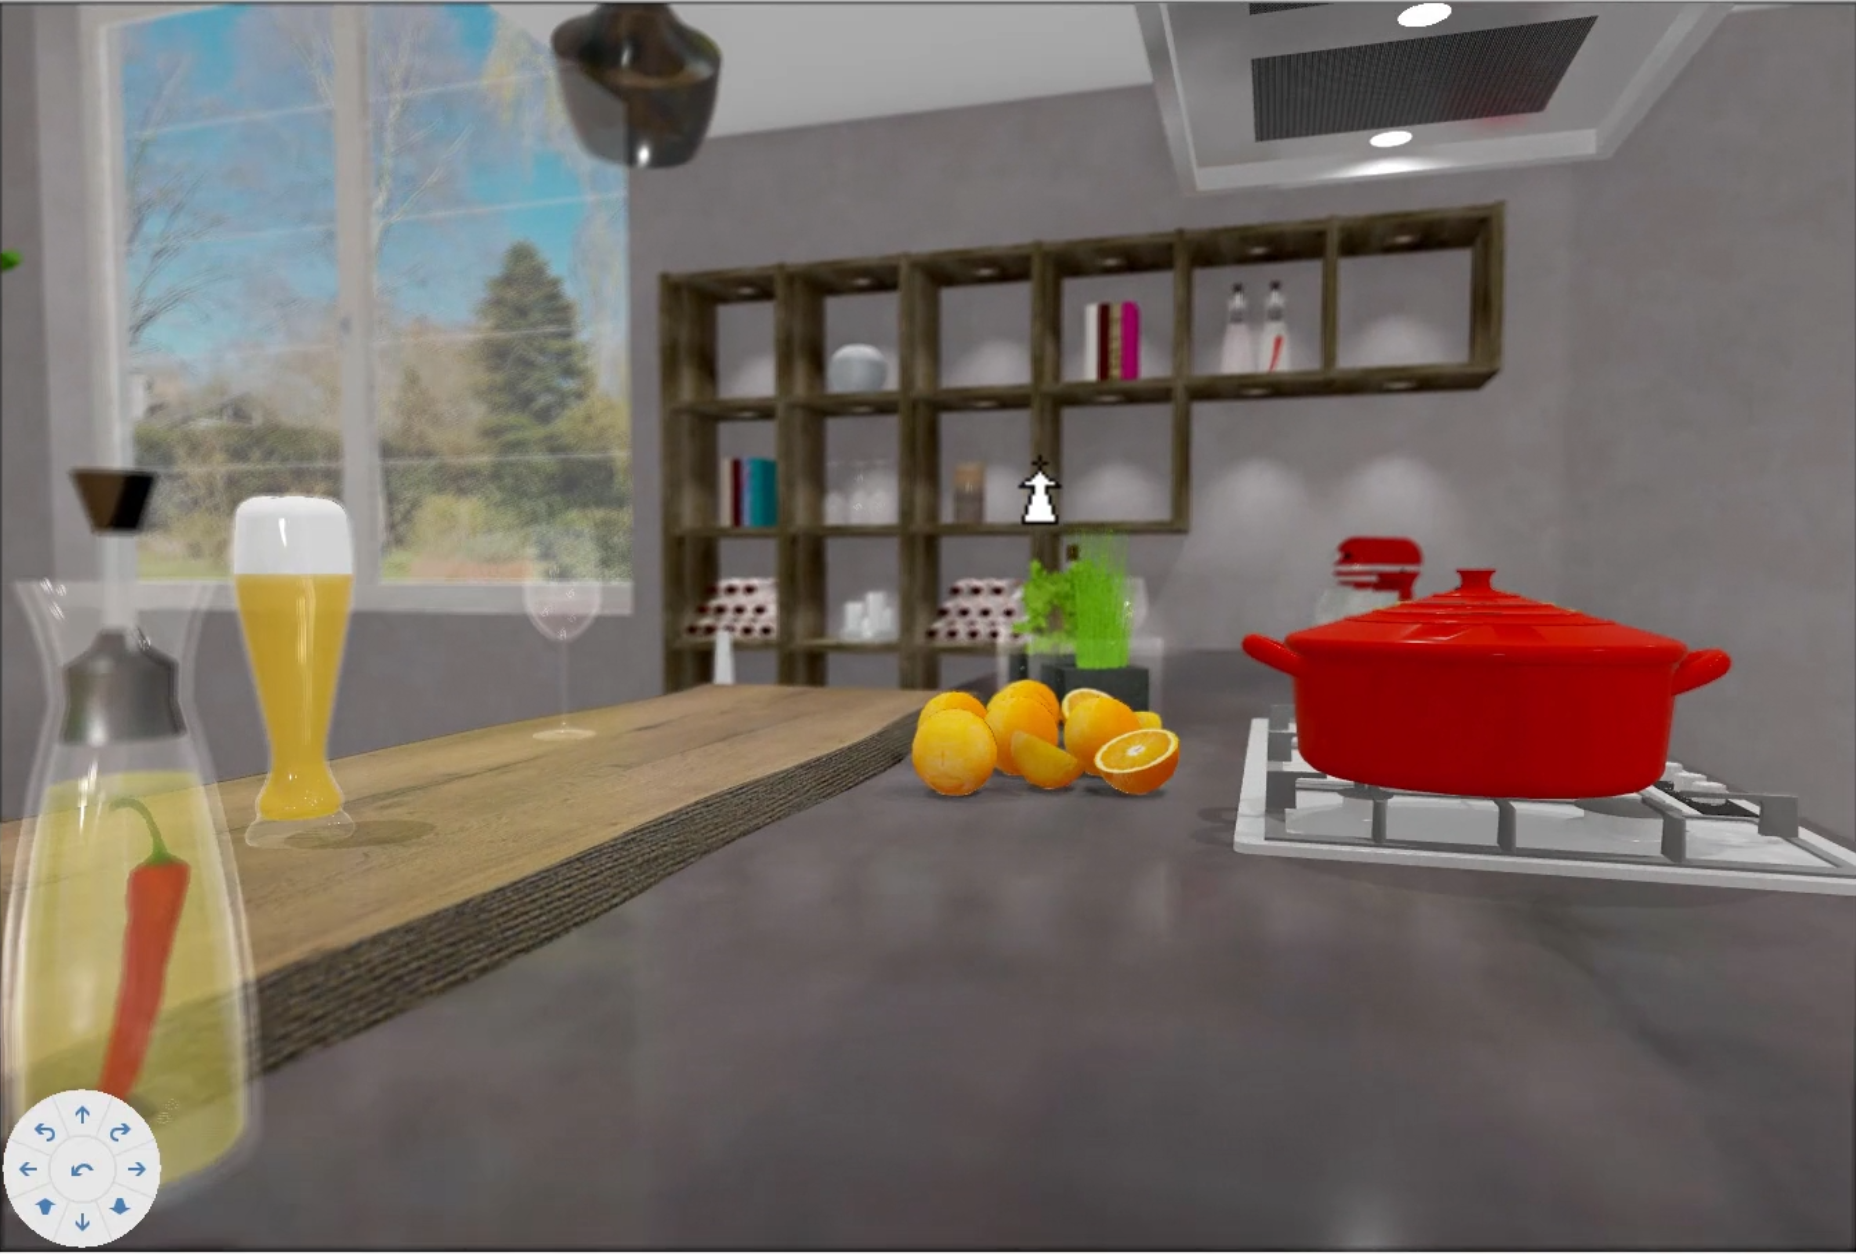
If you now click on an object, CARAT will memorise the distance for the focus between the camera lens and the object. When moving within the perspective, CARAT maintains this focus distance to constantly focuses the image within this distance range.
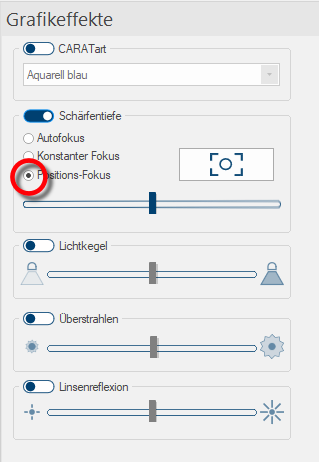
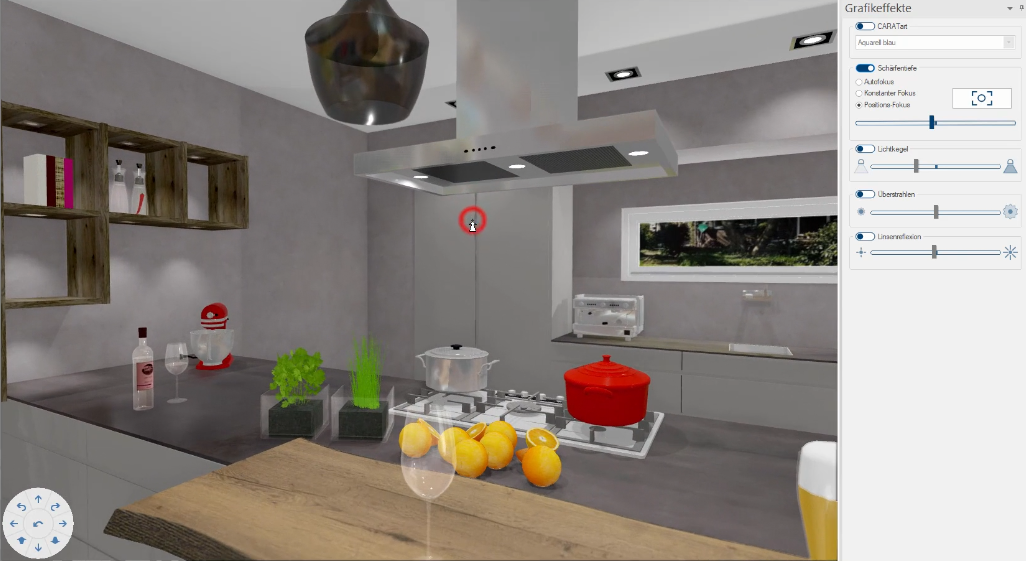
When activating the position focus, CARAT automatically locks itself in on one object and tries to keep the focus area always on that targeted object. Also here, in the perspective, the mouse pointer changes again into a Focus indicator and you can select the object to be focused with a mouse click.

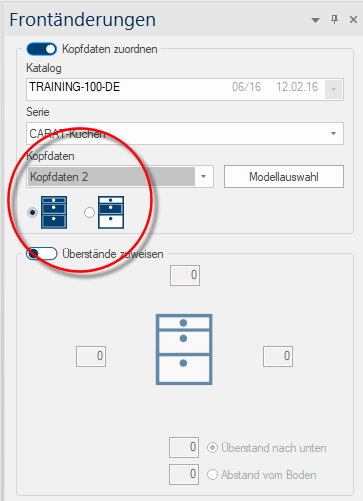
The front changes sidebar makes both the assignment of varying Head data per article as well as the Assignment of projections in an open commission possible. This sidebar is in the standard setting situated at the right side of the program window in unfolded condition.
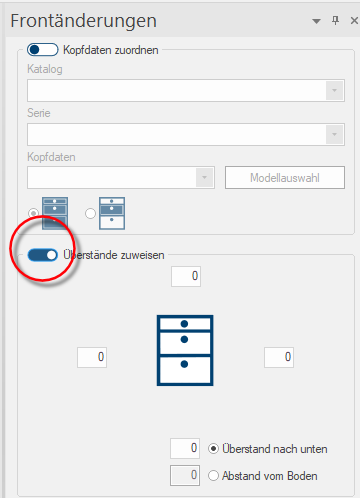
- The Assign projections function can be activated by a click in the lower part of the front changes sidebar.
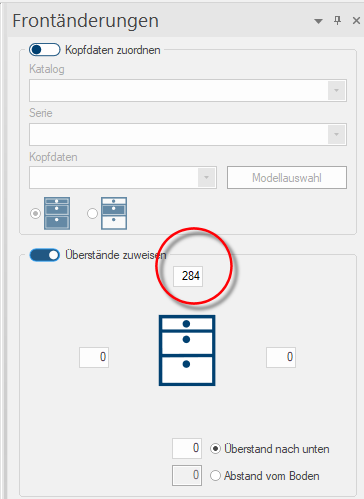
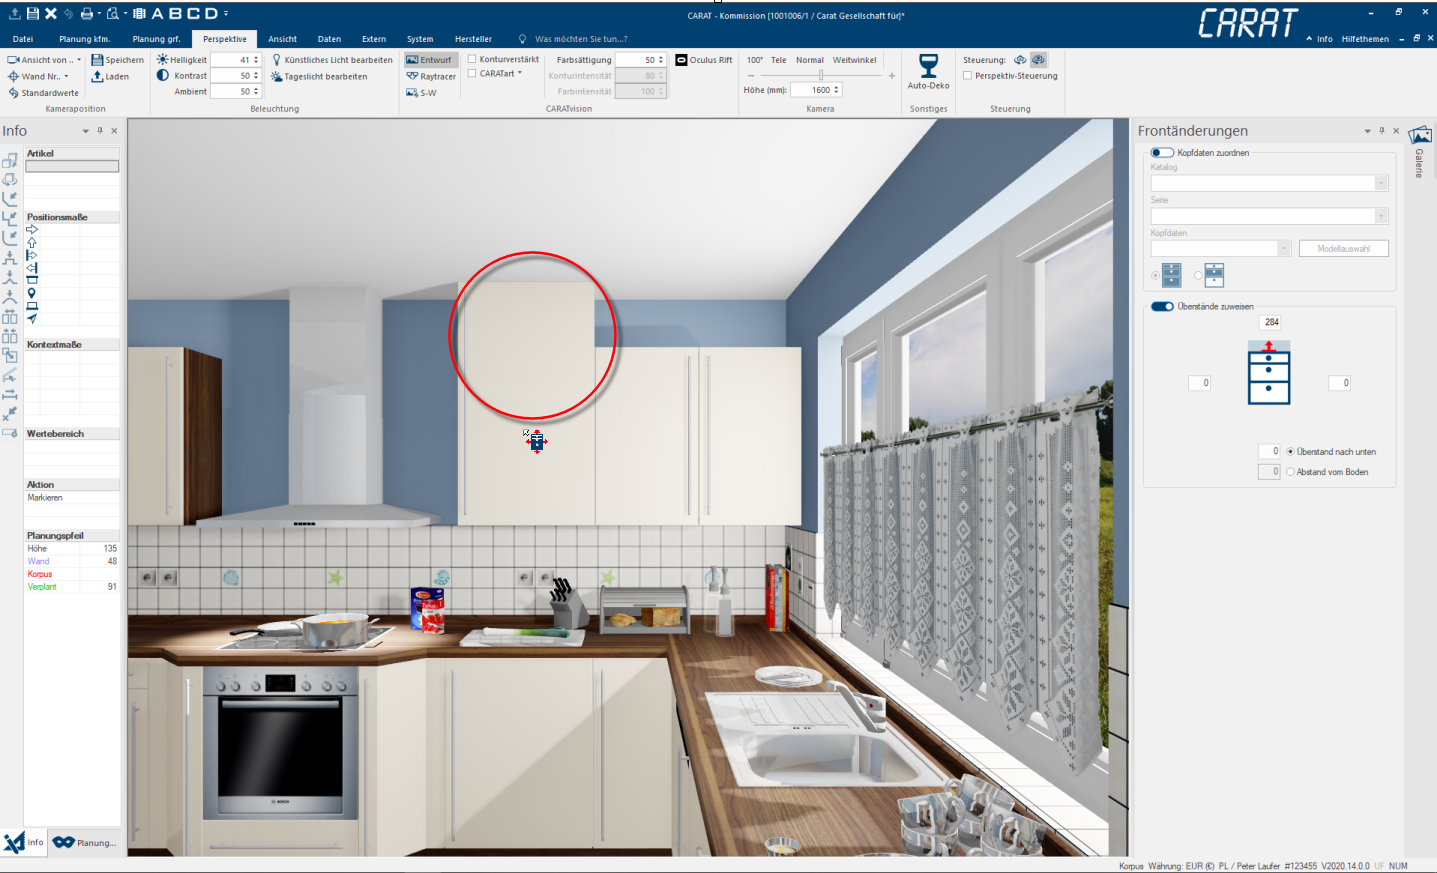
- You can enter the sizes of the left, right, above and under projections in millimetre in comparison with the cabinet, in the schematic representation of a base unit that is shown there. Beyond that, you can also enter the downward distance from the floor of the room, so that CARAT can determine the height autonomously.
Example of entering an upward front projection of 284 mm.
- The assignment of the required front projection will now be completed in the Perspective, by clicking on the front of the article that should be changed.
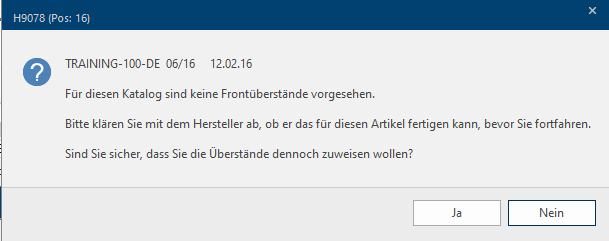
In this case, planning in the projection can be confirmed on one's own responsibility with yes, as far as the user has the relevant authorisation. It is assumed here that the planner has the opportunity of producing the planned in front projection himself, for example through his own carpentry shop. Also in this case, CARAT will create an article wild card in the parts list, so that it can be considered commercially.
You will get an extensive impression of this from our new videos in the CARAT academy:

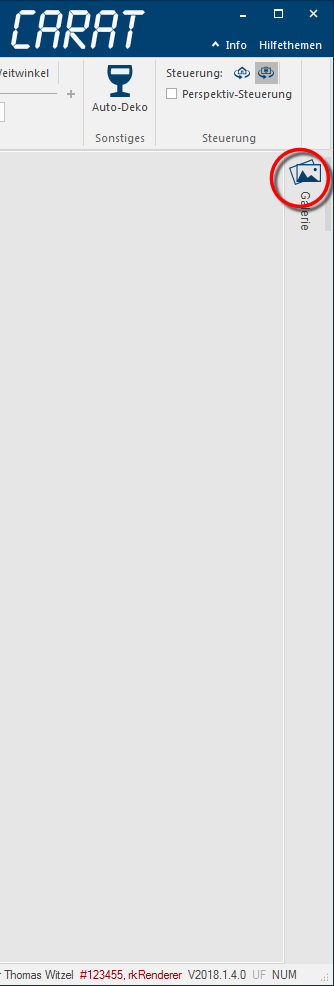
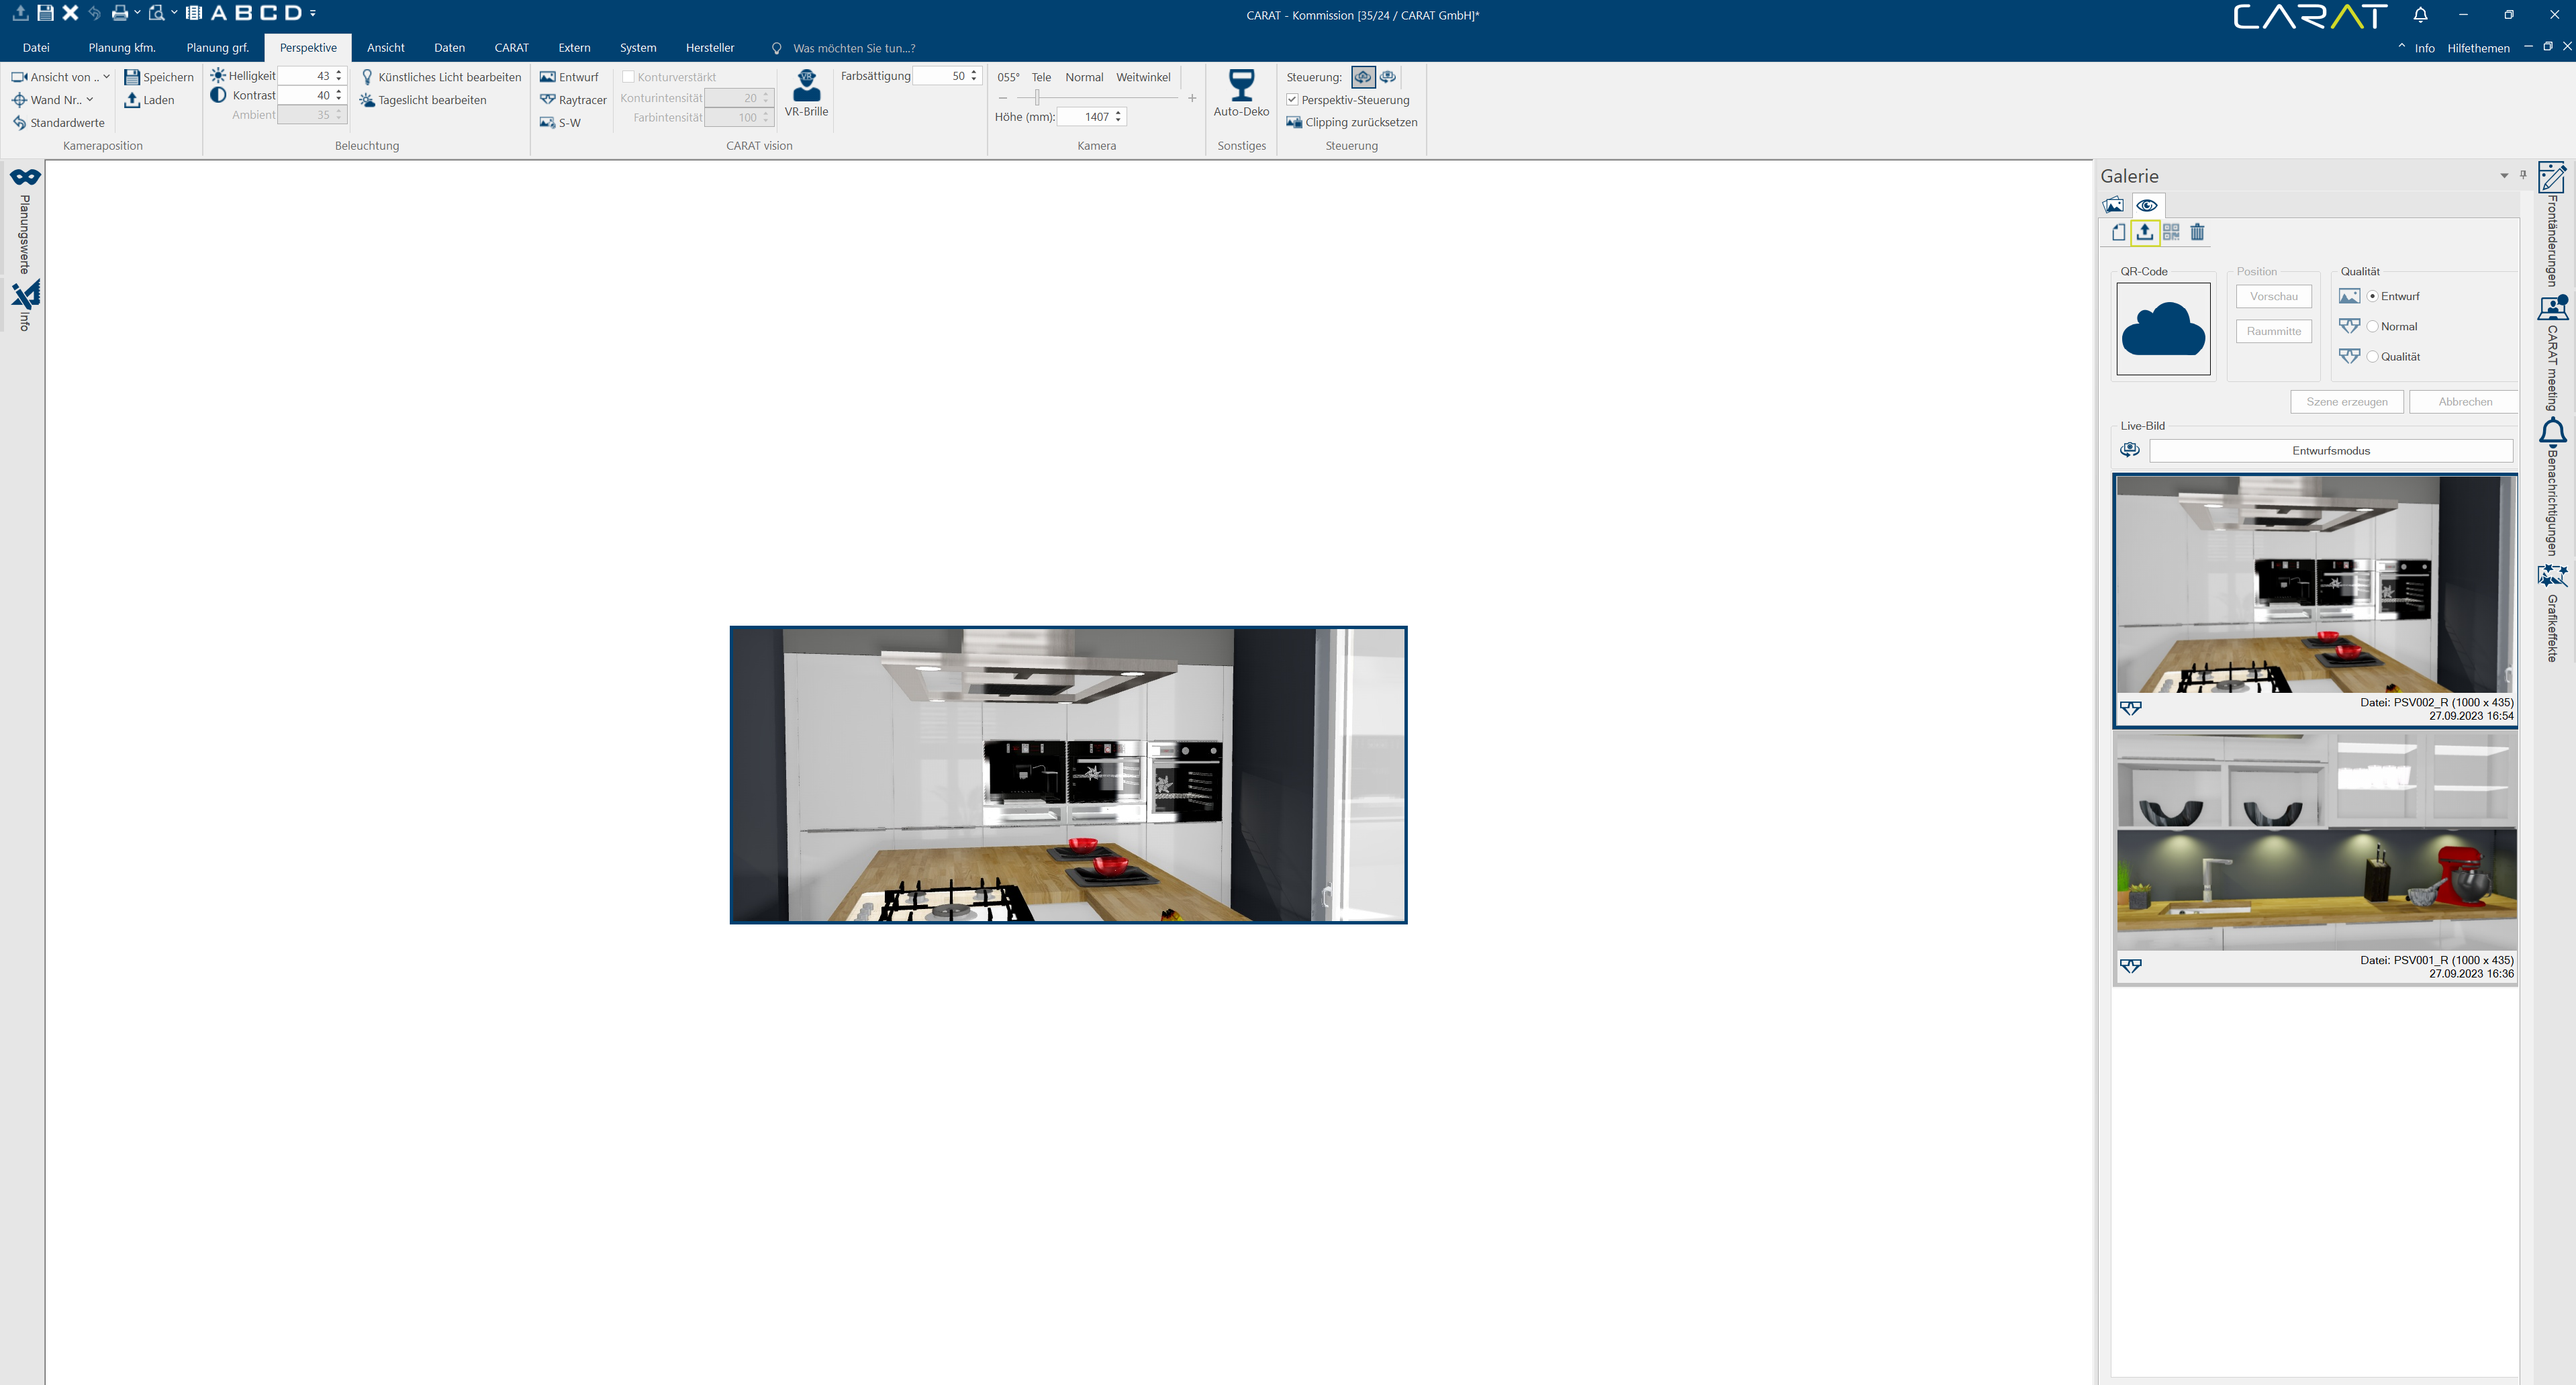
The sidebar Gallery is situated at the right side of the program window and is collapsed to begin with. The sidebar will unfold as soon as you move your mouse pointer on the symbol. The sidebar will collapse automatically as soon as you move the mouse pointer away from the sidebar area.
If you want to use the functions of the sidebar gallery for any length of time we would advice you to unfold the sidebar for this period permanently by clicking on the pin symbol. To this, please also note the explanations of the special functions of the sidebars further below. The sidebar Gallery is divided in the index cards Perspective pictures and CARAT view-scenes.

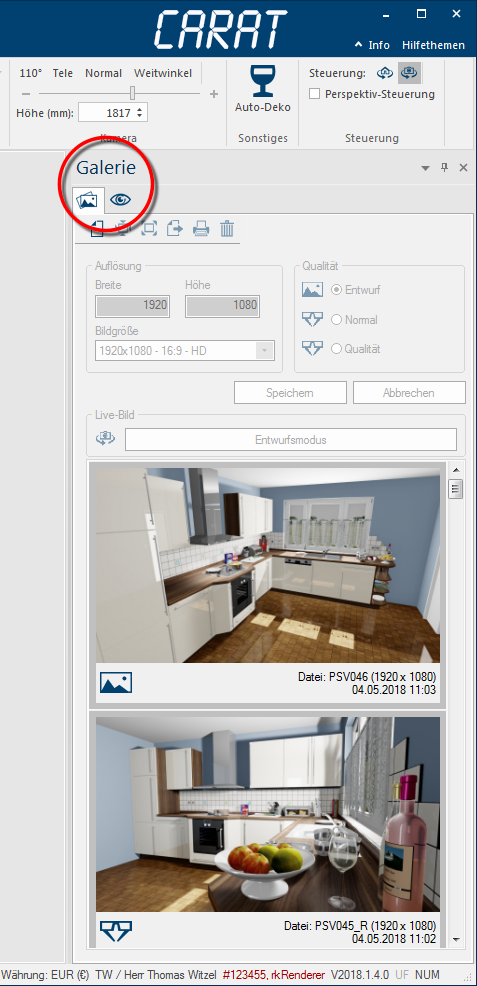
A picture administration is available via the index card perspective pictures. By using this index card you can save the current live picture of the perspective window as graphic file (PNG Portable Network Graphics (PNG) is a graphics format for raster graphics with loss less image compression. Besides different colour depths PNG also supports transparency by alpha. It is an universal, from the World Wide Web Consortium (W3C) recognized format and is supported by all modern web browsers.). It is irrelevant for this if you use the Design or Raytracer Raytracing is a mathematical method that copies the natural vision. With Raytracing is a trick used: the reversal of the light rays from the virtual eye in the virtual room, so that only those light rays, that actually would reach the eye in the selected position, are calculated. mode and if you also have used additional effects, like contour intensified, colour saturation or even special lighting settings in combination. You can of course save a graphic in any size you like, independent of the size shown in the perspective window. The maximum size is only limited by the capacity of your graphics card. The functions necessary for the picture administration are made available in one toolbar. These are: New, Fitting, Original size, Export, Print and Delete. A short note about the respective function will appears when you linger shortly with the mouse pointer over a symbol.
New - Saving a picture
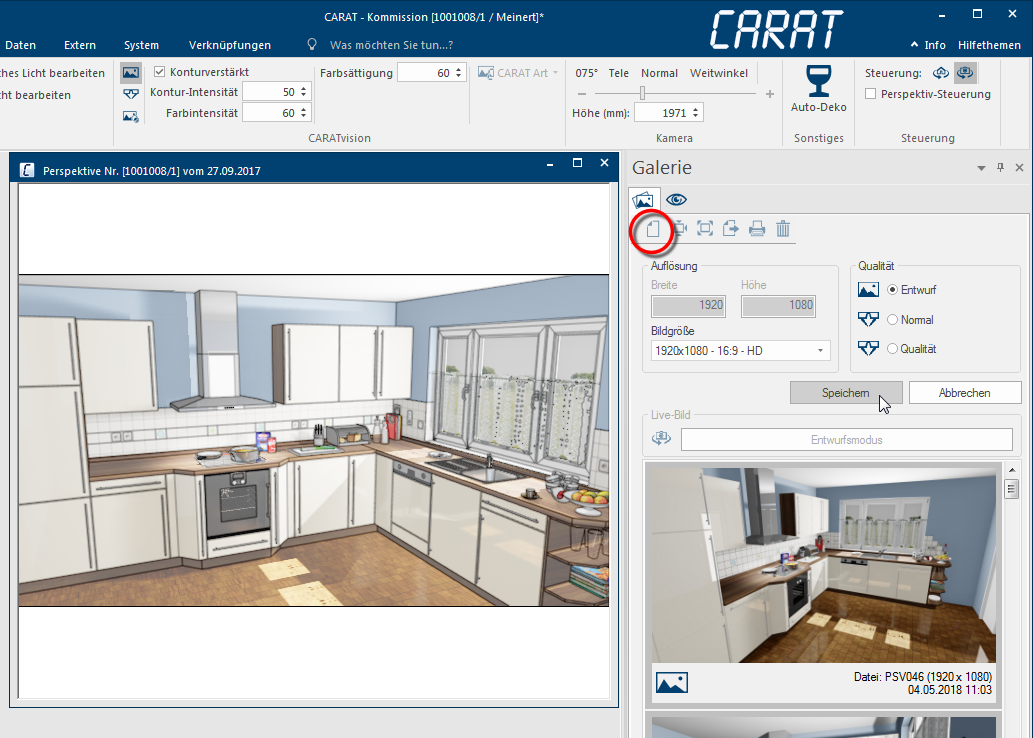
- As soon as you have clicked on the symbol new you can select the desired size of the picture to be created in the Resolution Commonly the picture resolution means the quantity of pixels (picture points), which make up a digital image. Normally values are given in width x height. area. The typical sizes are available via a selection list. You can however, also define an individual size. A default specific aspect ratio is inherent to selecting a certain size. The live picture in the perspective window will be adjusted to the set aspect ratio so that you can trim the picture section correctly. At any time you have the possibility to move the camera in the perspective window as usual, to adjust the picture section optimally.
- In the Quality area the Design mode is always preset, so that you first can arrange the optimal picture section. For the design mode is the Live mode. You can only move in real time through the scene in the design mode, and this in an already impressive high quality. To allow for the amazing speed of the design mode in the first place, are calculation intensive effects like reflections only simulated, and effects like gloss levels of surfaces or the refraction of glass not shown.
- To be able to create a graphic with these additional effects are two options for the Raytracer calculation available - Normal and Quality. The option Quality requires about twice as much time for the creation as the option Normal, because a significantly more complex calculation of the picture needs to be carried out. The time span needed for the calculation of a picture depends on the size of the picture to be calculated and on the capability of your computer, thus on how many cores the processor has. As rule of thumb applies: twice as many processor cores cuts the calculation time of the Raytracer in half.
- You have, irrespective of the fact that the perspective momentarily is shown in the design mode, the possibility to create the picture that should be saved already with the Raytracer, by using the quality area. By this you save an extra calculation, because only the picture to be saved and not also the live picture has to be calculated anew.
- You can create the picture with a click on the button Save, after you have selected the desired picture size and the appropriate picture section as well as the quality mode.
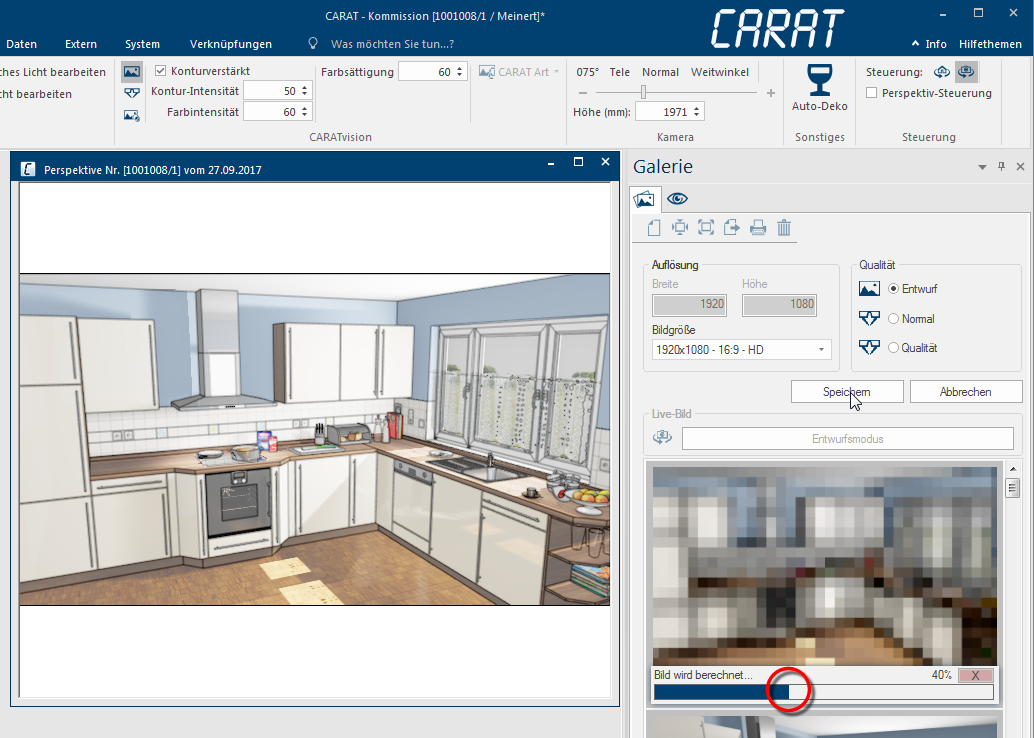
- In the area of the saved graphics is first a placeholder, a very rough reproduction of the scene to be calculated, inserted and a progress bar informs you about the time flow of the picture calculation. In design mode should the creation only take a few seconds. The Raytracer calculation of a picture in HD-resolution (1920 x 1080) with the option Normal takes, with a average computer (current processor with 4 Cores), about a minute.
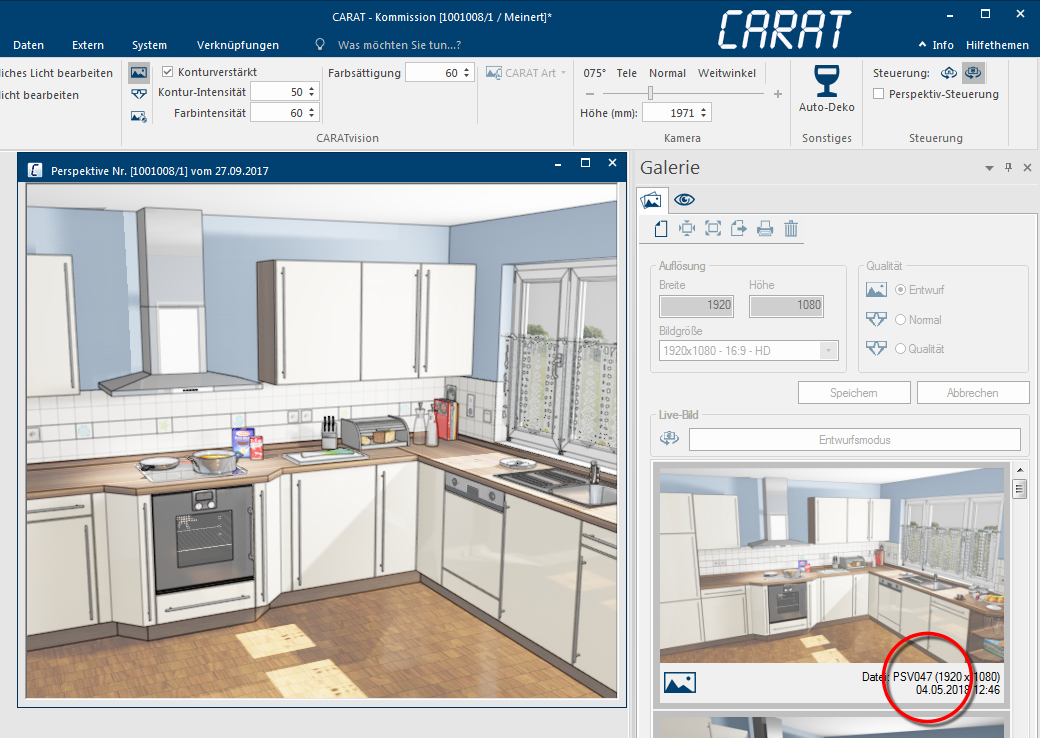
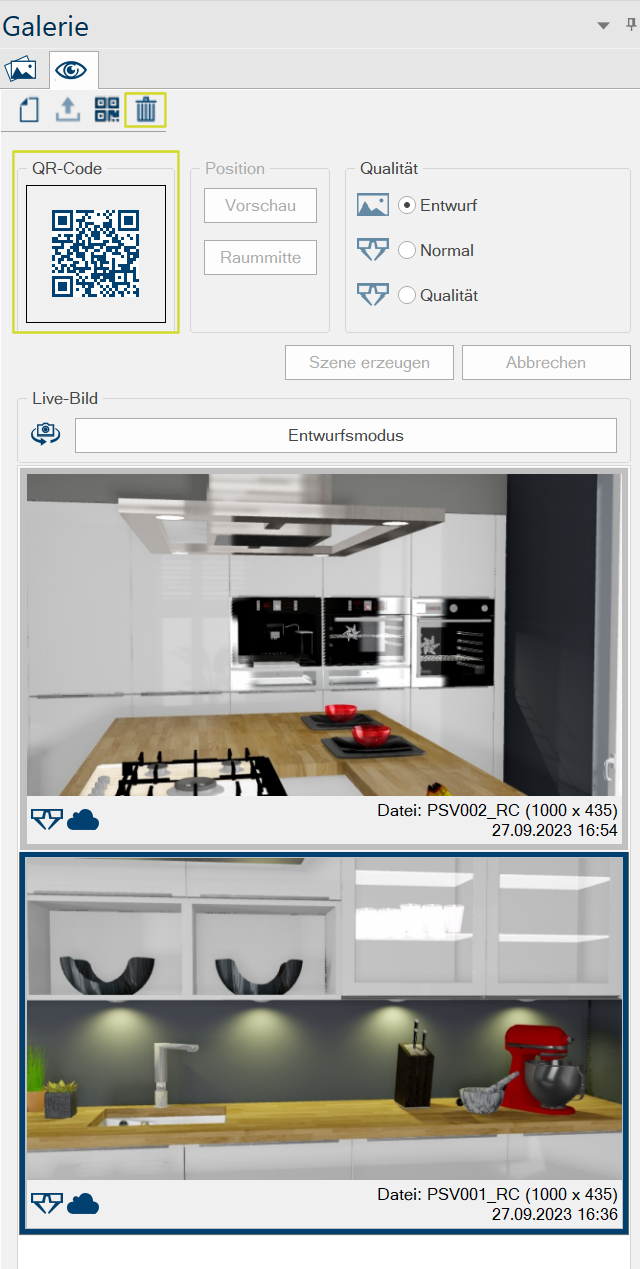
- The placeholder will be replaced by a preview of the completely calculated picture, after the picture calculation is finished. The picture mode (picture icon for Design or glasses for Raytracer), the file name, the picture size and the date of creation is now shown at the lower edge of the preview.
Show and administer saved pictures
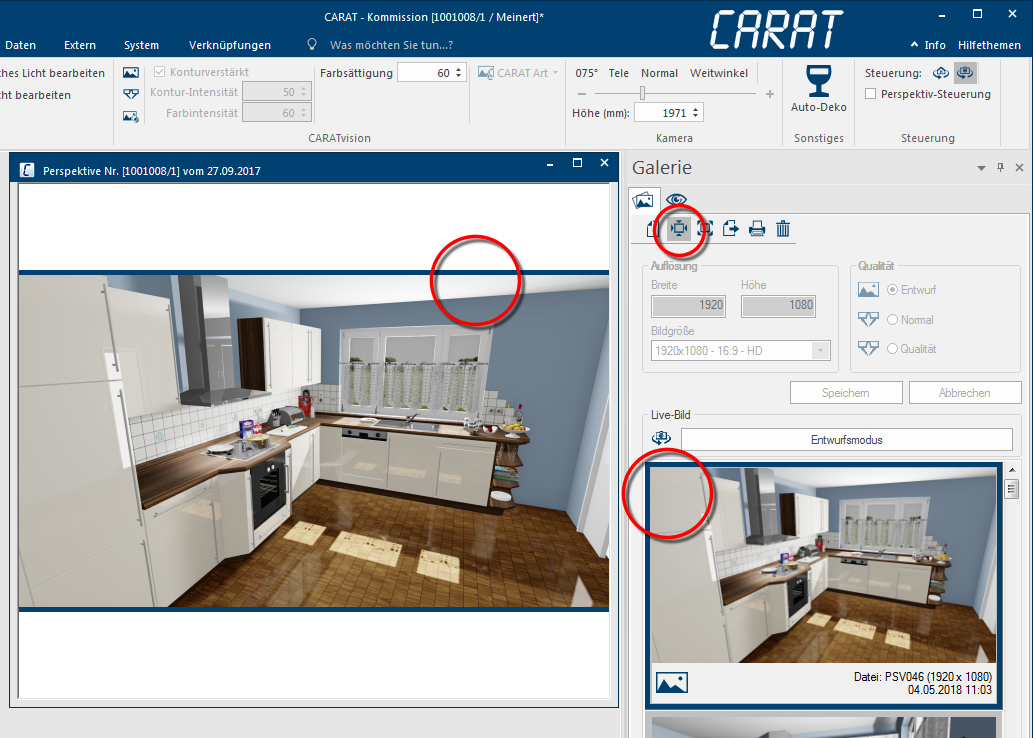
- The list of pictures is sorted by creation date, from newest to oldest. Please click in the sidebar on the appropriate preview, to show an already saved picture. The preview of the picture currently shown is marked with a blue frame.
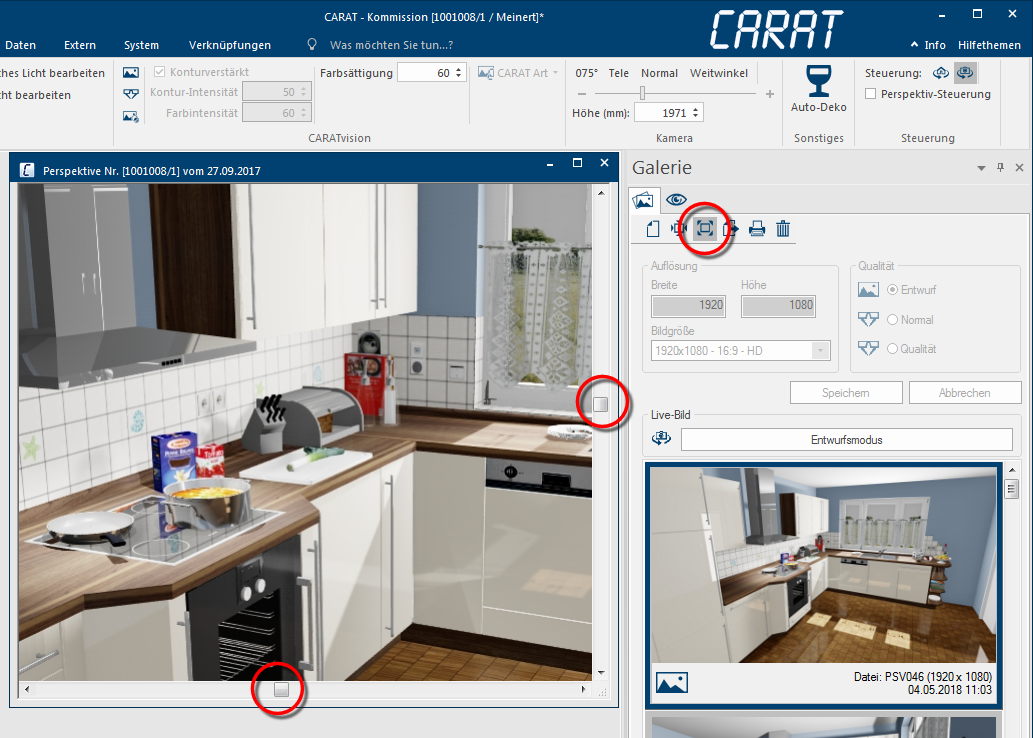
- The selected picture will first be shown in the correct aspect ratio and thus fitting in the perspective window, irrespective of the size of the perspective window. For a better recognition will the active function Fitting, with which a saved picture can be shown completely in the perspective window, be displayed in grey in the toolbar.
- By using the button Design mode in the live picture area, directly above the preview list, you can leave the preview mode at any time, and activate the real time graphic of CARAT again.
- You can select the Original size function from the toolbar if you have created a picture in a higher resolution, and you want to verify this picture subsequently in the perspective window in original. By this, the saved picture will now be shown 1:1. 1:1 means, one pixel Pixel or picture element identifies both, the smallest unit of digital raster graphics and the display of these graphics on a monitor with raster activation. of the picture corresponds with one pixel on the screen. Because the size of the perspective window is usually not big enough to show the complete picture, is the perspective window now supported by two scrollbars with which you can move the picture section.
- Via the toolbar is the function Export available, for in case you want to use one or more pictures outside of CARAT. First mark one or all of the pictures that you want to export by clicking on the respective preview(s). Please hold optionally the Shift or de Ctrl-key The Ctrl-key (short for Control Key) is located on the PC keyboard to the far left in the bottom row of keys. The Ctrl-key has a similar function as the Shift-key. Usually this key is used in conjunction with another key or with the mouse to perform a special function., if several pictures should be marked.
- Left click + Shift-key The Shift-key is a key that appears on the computer keyboard and type writer. The key is most often used to make lower-case letters into upper-case letters by holding it down while selecting the relevant letter. = All pictures between the first and the second marked picture will be marked.
- Left click + Ctrl-key = Only those pictures on which you click will be marked.
- You can print a marked picture directly from CARAT by using the function Print.
- You can delete one or even several marked pictures from the preview list by using the function Delete.

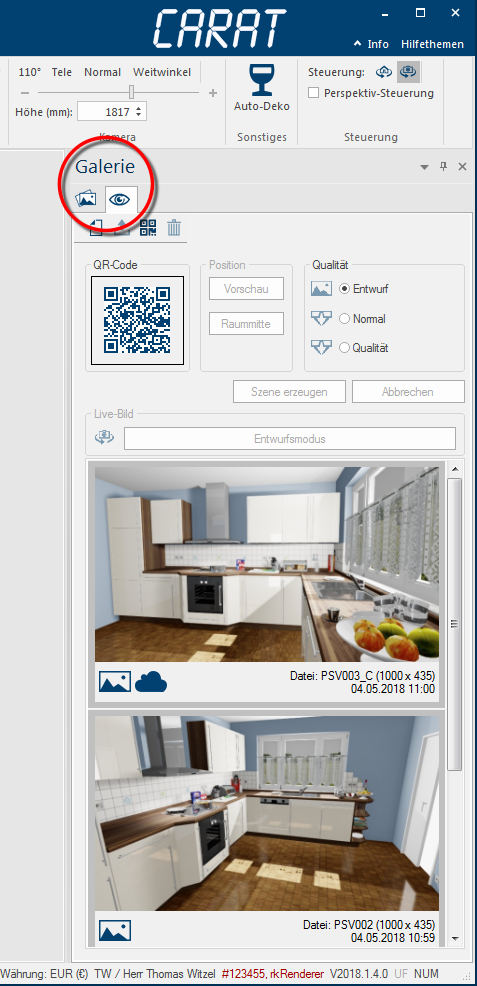
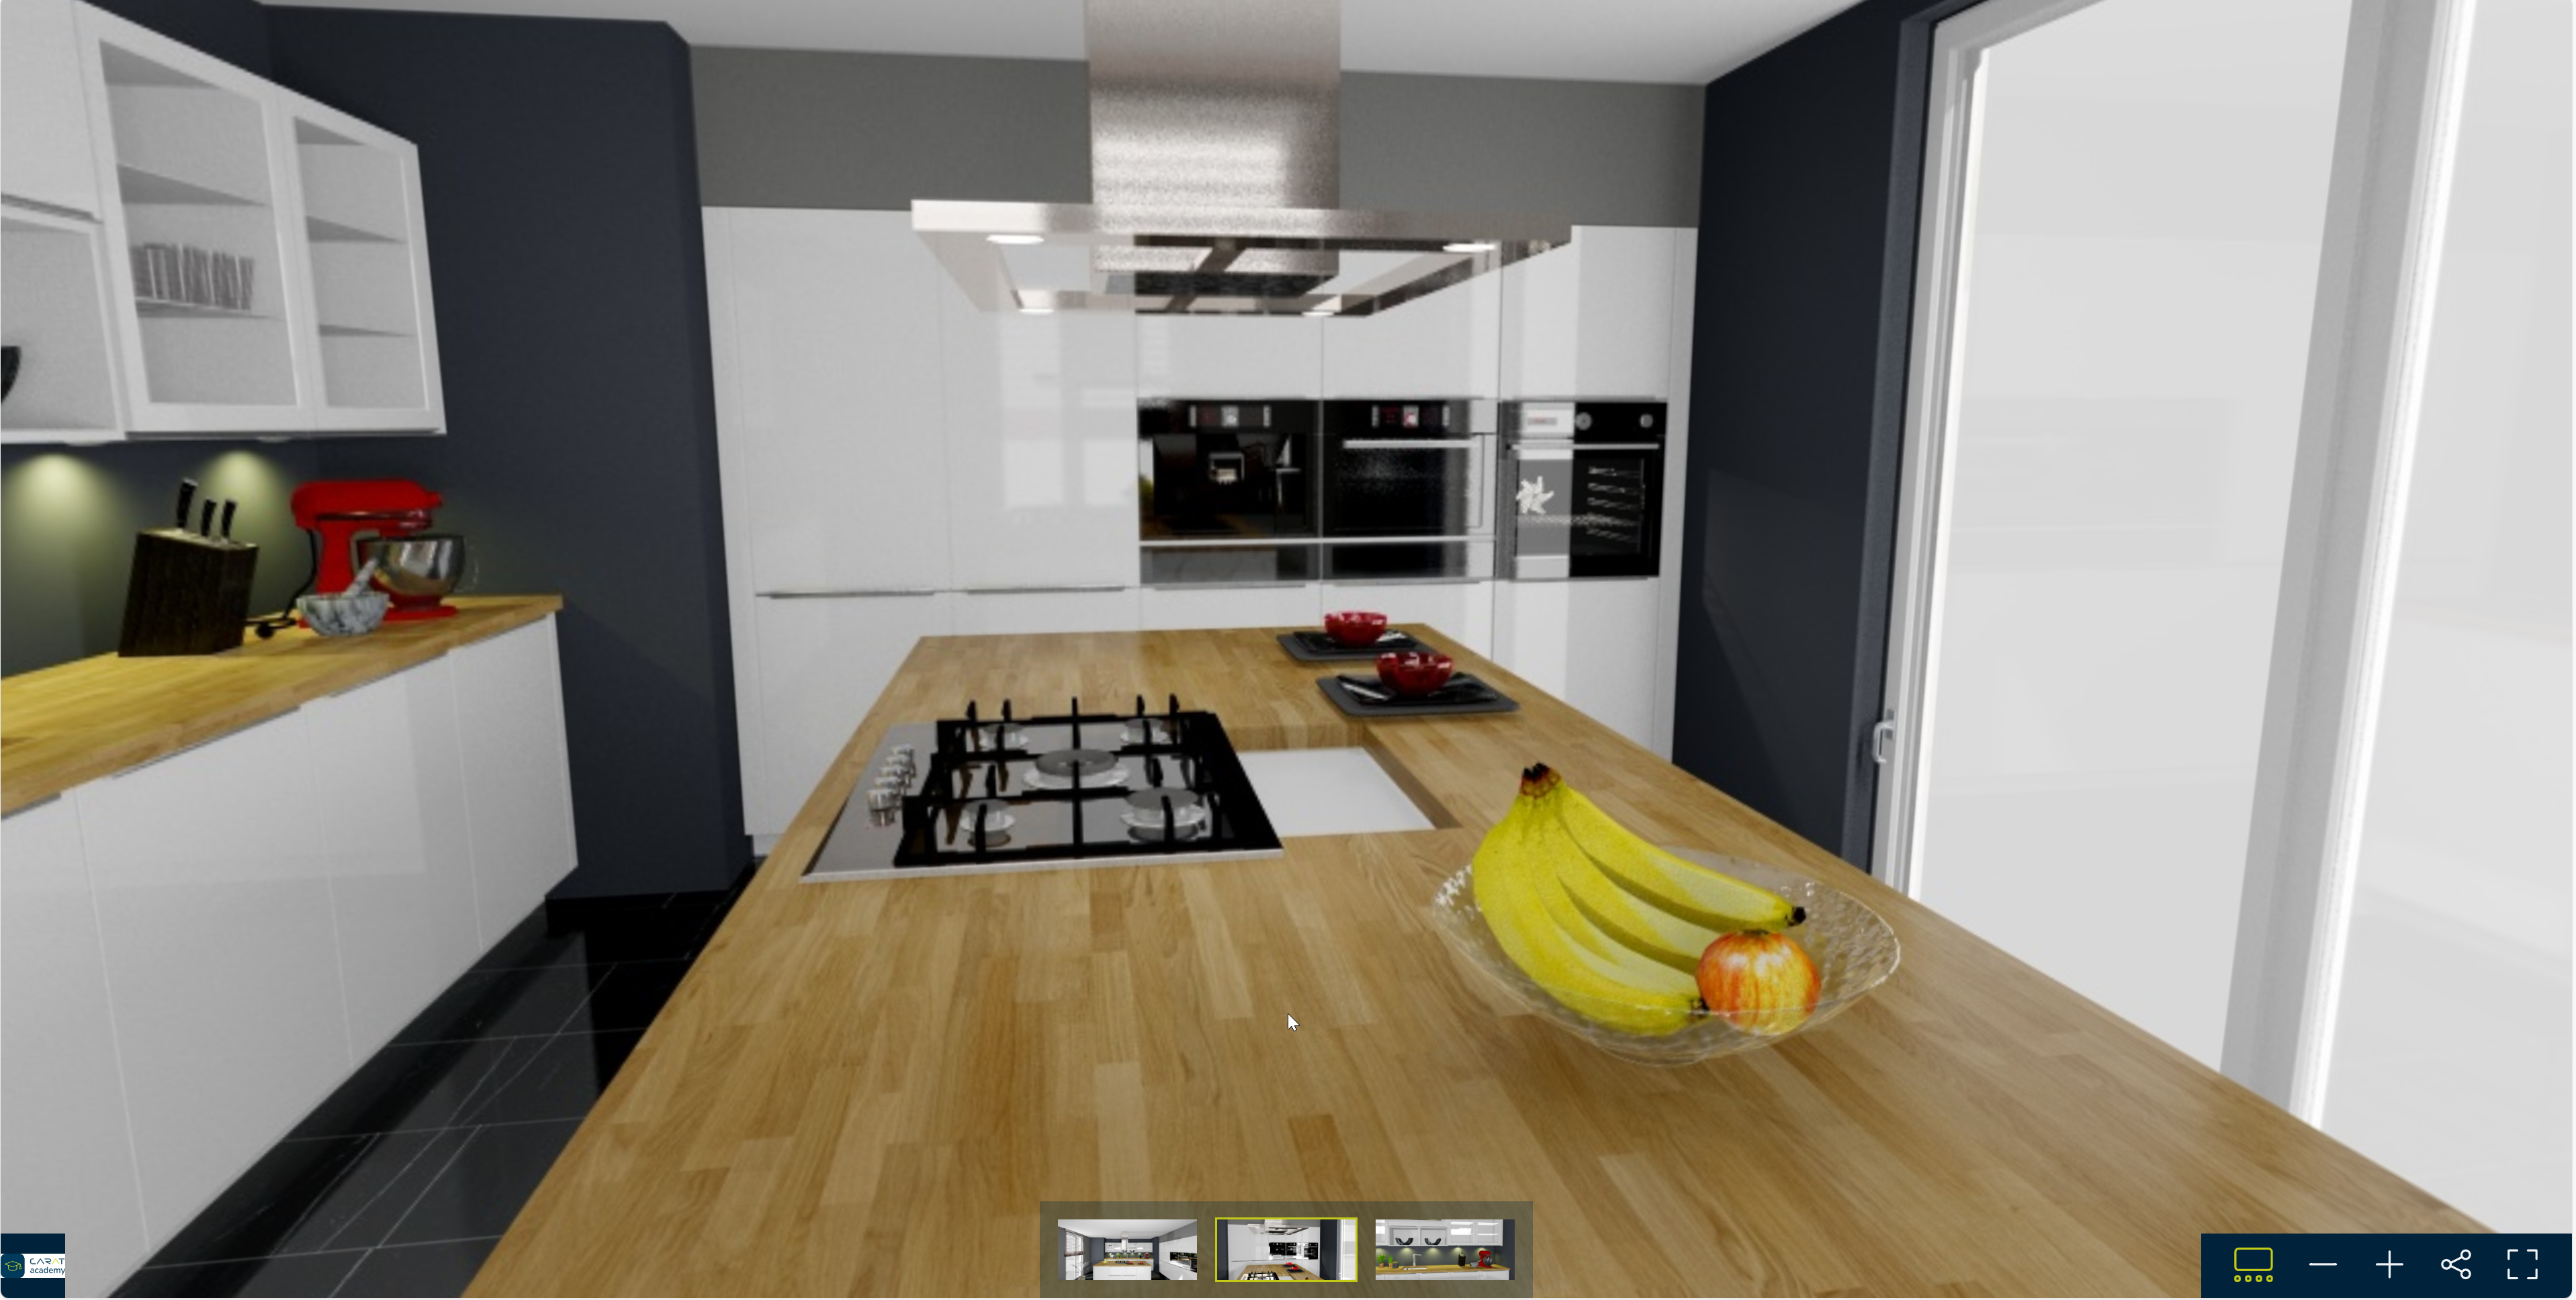
The administration of the CARAT view-scenes is available via the CARAT view index card. You can offer your customers a virtual 360° perspective of his new kitchen by means of a CARAT view-scene. To view the 360° perspective, you can either use the CARAT view VR app (downloadable Downloading is a term used in electronic data processing. To download means to acquire data from another location (e.g. network PC or Internet) and transfer this data to your own computer. free of charge from the Apple and Google Play Store) or open an internet link from an automatically generated PDF The Adobe Portable Document Format (PDF) was developed and perfected in the 80's by Adobe Systems. Adobe PDF files contain data from any application, that can be displayed on every computer, and are suitable thereby to be exchanged with users throughout the world. in the browser.
With the introduction of the sidebar Gallery can a CARAT view-scene now very quickly and comfortable be made available for download via the CARAT cloud. Via the CARAT view index card you have the possibility to create also multiple CARAT view-scenes for a planning. Thus, are you capable of creating individual CARAT view-scenes as 360° perspectives for every interesting point of view in the planning.
By means of the index card CARAT view you have also the possibility to choose the quality in which you want to create a CARAT view-scene. You can decide which CARAT view-scene you upload in the CARAT cloud or which CARAT view-scene you want to delete.
Creating a new CARAT view-scene
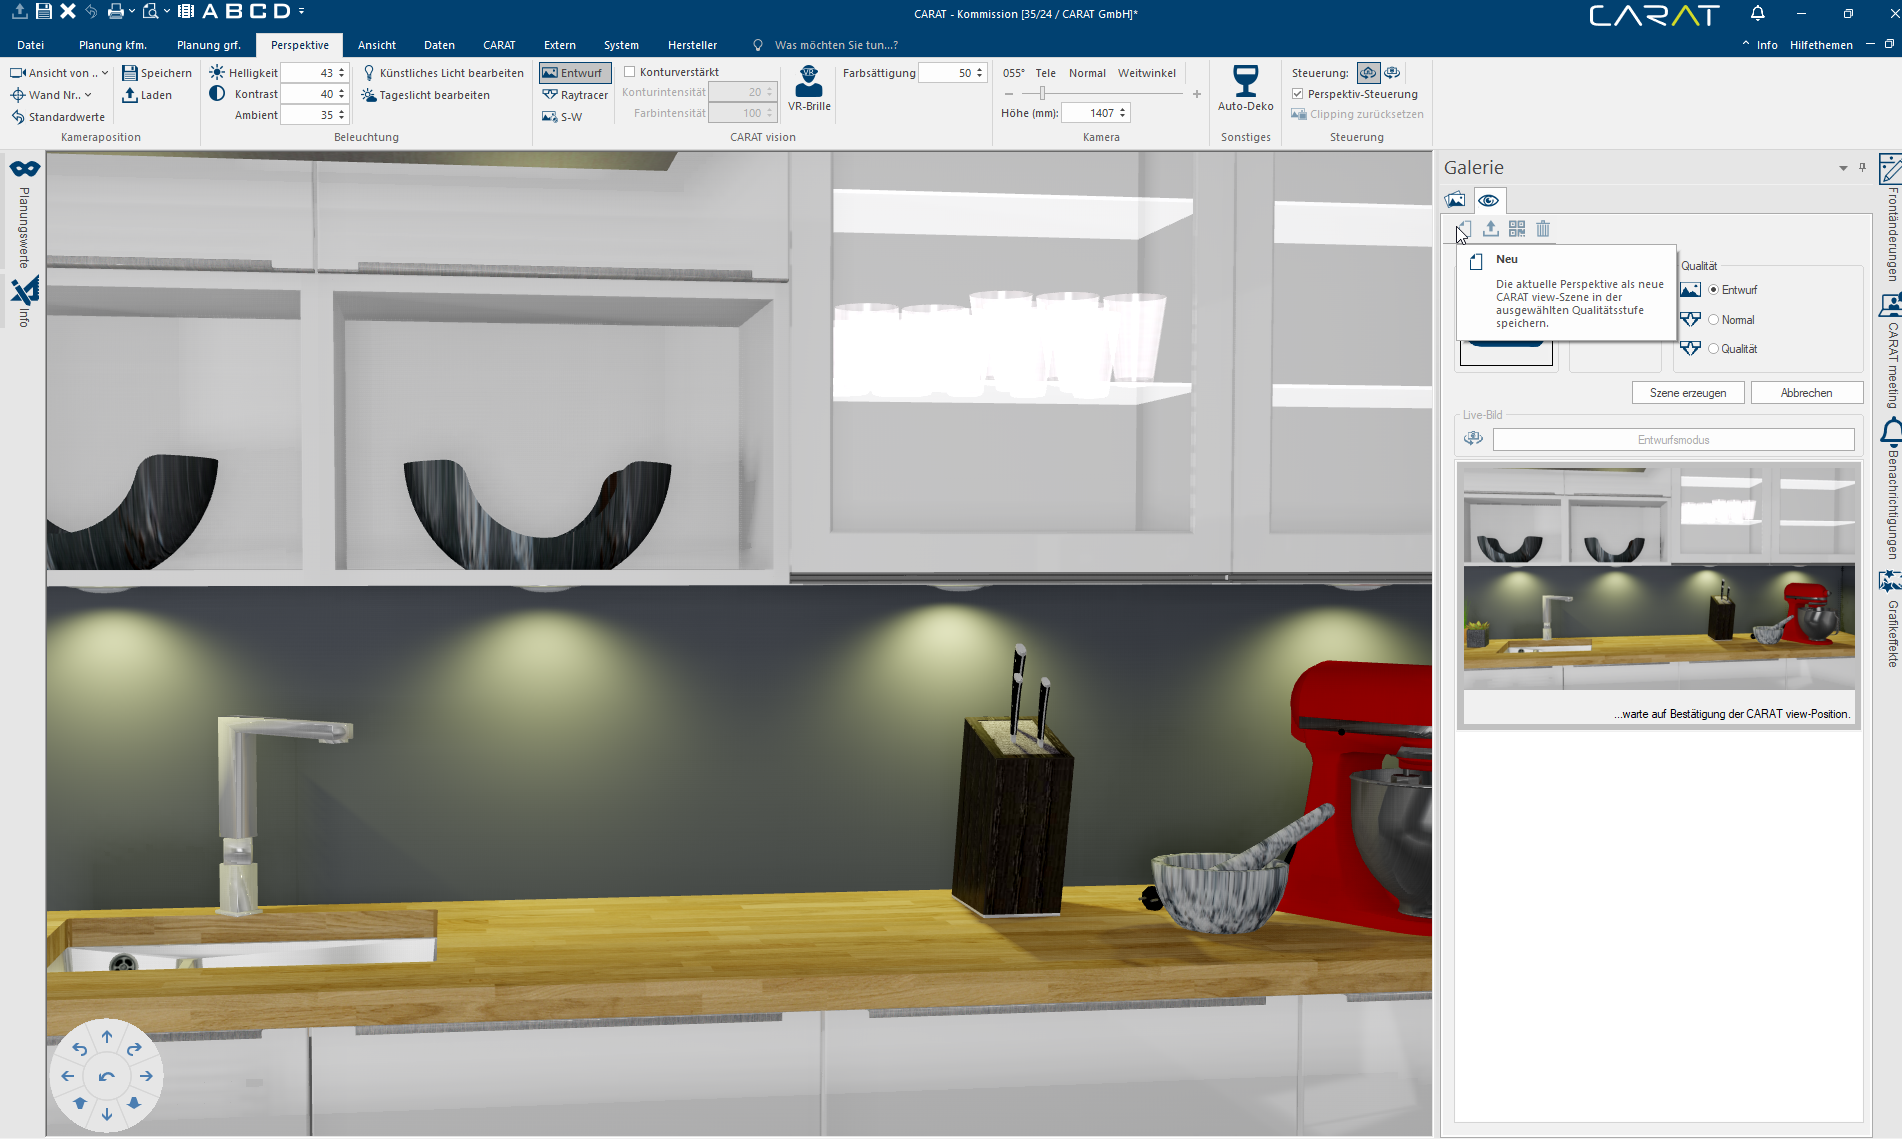
- The function New will be available via the toolbar as soon as you have switched to the index card CARAT view. Simultaneously is the picture of the kitchen in the perspective window set to the aspect ratio for the preview image of the CARAT view-scene.
- You now still have the possibility to set the picture section in the perspective window, by moving the camera in the perspective as usual. All setting option of the index card perspective are also in the menu ribbon available. By using the Quality area you can define if you want the preview for the CARAT view-scene to be created via the design mode or the Raytracer.
- After you have made all presettings for the perspective you can first create the preview image by clicking on the symbol New in the toolbar. To start with will thereupon the preview image be calculated. For the design mode this will only take a few seconds and will need a little more time for both quality levels of the Raytracer.
- After the preview has been made, the camera in the perspective window will first move to the middle of the room, because this position makes it possible to look around the complete room with the CARAT view VR app. You can of course also select an other point of view for the CARAT view-scene. For this, please simply move the camera to the desired position in the perspective window.
- A relevant note underneath the preview will indicate that you did not yet finish the second step, setting the position for the CARAT view-scene, with a click on the Create scene button.
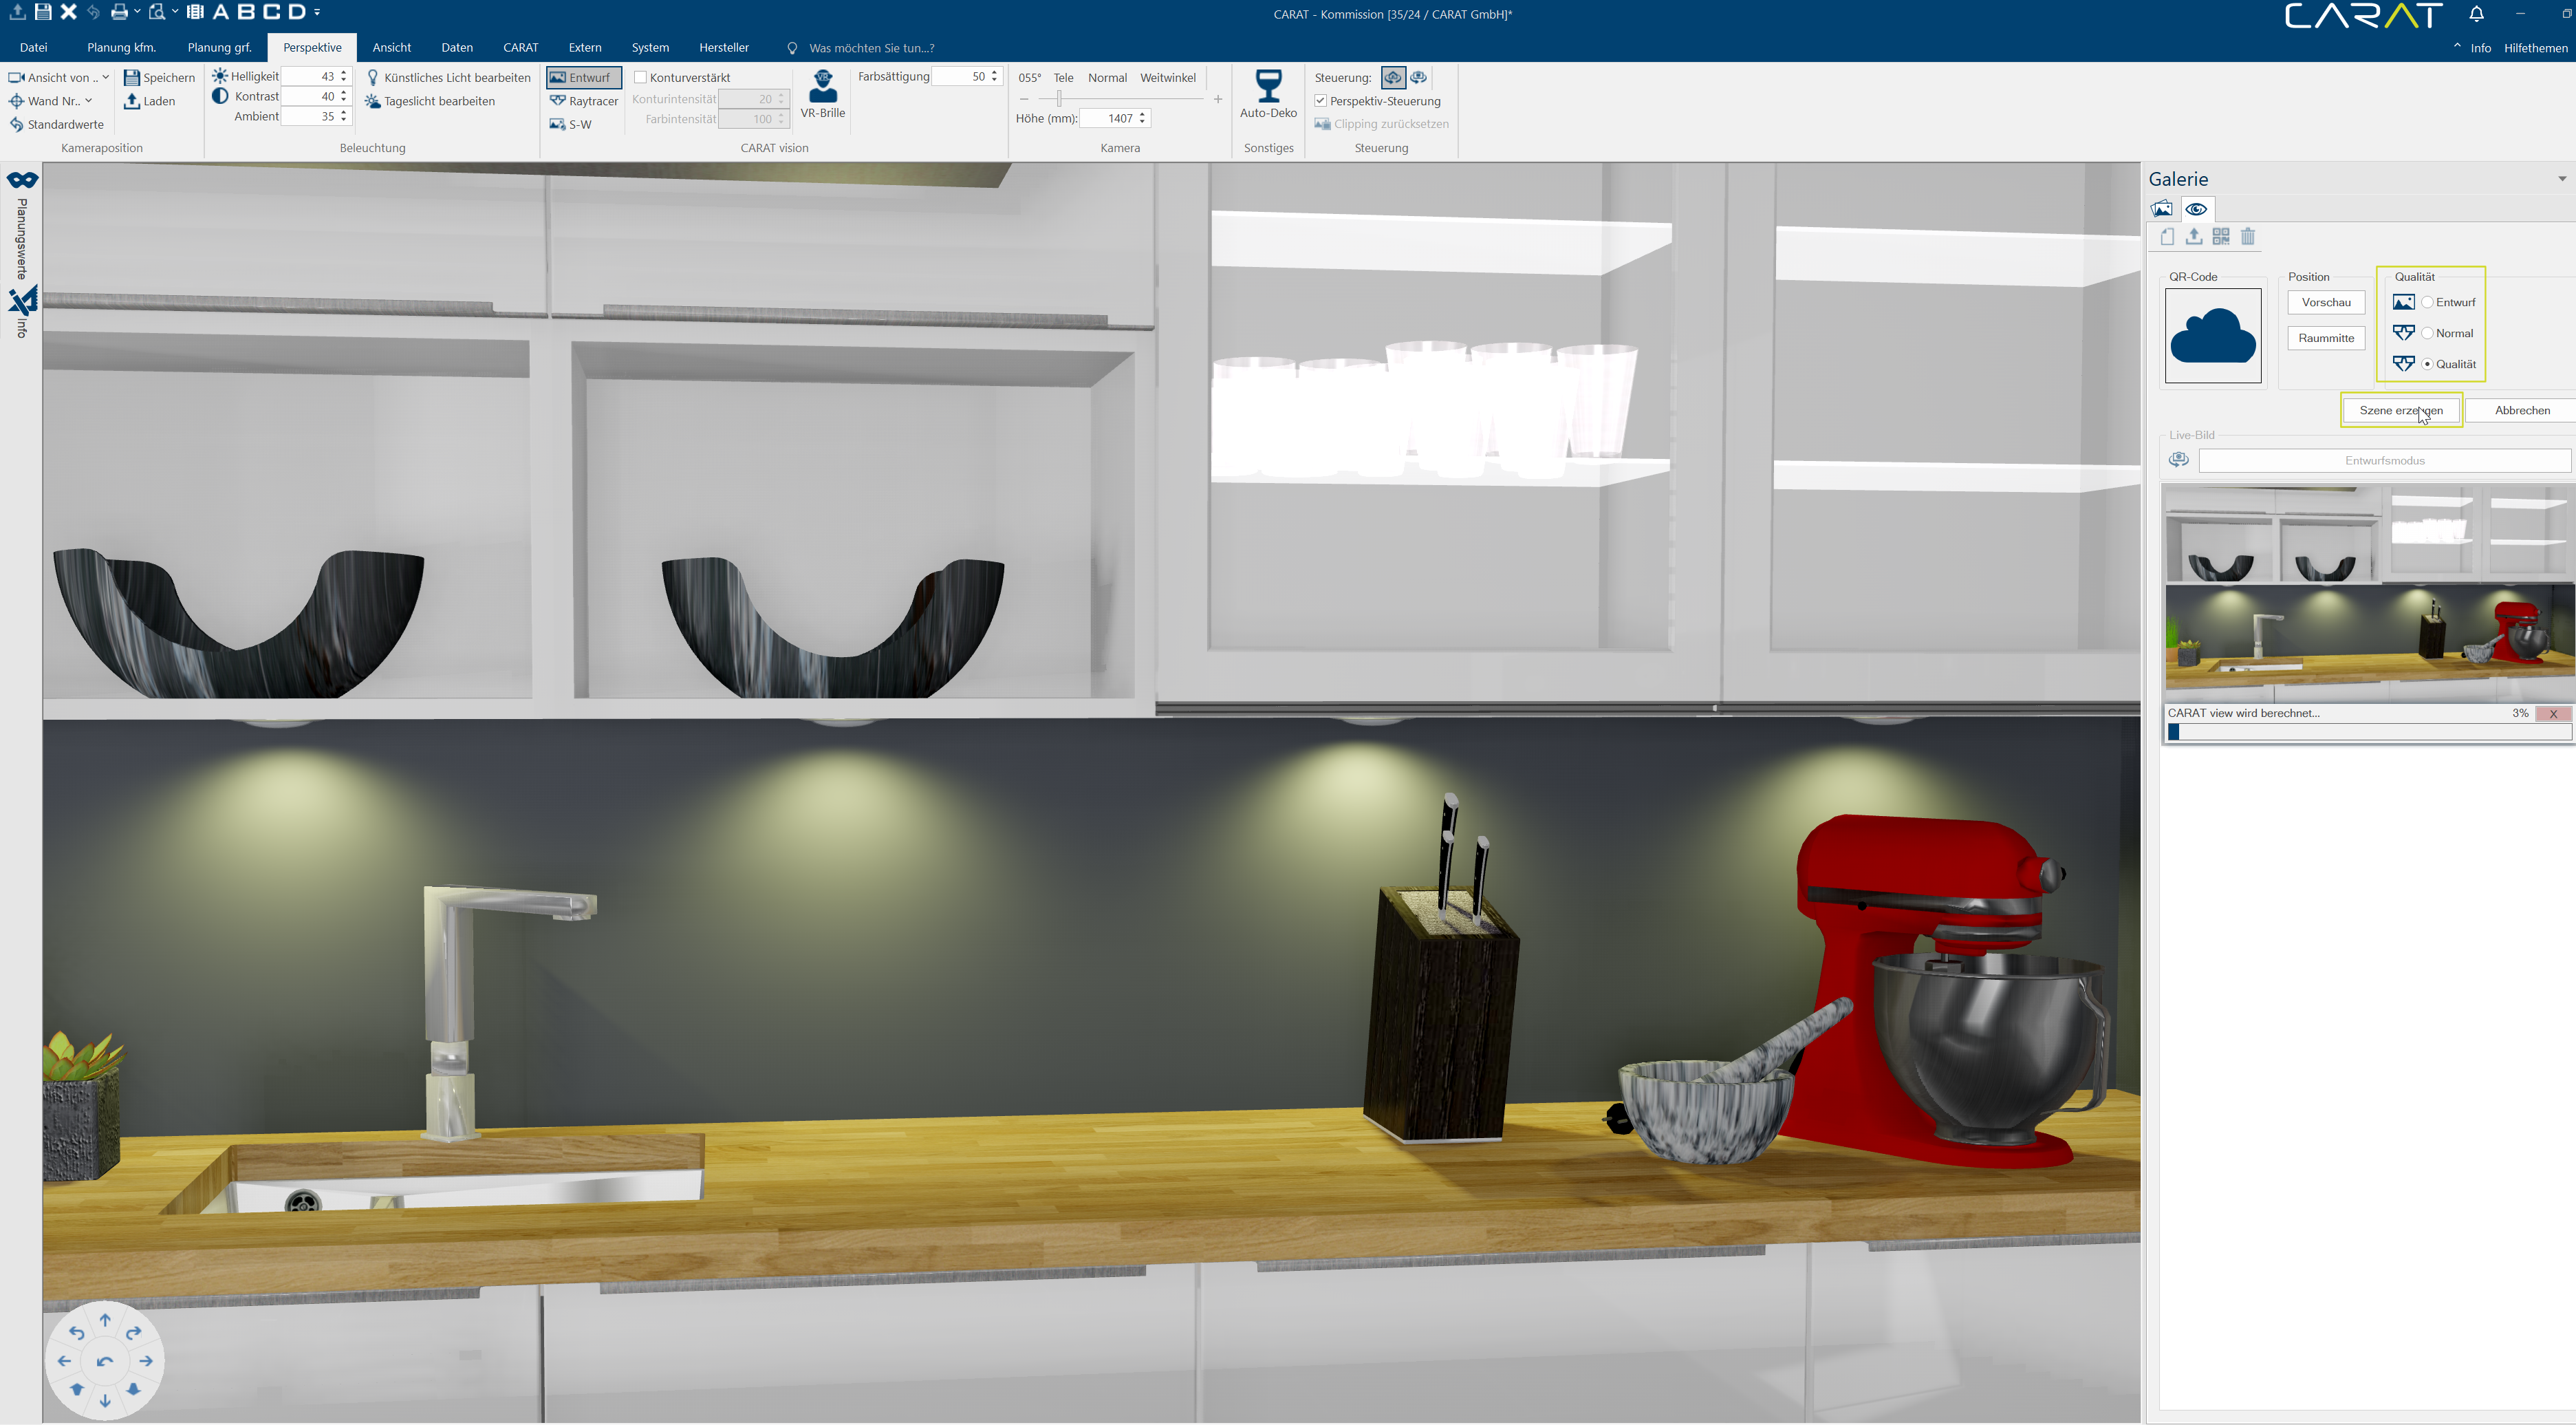
- You can check the new camera position by means of an automatic 360° rotation by clicking on the button Preview. You can quickly reach the position in the middle of the scene by clicking on the button Middle of the room.
- As soon as you like the currently set camera position, you can create the CARAT view-scene. For this, please click on the button Create scene. Now, views are being made in all directions of the position of the camera. From these six views will subsequently the CARAT view-scene be created. Also this calculation takes in the design mode only a few seconds. For calculating the CARAT view-scene with the Raytracer in normal quality level this will take less that two minutes, assuming the use of an average computer (current processor with 4 cores).
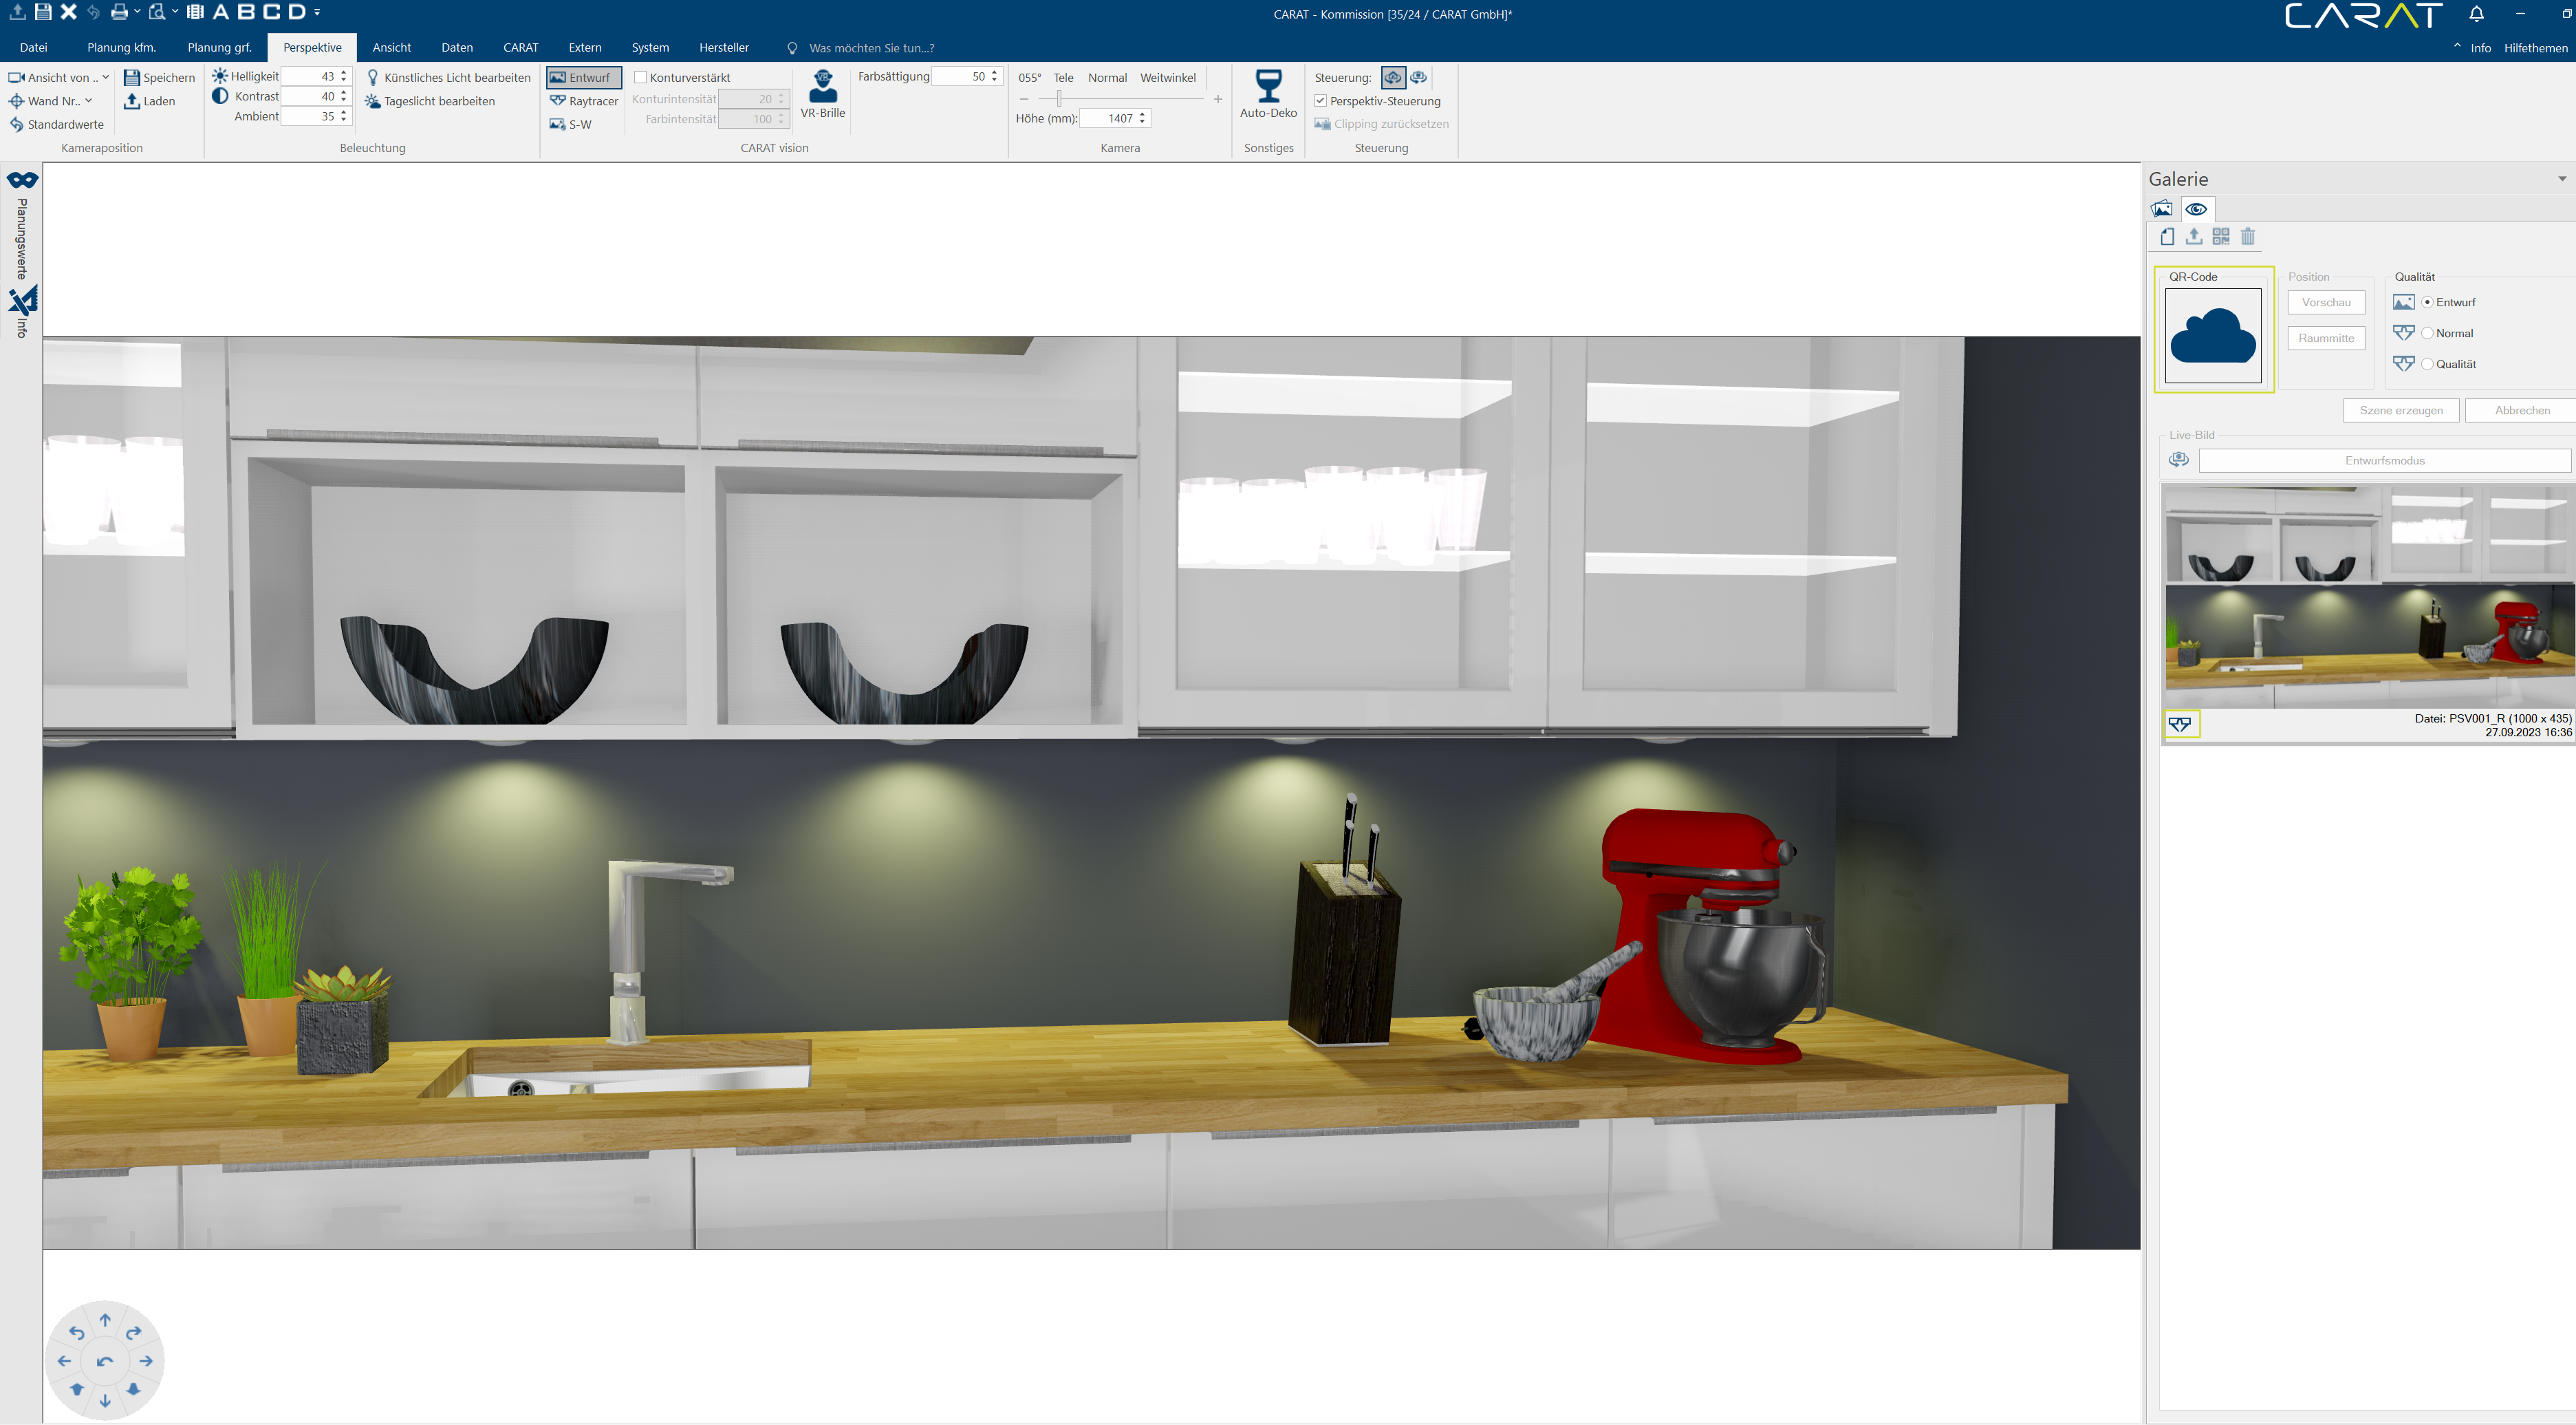
- After the CARAT view-scene is calculated completely the picture mode (picture icon for Design or glasses for Raytracer), the file name, the picture size (fixed preset) and the date of creation is shown at the lower edge of the preview.
Upload and administer a CARAT view-scenes
- You can upload one or even several CARAT view-scene(s) in the CARAT cloud by using the Upload function. Only CARAT view-scenes that have been uploaded in the CARAT cloud can be downloaded and viewed with the CARAT view VR app, by scanning an QR-code. For this, please first mark the desired CARAT view-scene(s). Please hold optionally the Shift or de Ctrl-key, if several scenes should be marked.
- Left click + Shift-key = All scenes between the first and the second marked scene will be marked.
- Left click + Ctrl-key = Only those scenes on which you click will be marked.
- Click subsequently on the function Upload to load the CARAT view-scene into the CARAT cloud.
- A reference dialogue will show you that the CARAT view-scene(s) are been uploaded in the CARAT cloud.
Automatically creating a PDF
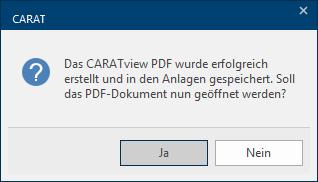
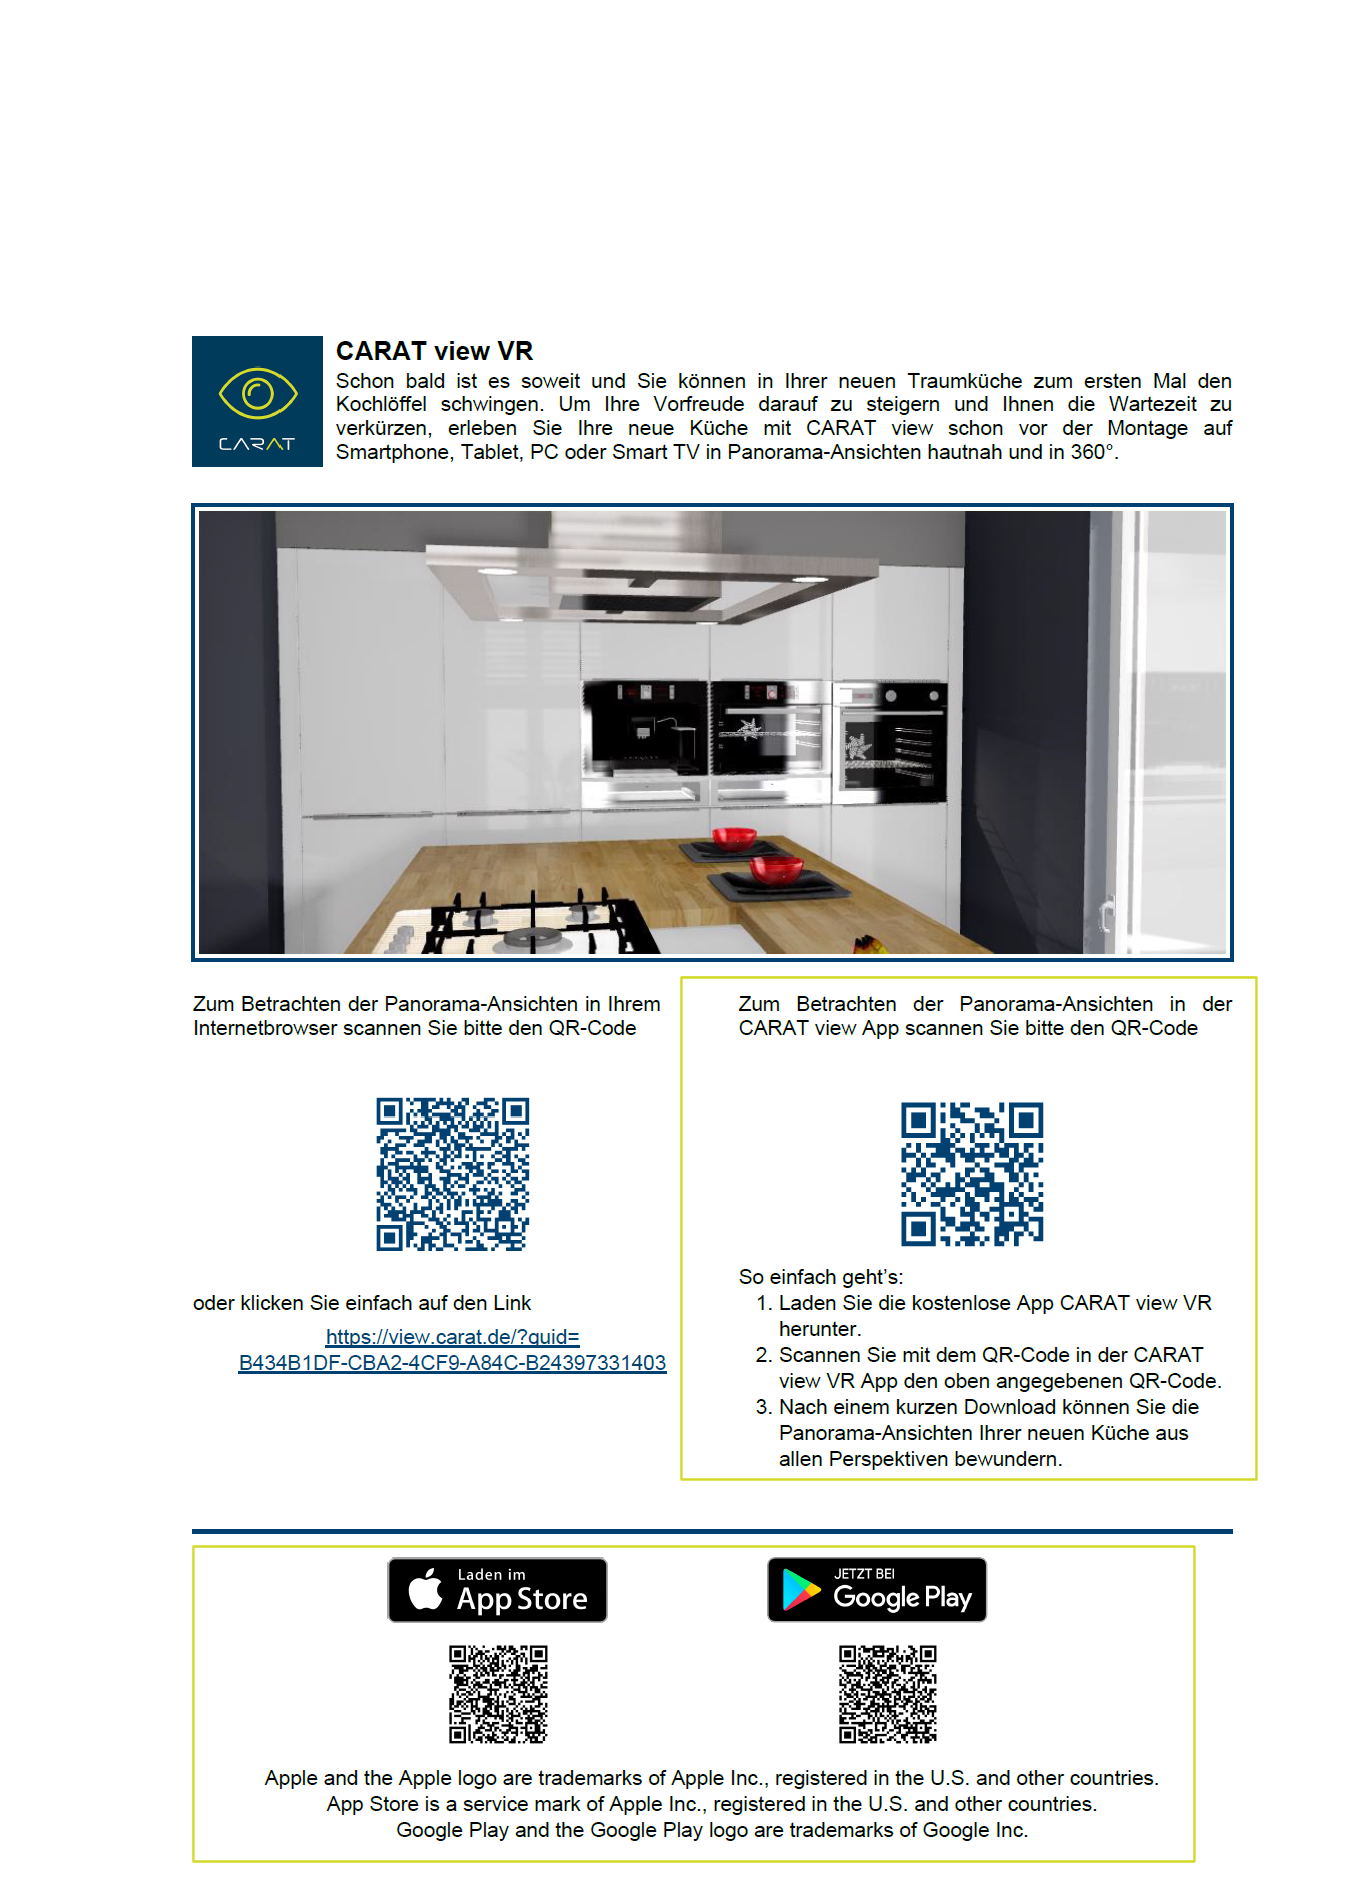
- CARAT creates automatically a PDF with the QR-code as well as a short explanation of how to download the CARAT view-scene(s) after the CARAT view-scene(s) is/are uploaded. If necessary, the PDF can be shown immediately by clicking on the Yes button.
- The PDF can also be printed or send by e-mail E-mail (electronic mail) is a letter like message transmitted electronically over a computer network. at any time. Thus, your customer will receive instructions and the necessary QR-codes to download the CARAT view VR app from the respective App store. Your customer can subsequently scan the QR-code of the planning with the CARAT view VR app, to download and view the CARAT view-scene(s) stored for him.
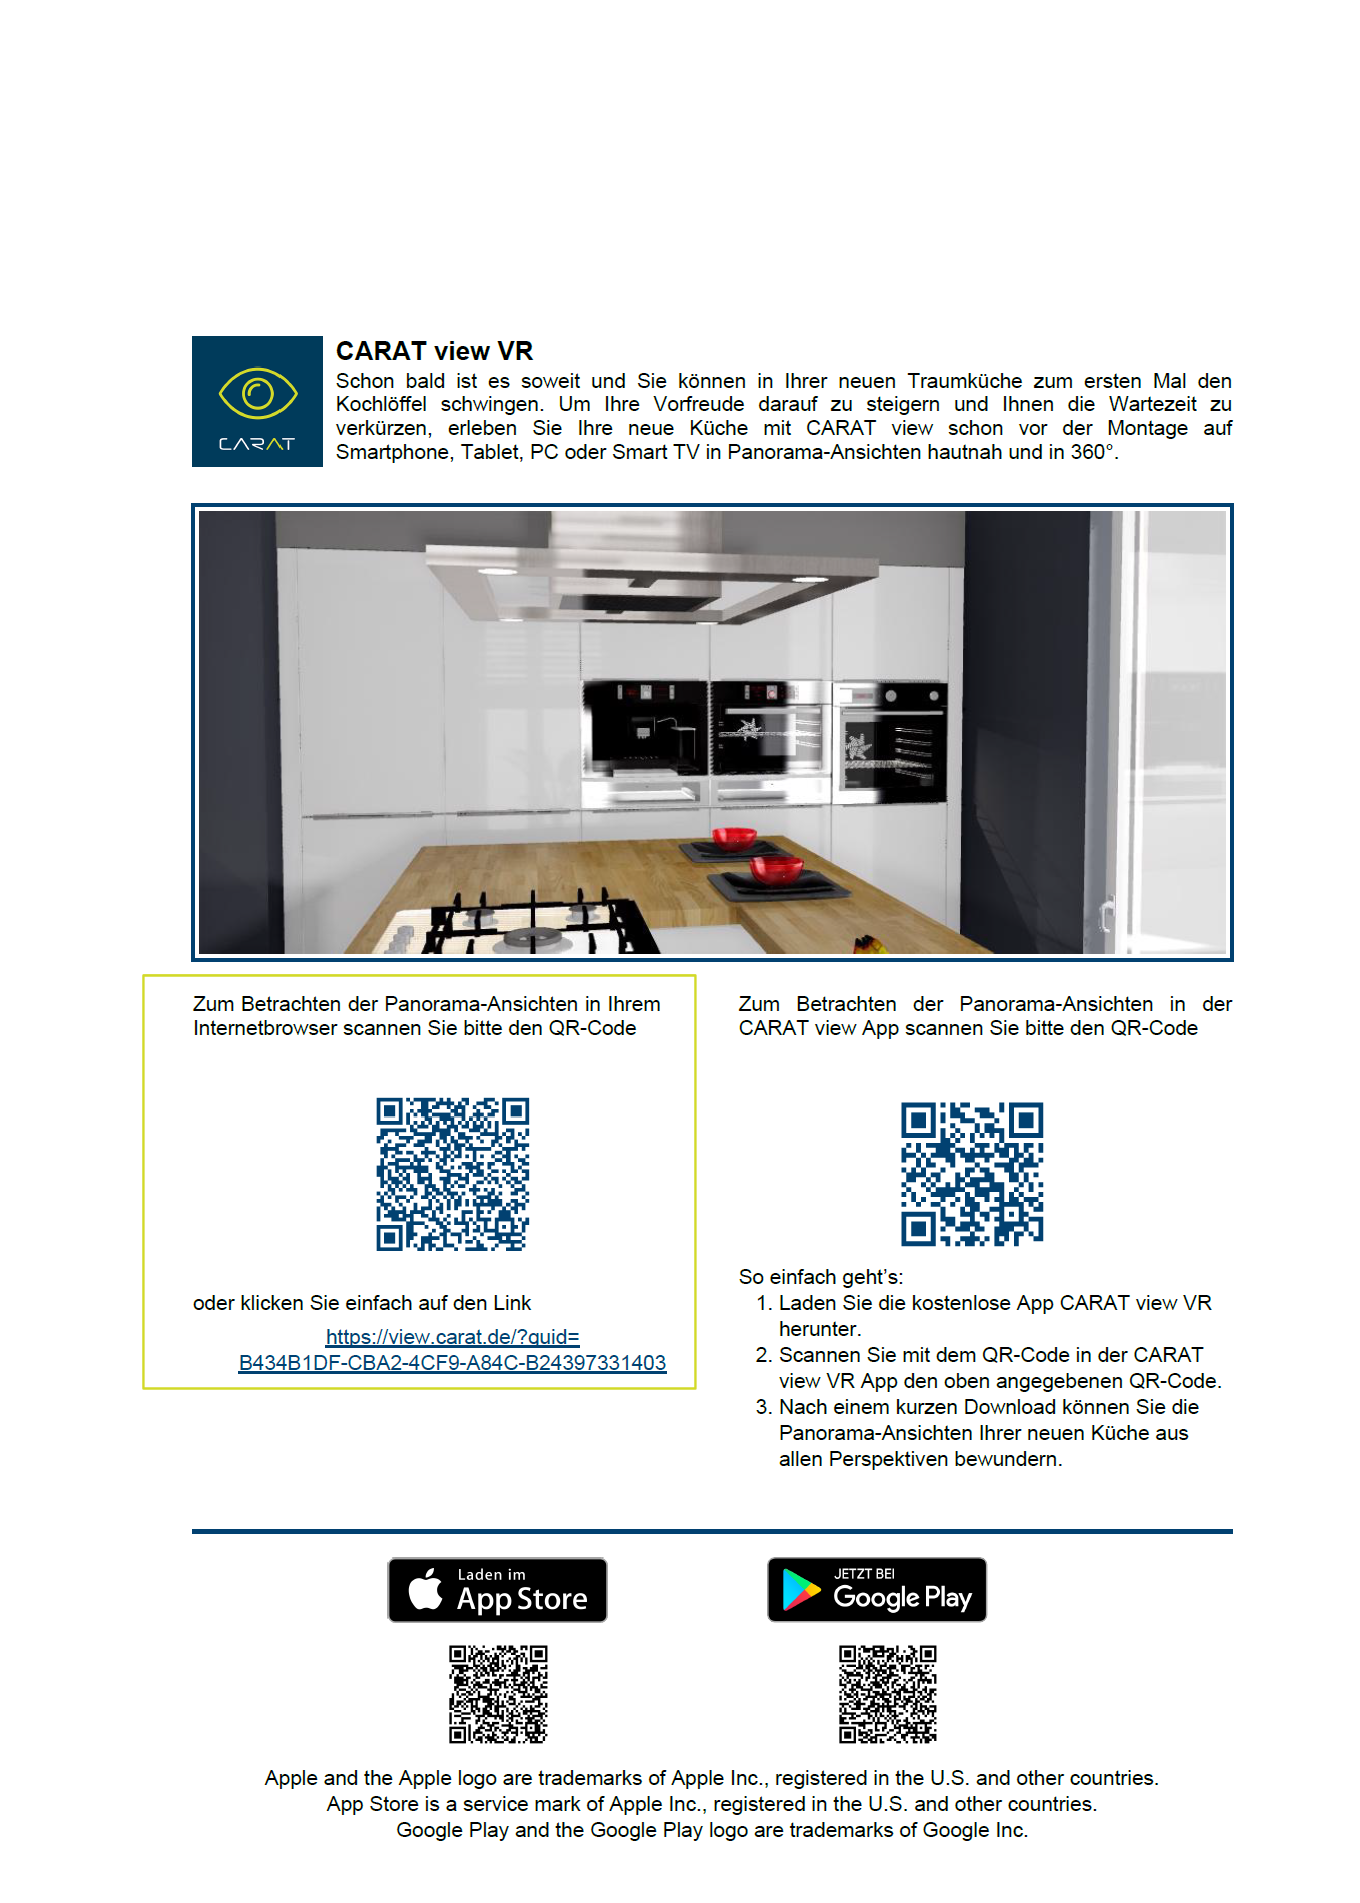
- New: To view the CARAT view-scene(s), as of version V2023.14.0.1, a QR-code and a link for opening the CARAT view-scenes in an Internet browser are also displayed in the automatically generated PDF. The CARAT view-scene(s) automatically adapt to the available screen sizes The screen size is stated in inches (1 inch = 2.54 cm) and indicates the distance along the diagonal of the viewable screen. Unlike a TFT-Monitor however, is with a cathode-ray tube (CRT) monitor the visible range somewhat smaller than the diagonal of the CRT. of the devices. You can rotate the CARAT view-scene by moving it with your finger or, on a PC PC: The English term personal computer is the trade name for a range of computer systems, which originally were primarily manufactured by the company IBM., by holding down the left mouse button.
You can delete no longer necessary CARAT view-scenes from CARAT by using the Delete function (trash icon).

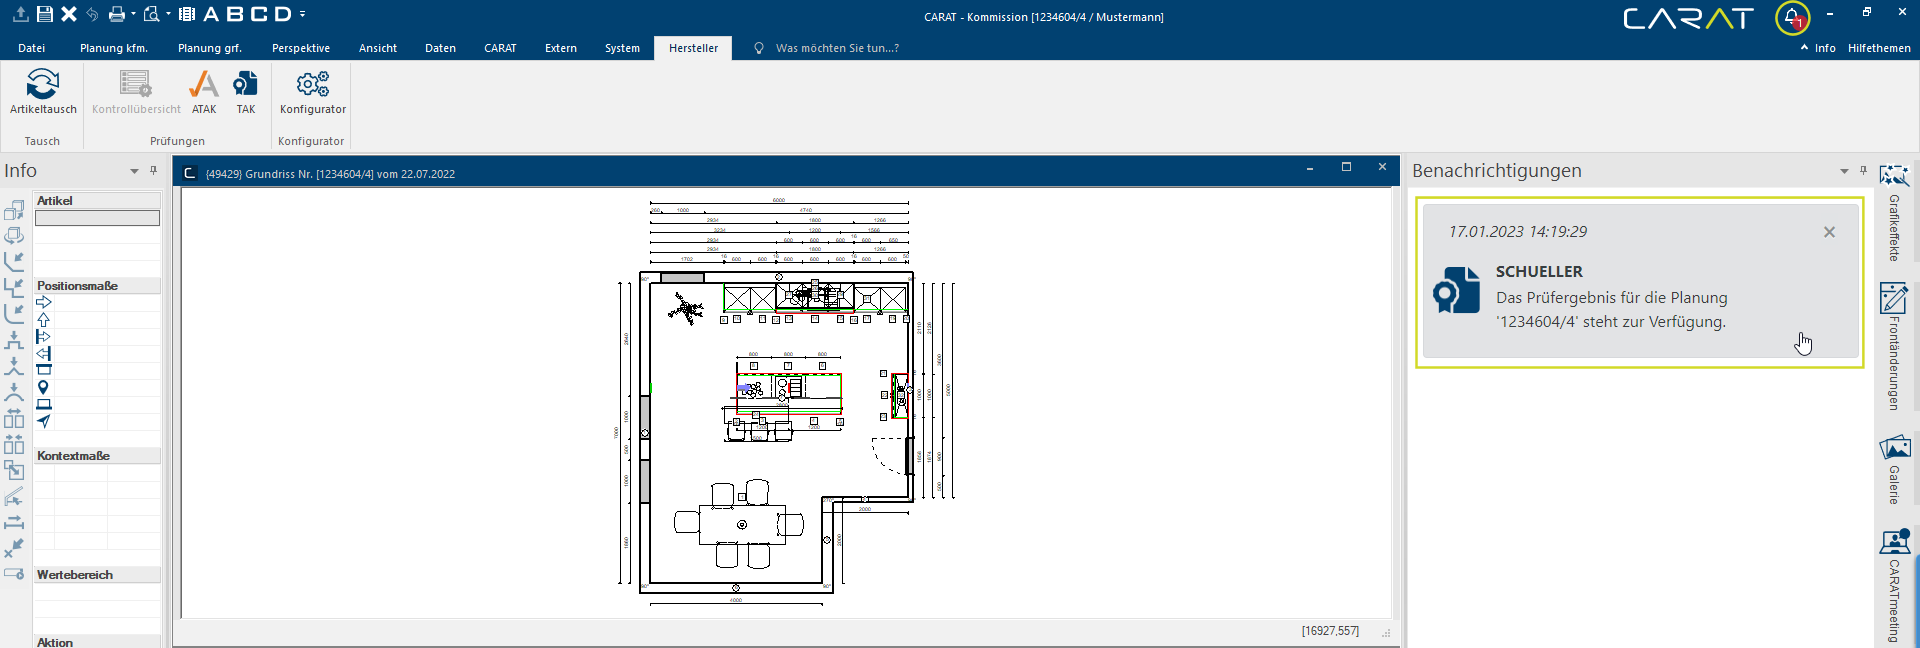
From Version V2022.16.0.0: The Notifications sidebar shows you important program information. In addition, New notifications are also signalled by a number next to the Bell symbol in the menu ribbon. Clicking on the symbol opens the sidebar on the right and displays the notification(s).
Example of a notification of the existence of a check result from TAK:
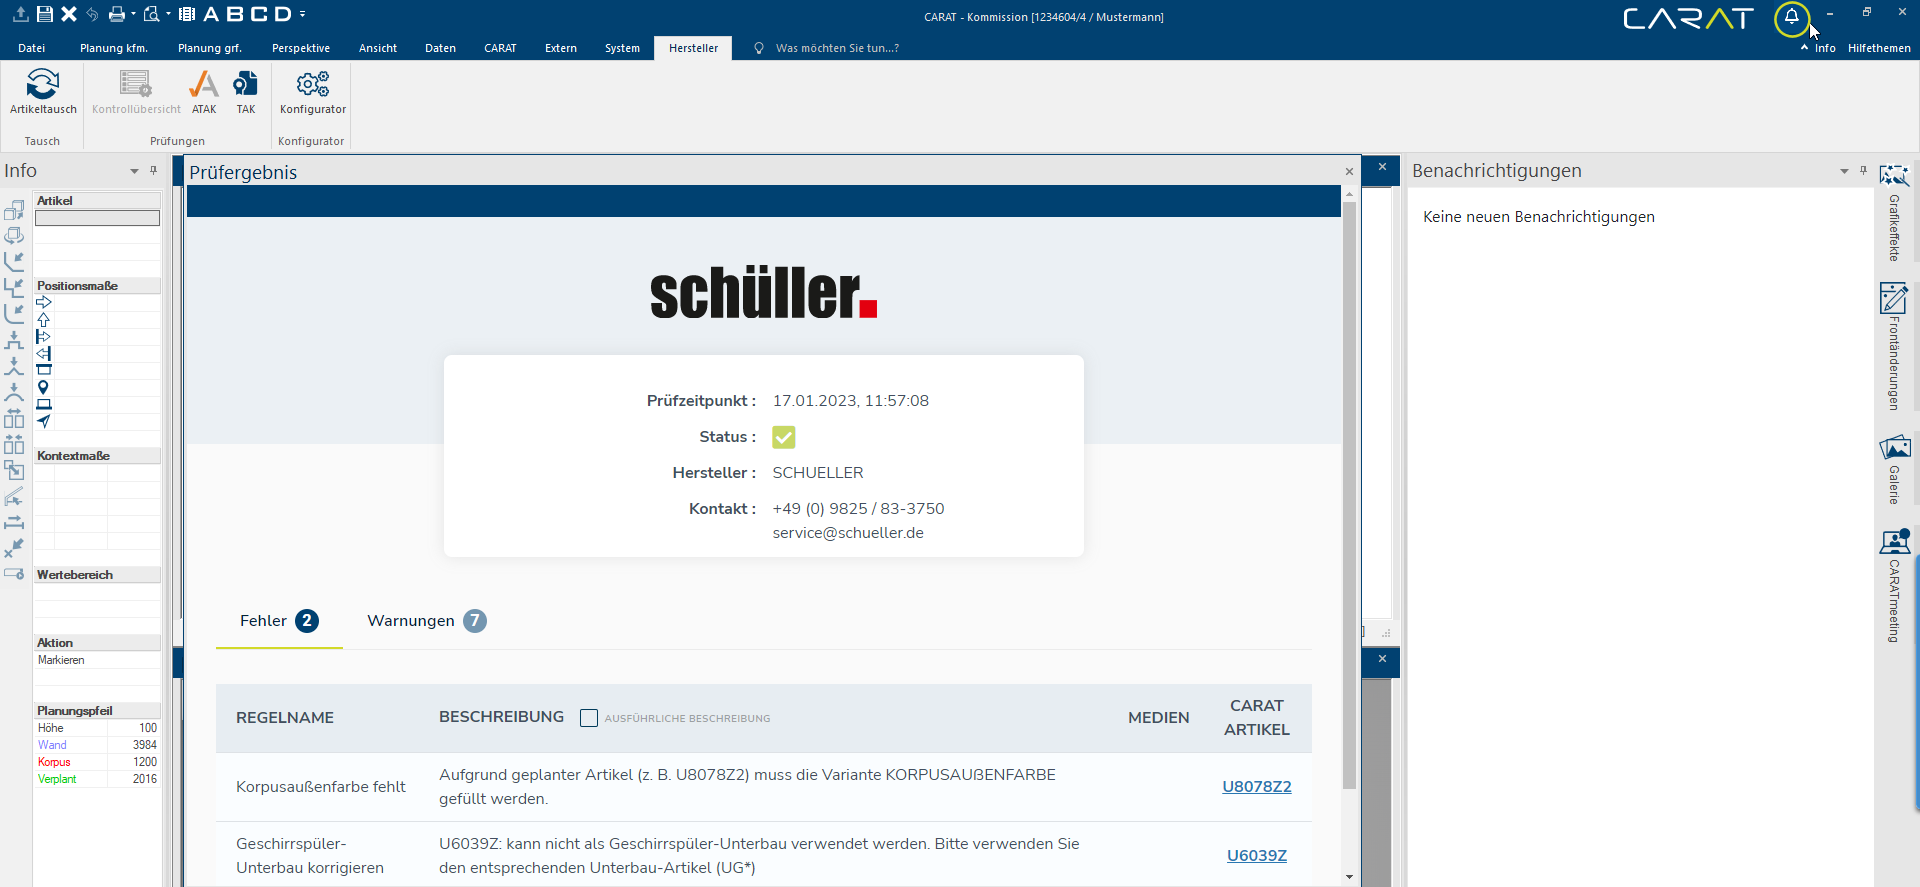
By clicking on the notification, further details appear, in this case the check result. In addition, the number next to the bell symbol has disappeared to indicate that there are no more new notifications.

