The Model Selection
You define the basic specifications of the design and colour design of the general variants of each catalogue (front, handle, cabinet,...) and the generate variants (plinth, worktop, light pelmet,...) via the Model selection dialogue Dialogue, dialogue windows or dialogue fields are special windows in software applications. Dialogue windows are displayed by application programs in different situations to request input or confirmation from the user.. At the beginning of the preparation of your offer you should at least specify the most important variants, because many settings in the model selection provide a basis for the price calculation or are used as check.
Using the model selection, you have furthermore the ability to enter up to 10 different model heads for a catalogue, the so called head data. You can also enter a name for each model head that you create, that you also can use for the print out of a commercial form. In addition Addition (in Latin: addere) is one of four basic operations in arithmetic. In primary school and in common language it is the expression used for the adding of two or more numbers., you can save existing head data as favourite. Favourites allow you to call up variants that you require frequently very easily, without having to fill in all the variants in the model selection manually over and over again.
The dialogue in detail
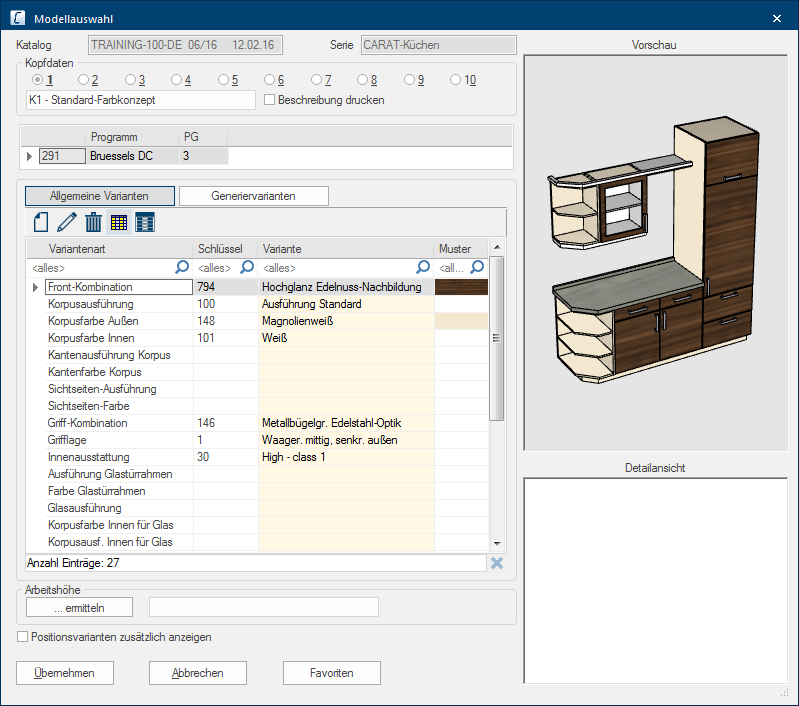
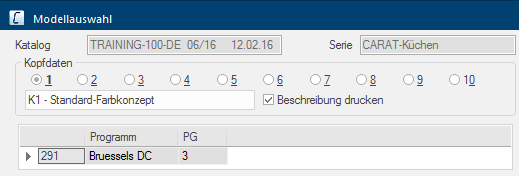
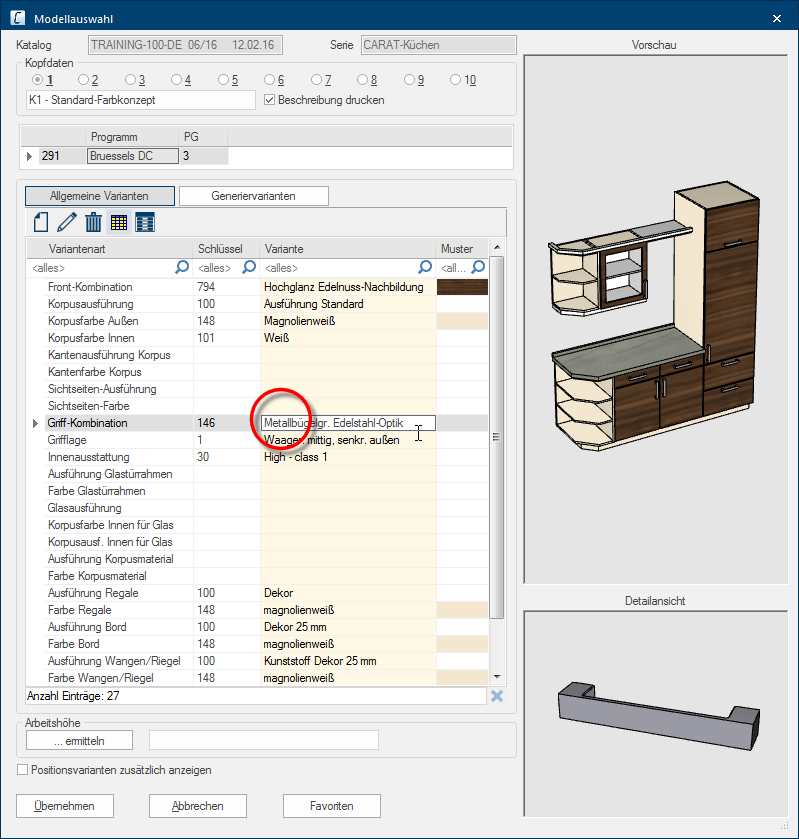
In the upper part of the model selection you are first shown the catalogue as well as the selected series. Underneath it, you will find a line with radio buttons A radio button is a standard element of graphic user interfaces. In contrast to a checkbox, when used in a group, only one radio button may be marked at a time. The name radio button comes from its similar behaviour to selecting a radio station on an old fashioned radio: when one button is pushed the others pop back out., via which you can create several divergent model heads. Underneath that line is an input field, in which you can enter a name for the model head currently shown. To the right of it is an checkbox A checkbox is a standard element in a graphic user interface. A checkbox has, in most cases, two states (set or not set). These usually correspond to a yes/no selection., which you can use to define if the name should be printed or not. The program set is shown underneath the head data selection. Besides the program key are also the program name and the price group listed.
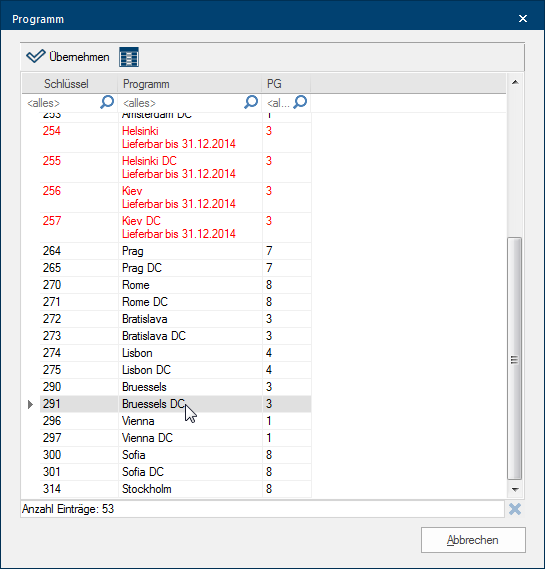
- Double click A double click is, amongst other things, needed to open files and programs or to activate an operation or a command. If the mouse cursor points to the desired symbol, you should click the left mouse button twice in quick frequency. The mouse pointer should not be moved between these two clicks. with the left mouse button In dialogue windows you always find one or more buttons that can be activated by clicking on them. Typical functions for buttons are e.g. OK, Cancel, Apply. Buttons are always activated by a single click with the left mouse button. either on the program key, the program name or the price group to select a program. Depending on the option The word option (from Latin: optio = free will) used in computing means a choice. In CARAT it is normally used with a list box. you have clicked Typically the LEFT mouse button is pressed once quickly, if not specified differently. Clicking will either mark an object, or when clicking on a button, the execution of the desired activity (e.g. OK, Cancel, Close)., the program list will be opened sorted accordingly.
- Now you can mark the line with the desired program in the program listing and return to the model selection by clicking on the button Assume. Alternatively you can also select a program with a double click.
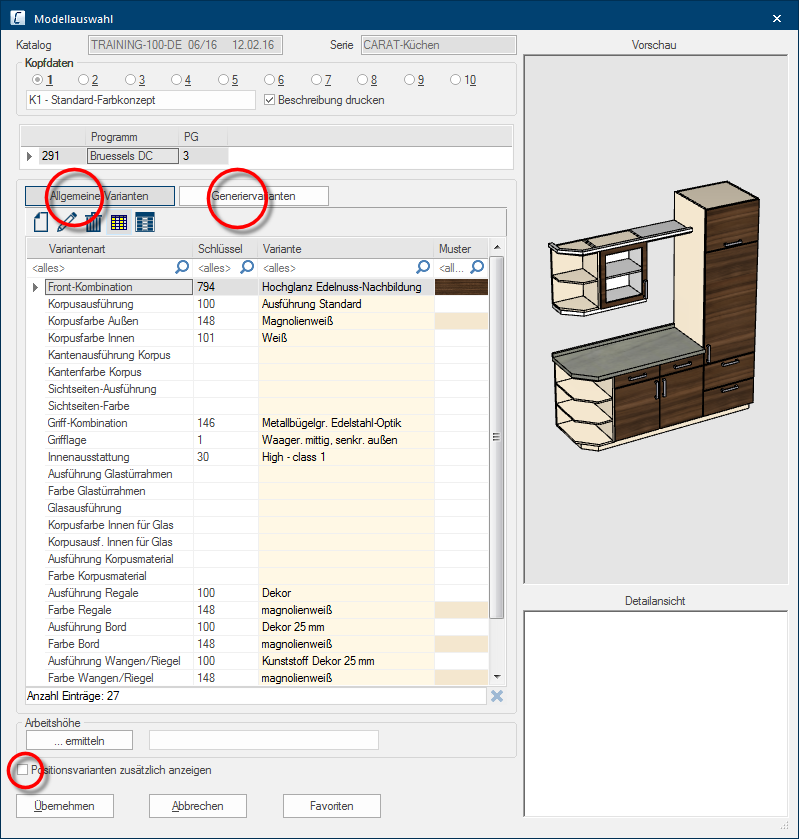
You will find the two index cards Some dialogue windows are too voluminous, therefore the functions are separated into indexed groups. The subgroup names typically appear on the tab of the index card at the top of the dialogue and can be selected by clicking on the appropriate tab. General variants and Generate variants in the middle part of the Model selection dialogue. On these both registers you can specify the style as well as the colour design for the individual variants. You define the appearance of all articles in the planning by the selection. Usually most variants are a question of order relevant specifications, that are necessary for processing the order with your supplier. Each catalogue can offer a different number of variants to choose from.
Position variants
It can occur that additionally to these variants also position variants available are. Usually you can, via a positions variant, select special specifications for limited article groups. These specifications can be used, amongst others, for further pricing of the article concerned. Because the position variants are usually only necessary for a few planning situations, the positions variants are not shown at first, but can be displayed by clicking the checkbox Show position variants additionally.
To apply a variant to the model selection you can proceed the same as when selecting a program. Also here the position, meaning the place in the relevant line where you double click, determines by what criterion the list is sorted. You can choose between the columns key and variant.
- Please click with the left mouse button on the desired variant in the open list to select a variant. Please click subsequently on the button Apply. Alternatively you can directly double click on the desired variant.
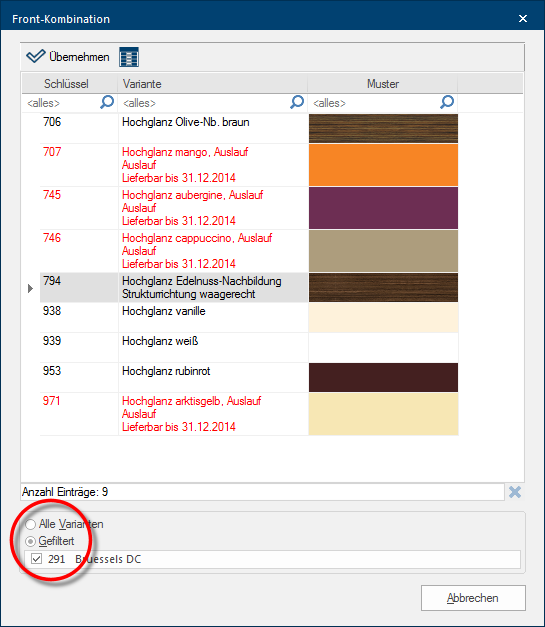
Please note that the contents of many selection lists are already filtered automatically, based on prior made selections. For instance are for a front combination only those variants available for selection, that are allowed based on the program selected beforehand.
- At any time you can delete a variant which you have selected but no longer need in the model selection. You can do this by marking the relevant variant in the model selection first and subsequently click on the delete symbol or click on the Del (delete) key on your keyboard.
- As soon as you have selected all variants necessary, you can save the entry in the model selection by clicking on the button Apply. Now these settings are available for further planning.
On the right side of the model selection, a preview of the current program as well as the selected variants is displayed. Using the preview, you obtain a quick overview of the selected front and the colour combination, because the representation changes depending upon the program used and selected colour-variants. If a variant shown in the preview is missing, the respective article is represented in white. In the detailed view the currently marked version variants can be displayed, like the version of the cornice, light pelmet or the handle combination, for example.
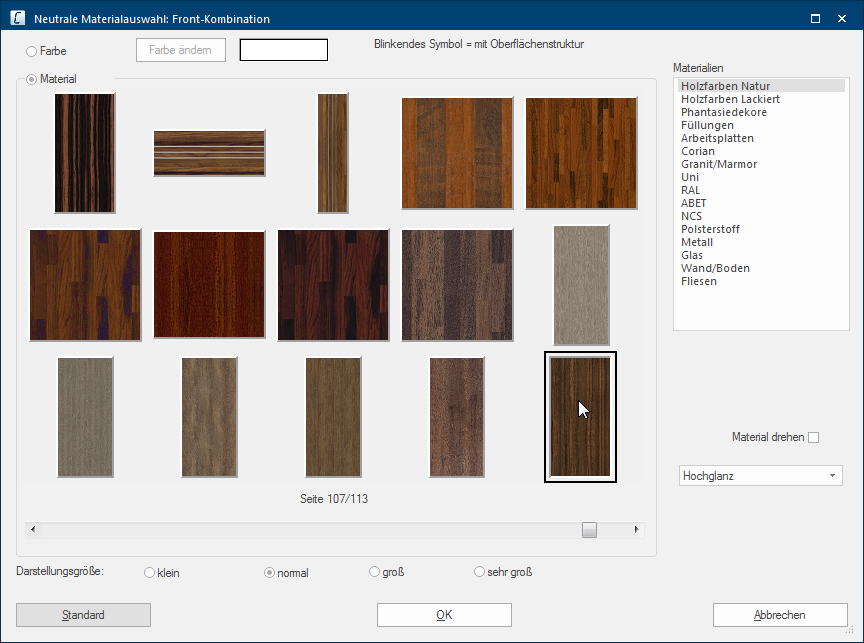
If you do not agree with the texture In computer graphics, one uses textures as surfaces of a 3D models. assignment for a colour variant, and want therefore to select a different design, or change the structural alignment or material properties of a texture, you can do this via the neutral range of materials.
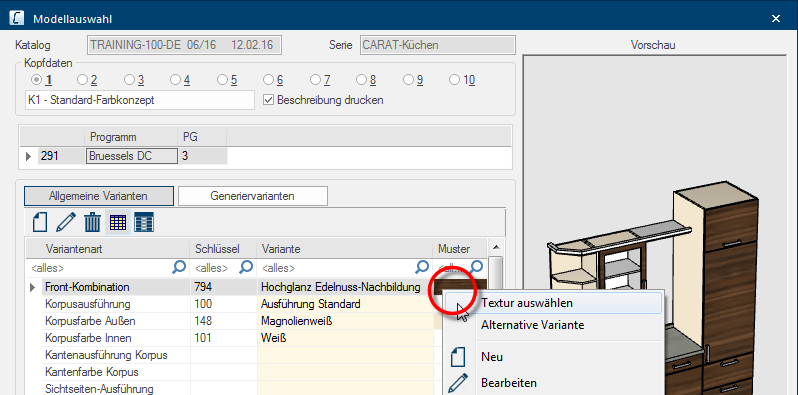
- To change a provided texture via the neutral range of materials, please click with the right mouse button on the line of the colour variant which you want to change. Click subsequently on the option Select texture from the context menu In almost all Windows programs a click with the RIGHT mouse button opens a context menu containing a list of commands that are commonly the next step of a procedure. that opens.
- Thereupon, the neutral range of materials opens. The currently selected texture is indicated with a frame. You can now select an other texture or colour and even change the material properties as well as the texture alignment via this dialogue. See also: The Material Selection
For special demands is in the model selection also the specification of an alternative program or alternative variant available.
The specification of an alternative model or an alternative variant can only occur commercial and always needs an already existing model or variant for graphical display. Therefore, you should first fill in the model selection with the specifications about the model and variants which come based on the price group or the graphical design closest to the desired alternative model or the alternative variant. Only the texture can be changed independently thereof, as already described above.
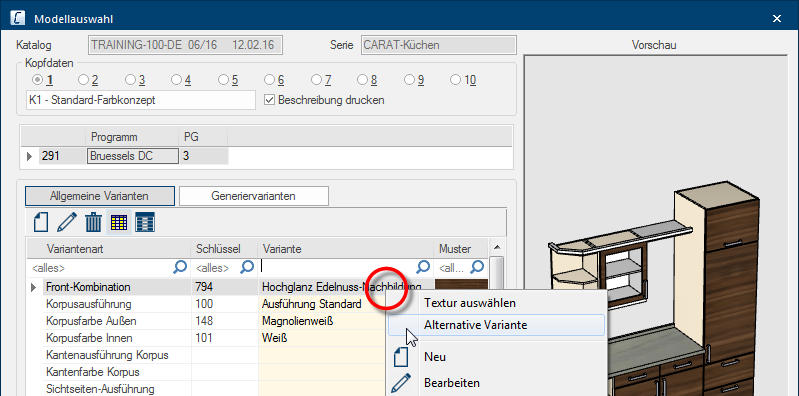
- Now please click with the right mouse button on the relevant line in the model selection to be able to create an alternative model or an alternative variant. Thereupon a context menu opens via which you can select the function accordingly. In the following picture was the variant front combination selected for example, to capture an alternative variant.
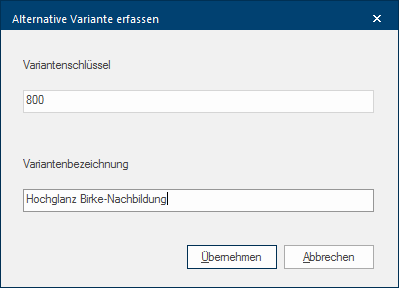
- As soon as you have selected the alternative variant option via the context menu, a dialogue will open in which you can enter the for ordering necessary model or variant key as well as the model or variant name manually.
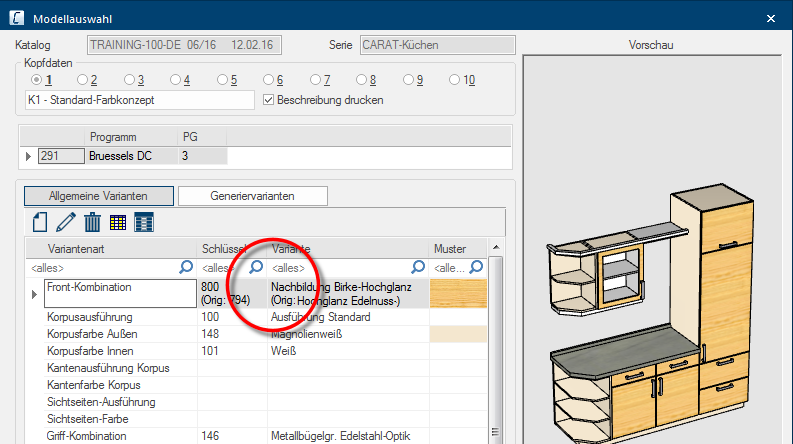
- You can enter the alternative model or the alternative variant in the model selection with one click on the button Assume. In case of a colour variant you can also change the texture if necessary.
Once in a while it can be necessary to provide extra information together with the regular head data in the therefore designated area of a commercial form. For this purpose, you can also insert additional lines as manual variants in the model selection, which you can fill with any text.
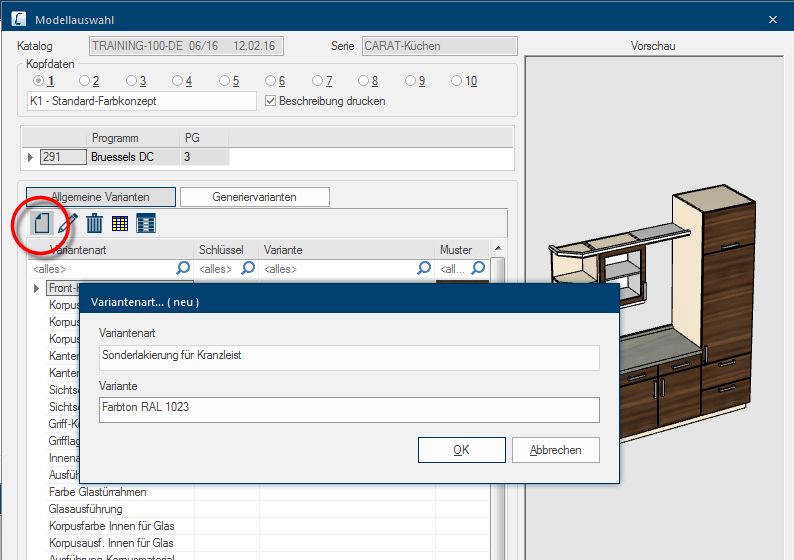
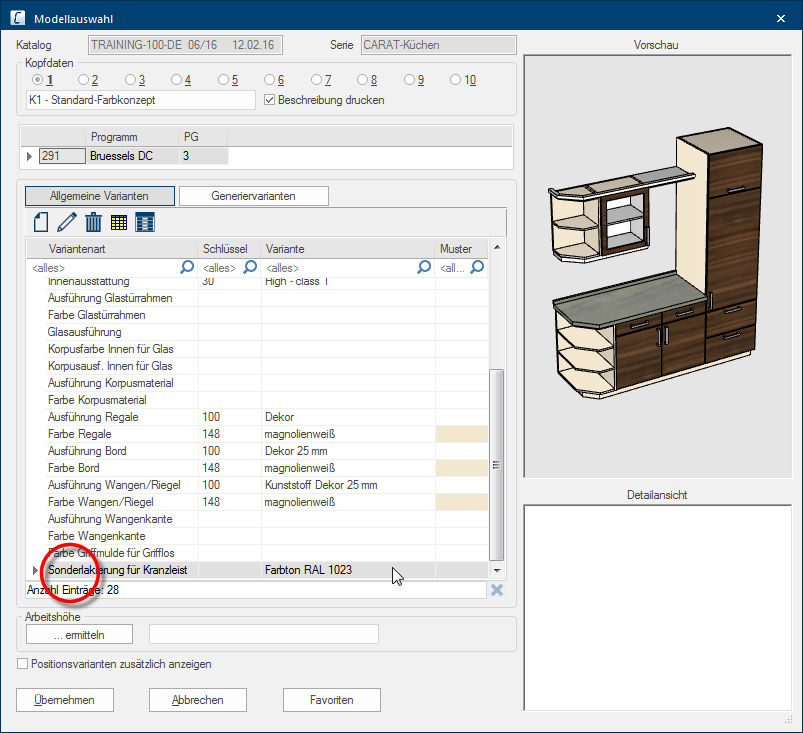
- To create an empty line in the model selection please click first once on any line in the model selection on the index card General variants. Subsequently press the Ins (insert) key of your keyboard once. This will open the Variant type... (new) input dialogue, via which you can enter a name for the Variant type as well as the Variant itself.
- The manual variant will be added Addition (in Latin: addere) is one of four basic operations in arithmetic. In primary school and in common language it is the expression used for the adding of two or more numbers. at the end of the variants in the model selection as soon as you click on the button OK.
- You can delete a manual variant which you no longer need at any time. You can do this by marking the relevant variant in the model selection first and subsequently click on the delete symbol or click on the Del (delete) key on your keyboard.
Special features
As you know from kitchen manufacturer folders, individual kitchen models are usually offered in specific arranged version and colour combinations. Such an arrangement should be taken as an advice for sales, as for which surrounding colours, handles or add-on articles can be combined optimally with a certain front.
In the model selection of CARAT is for this the function Favourites available. With their IDM IDM (Integrated Data Model) refers to the improved VdDK data format (Verband der Deutschen Kuchenindustrie = Association of German Kitchens Industry). This data format serves as a systematic collection of catalogue data for the kitchens industry.-catalogue data, every supplier can provide for any number of favourites, if needed. These favourites are available in the model selection after reading in a catalogue.
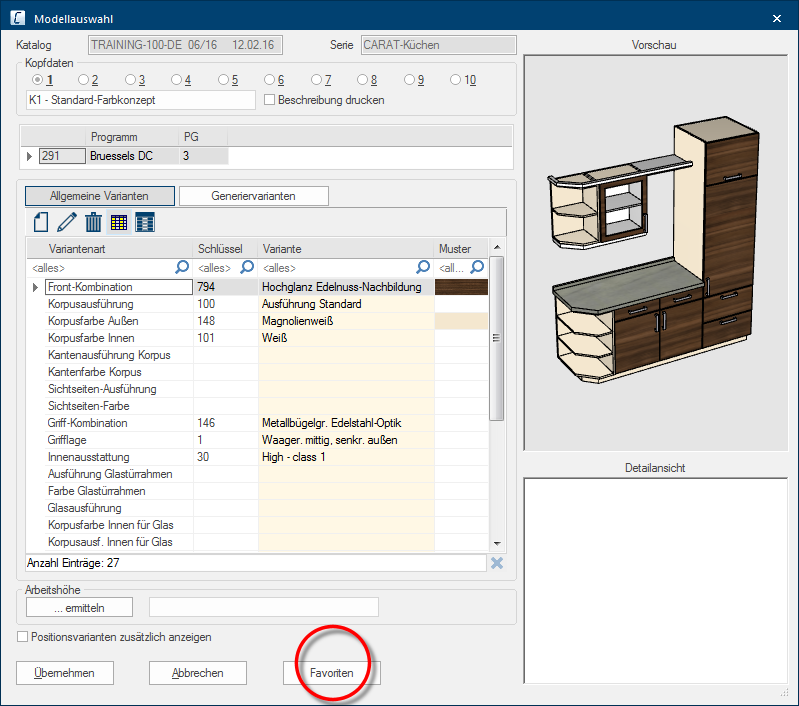
- Click for this, on the Favourites button to view the list of the available favourites.
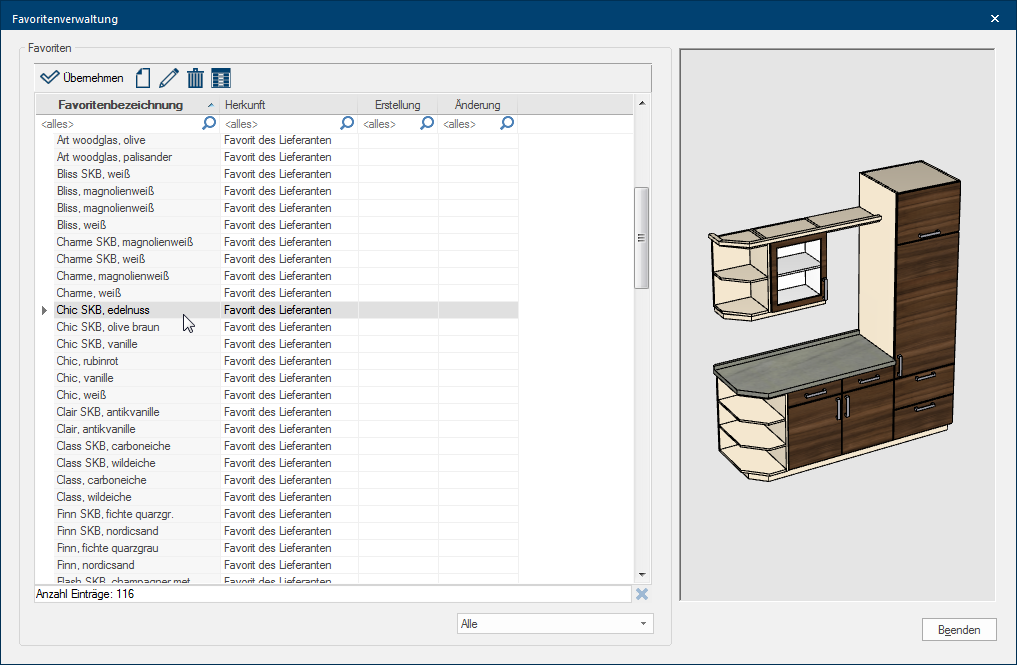
- The table for the listing of the favourites contains several columns. In the first column is the name of the favourite specified. You can find out who created the favourite from the column Origin. If you have created your own favourites, a creation and change date will be displayed.
- You will find the toolbar above the table, you can use this icon bar to apply an available favourite in the model selection.
- You can create an own favourite for an already filled in model selection by using New, modify the description of the own favourite afterwards with Edit or remove an own favourite again with Delete.
- In order to be able to find your own favourites more quickly, there is a list box If several options are provides for one function provides, are these often shown in a list. Please click on the little black triangle in the right margin to select the desired option. beneath the listing available, with which you can limit the list of the favourites to only your own or those of the suppliers, if desired.
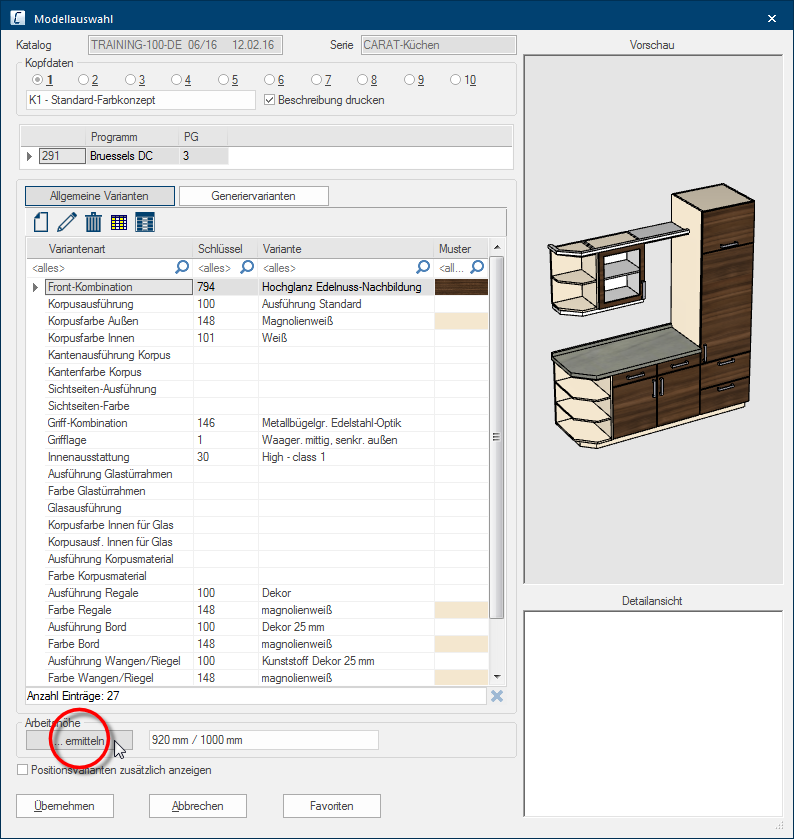
As soon as you have generated one or more worktops in your plan with possibly different plan heights, you can have the respective worktop heights also be determined automatically in the model selection, when needed.
- To do this, click on the Determine... worktop height button, in the lower area of the model selection. Thereupon all worktop heights existing in the plan will be determined. The worktop heights will then be displayed with the other model information, on commercial forms.
However, you must not always determine the worktop height, instead you can directly enter a text into the worktop height field. For this, you can enter up to 30 characters.
