The Material Selection
After you have completed the graphic data The graphic data includes all colours and material illustrations (textures) that are needed to represent the surfaces, as well as specially made 3D articles. in CARAT, you have an abundance of textures In computer graphics, one uses textures as surfaces of a 3D models. and colours available for the design of your plans. For the colour design of the kitchen furniture, you have to make the necessary colour selection by using the model selection of the respective supplier. See also: The Model Selection
Use for all other articles, like room, construction and decoration articles, the colour range in the Material selection dialogue Dialogue, dialogue windows or dialogue fields are special windows in software applications. Dialogue windows are displayed by application programs in different situations to request input or confirmation from the user.. Via this dialogue you can access all textures that are stored in CARAT. Via the material selection you can furthermore also access the textures that you have created yourself by using the Own materials heading in the materials area and the colour dialogue of Windows, which you can use for the creation of individual colour shades.
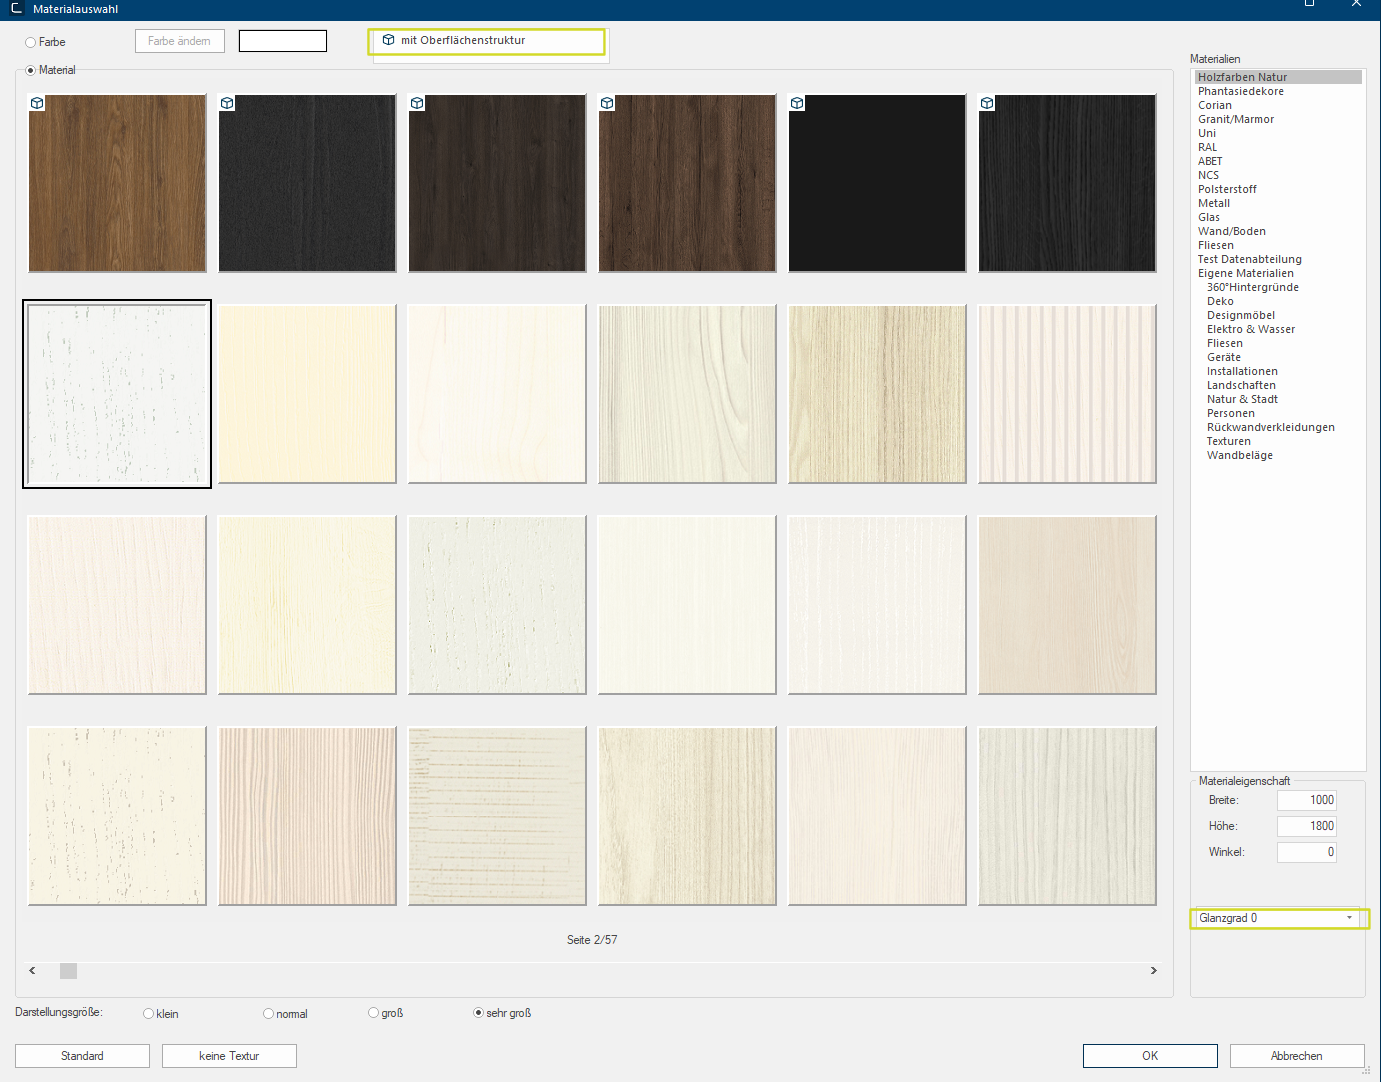
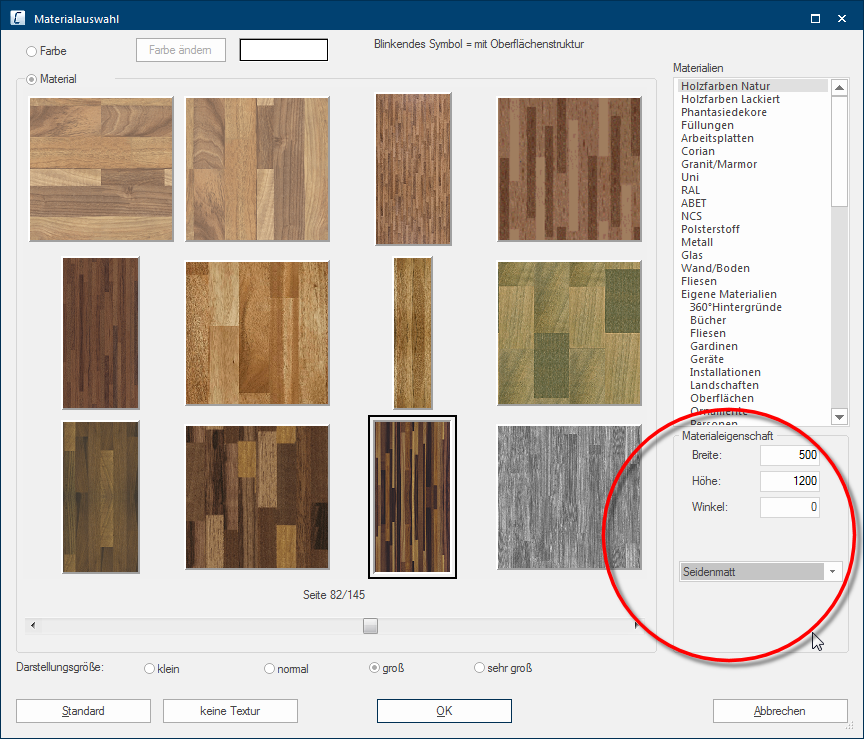
After you have selected a texture, the presetting of the selected texture will be shown in the area Material property. These are the width, the height and the angle with which the textures are displayed in the planning. In this area you can also set the Gloss level, by which you can define if the texture for example should be displayed mat or glossy.
New: From CARAT version V2023.10.0.0 onwards, with the introduction of CARAT emotion, you will also be offered materials with 3D surfaces. These are marked with a cube.
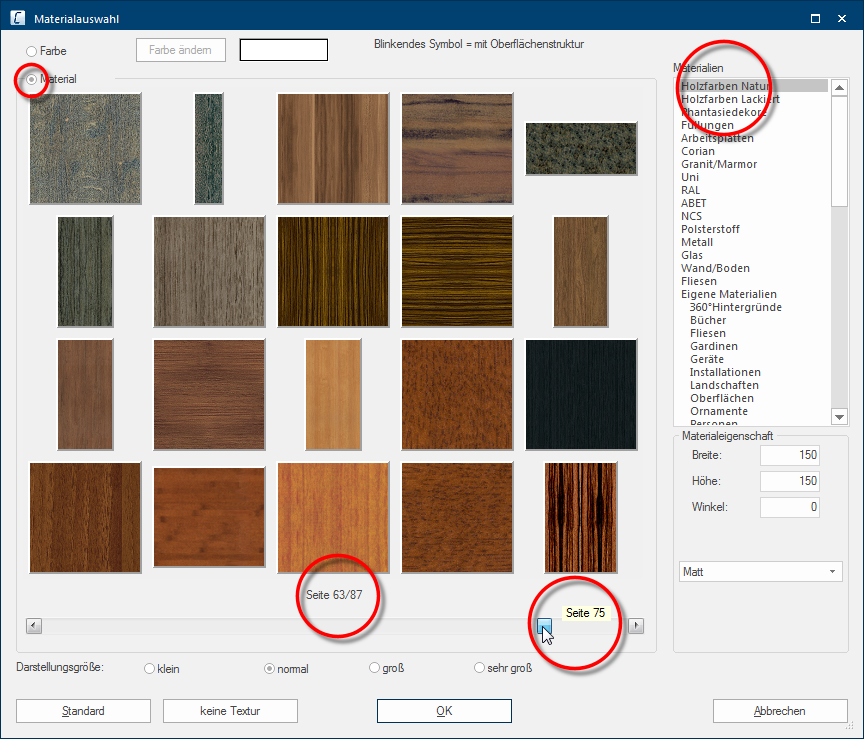
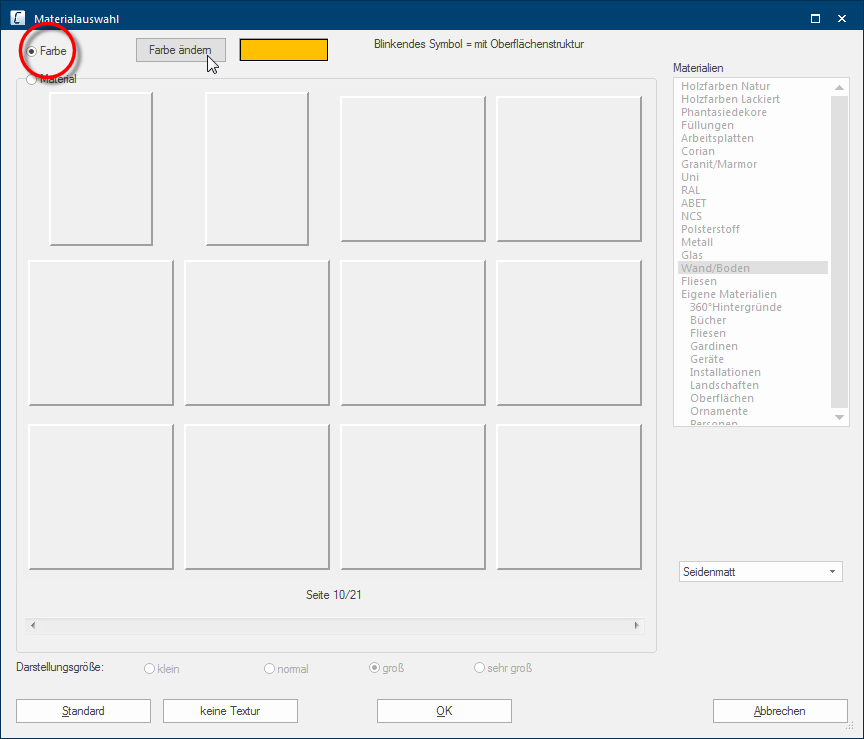
The radio button A radio button is a standard element of graphic user interfaces. In contrast to a checkbox, when used in a group, only one radio button may be marked at a time. The name radio button comes from its similar behaviour to selecting a radio station on an old fashioned radio: when one button is pushed the others pop back out. Material at the top left, should be selected to be able to see the available textures. The textures are shown, in a scaled Scaling is a term in mathematics that designates a size change. In computer graphics the term is used to represent the optimal size of a design on paper. down preview, in the area under the radio button In dialogue windows you always find one or more buttons that can be activated by clicking on them. Typical functions for buttons are e.g. OK, Cancel, Apply. Buttons are always activated by a single click with the left mouse button.. Beneath the textures you will find a scroll bar A scroll bar, also called roll bar, is a graphical processing element in application programs with a graphical user interface. If, because of the quantity, only a part of text and picture elements can be displayed, the relevant spot can be reached by using the scroll bar. The English scrolling originates from scroll. with small buttons with black triangles to the left and right. With these two buttons you can move through the material selection.
Centred above the scroll bar you will see a display that shows you the current page, as well as the total number of pages for the selected material range. As an additional Addition (in Latin: addere) is one of four basic operations in arithmetic. In primary school and in common language it is the expression used for the adding of two or more numbers. functional element, the scroll bar contains a slim slider that also shows the position of the currently displayed page. To be able to quickly call up a specific page in the material selection, you have the option The word option (from Latin: optio = free will) used in computing means a choice. In CARAT it is normally used with a list box. to move the slider of the scroll bar while holding the left mouse button pressed. Thereby, a tool tip will show the page of the material selection that will be displayed when releasing the left mouse button.
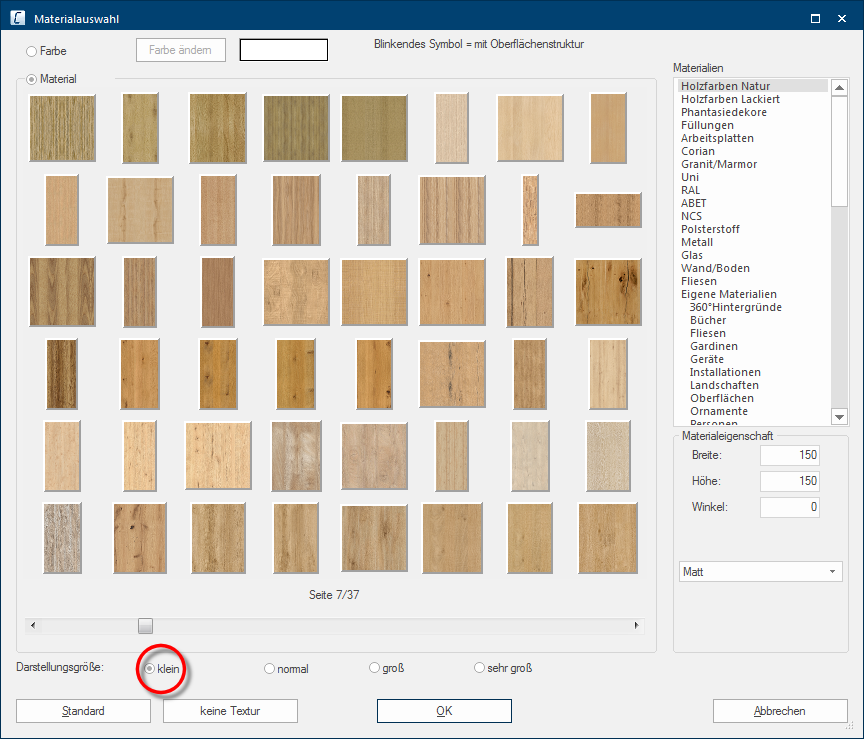
Underneath the material selection, you can modify the display size for the above preview. With smaller settings, you will see clearly more textures at a time. With larger settings, you will in fact see fewer textures, but you can therefore discern the individual samples of the textures better.
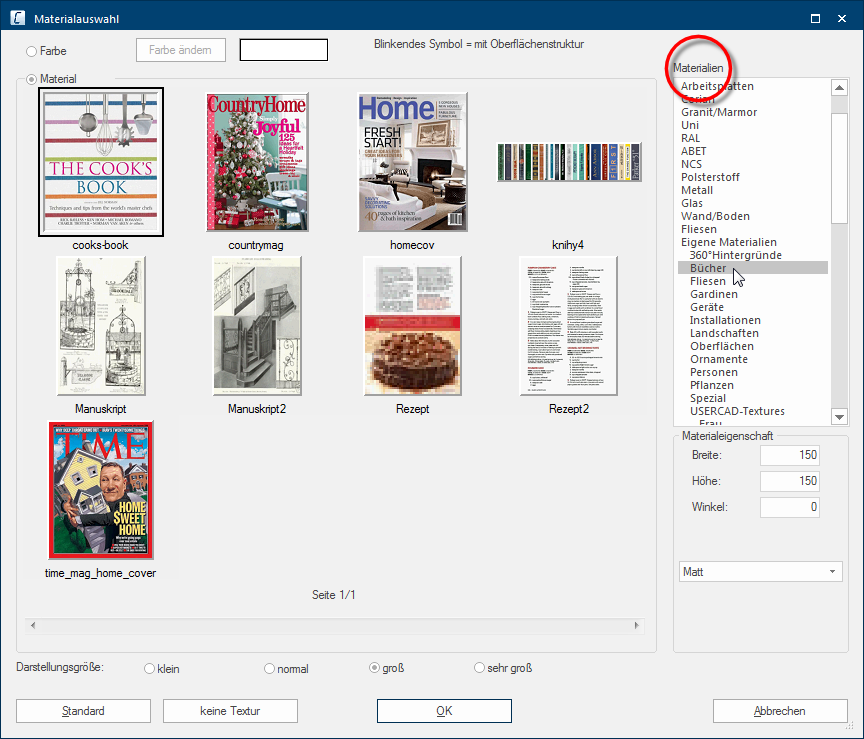
On the right side of the dialogue you will find the Materials area. All textures existing in CARAT are there specified, divided into the categories, so that meaningful groups of textures result, like for example wood or stone textures or also RAL colours. As soon as you click Typically the LEFT mouse button is pressed once quickly, if not specified differently. Clicking will either mark an object, or when clicking on a button, the execution of the desired activity (e.g. OK, Cancel, Close). on one of the categories, the corresponding textures are displayed. Always pay attention to the page number indicator under the textures, to identify how many textures belong to the respective category.
You can edit the appearance of a texture for the display in the perspective according your needs via the material properties. Usually are the settings already preset, fitting the particular texture. However, you can change these settings at any time, to be able to use the texture also for varying ranges.
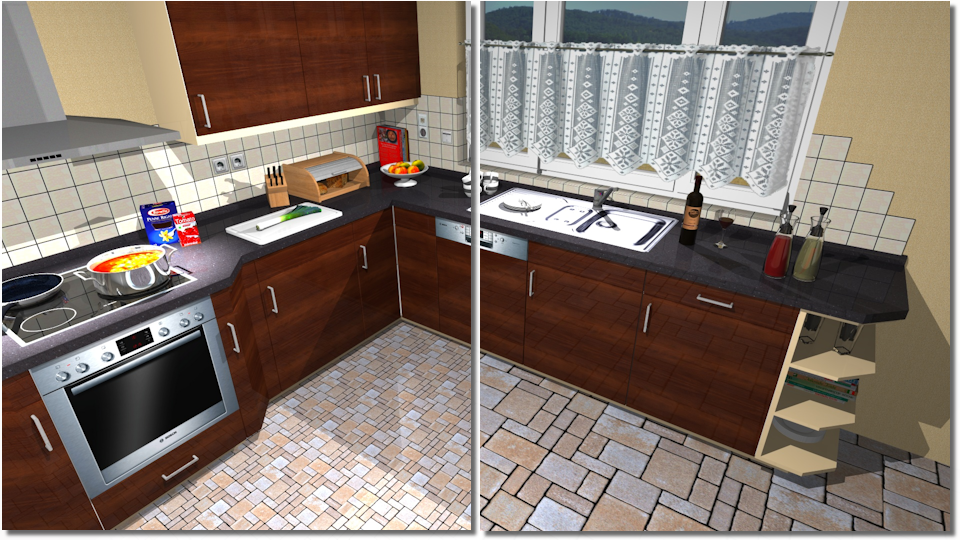
A texture is repeated on a surface until the surface is completely covered with the texture. How many times a texture should be repeated on a surface, depends of course on the size of the texture and the size of the surface to be covered. You can define the size of the texture which you want to use to cover the surface by using the fields width and height. CARAT has already preset a reasonable size for each texture. Depending on the purpose of use of the texture, you can of course change the size.
- In the illustration below, you can see a texture for floor covering as an example, that in the left picture section has been planned in in a size of 300 x 300 (W x H) and in the right image with a size of 800 x 800.
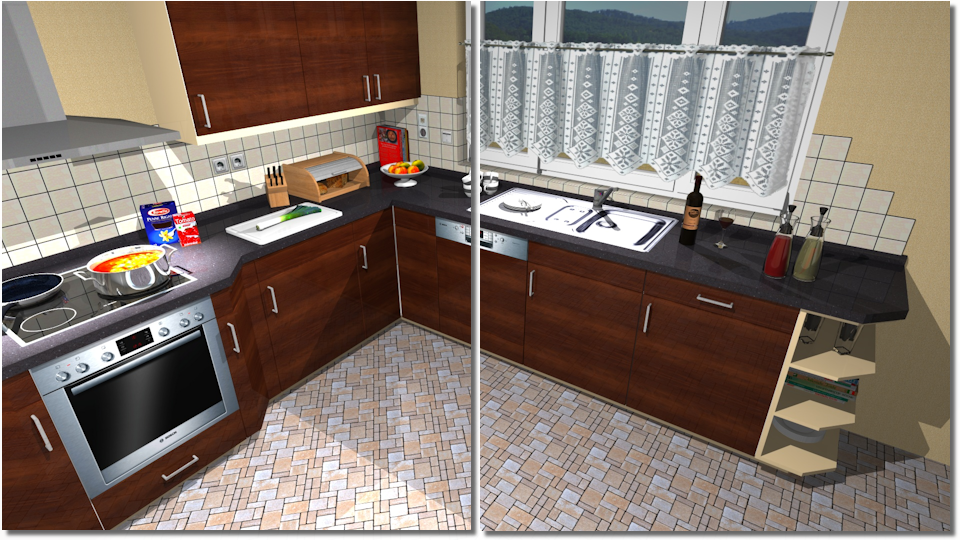
In the angle field, you can enter any angle by which the texture should be rotated.
- In the following illustration, you see as an example a texture as floor covering, that has been inserted in the left picture section at an angle of 45°, so that the grain runs diagonal in the room. In the right picture section has the texture been inserted with an angle of 0° and runs therefore parallel with the wall and the kitchen block.
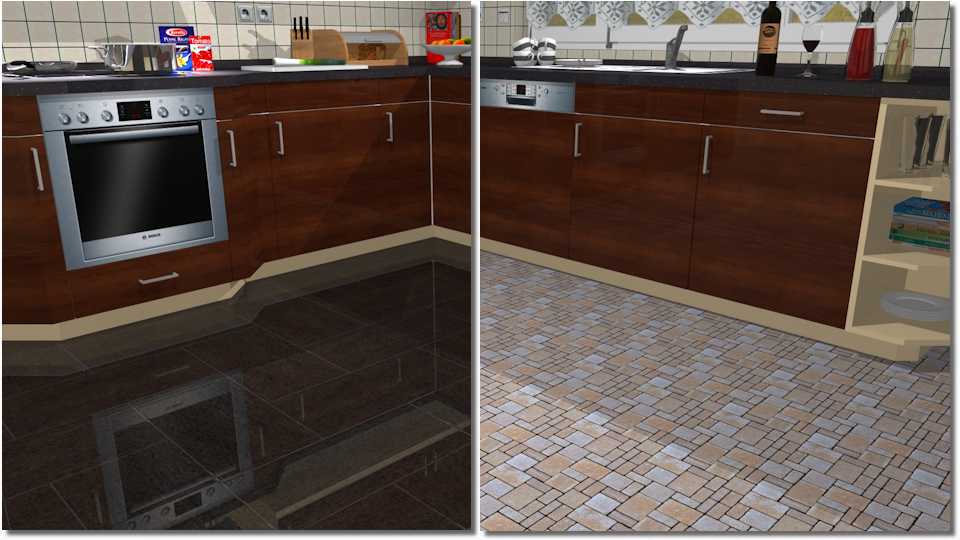
A list of surface properties is available via the list box If several options are provides for one function provides, are these often shown in a list. Please click on the little black triangle in the right margin to select the desired option. in the Material property area. Besides several gloss levels, from mat to high-gloss, you can also select special properties for the design of metals and glass. The surface properties are primarily meant for display in Raytracer Raytracing is a mathematical method that copies the natural vision. With Raytracing is a trick used: the reversal of the light rays from the virtual eye in the virtual room, so that only those light rays, that actually would reach the eye in the selected position, are calculated. mode, because the gloss and reflection effects can only be calculated realistically by Raytracer.
- In the following illustration, you see in the image to the left a texture for floor covering as an example, that has been provided with the property high-gloss. In the right picture section, is the property matt used for the texture.
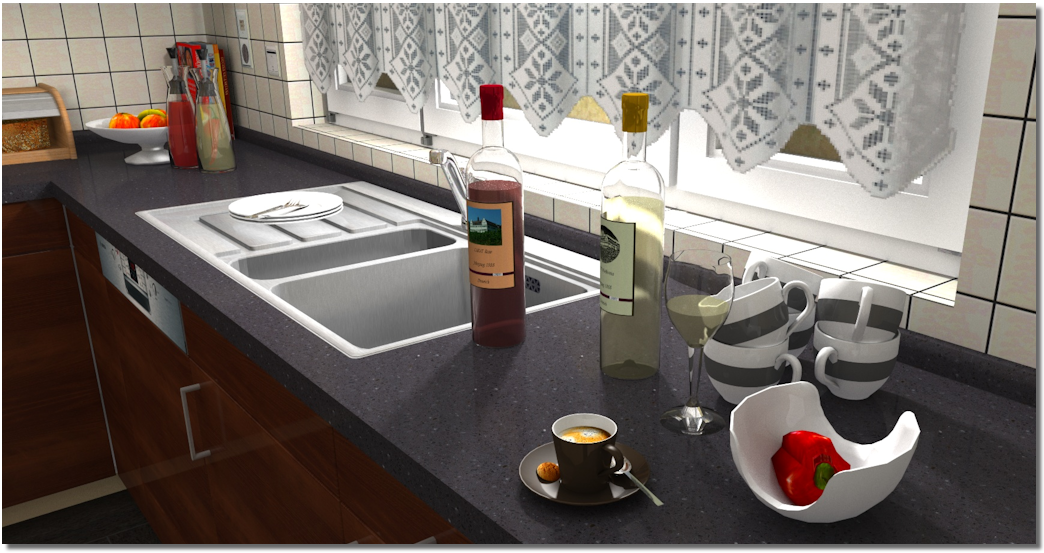
The following graphic should give an impression of the effects, the varying material properties can create. The setting silk mat has been selected for the worktop. The setting refracting has been selected for the glass bottles and the setting frosted glass for the fluid in the bottle. The property ceramics is assigned to the china ware to achieve that special gloss.
Usually are the properties for a texture already preset realistic. However, you still have the possibility to edit the properties, so you can achieve the effect you want.
After you have activated the Colour radio button, you can use the colour range of Windows, to create any colour you want. Click on the Edit colour button to open the colour range of Windows.
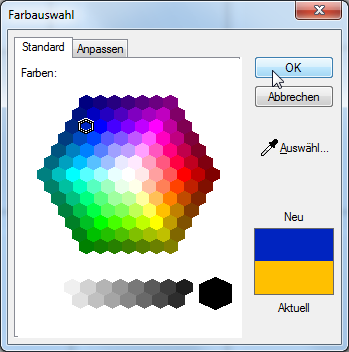
- The colour range dialogue initially includes only a few basic colours. To use one of the colours existing in CARAT, mark the desired colour and click subsequently on the OK button.
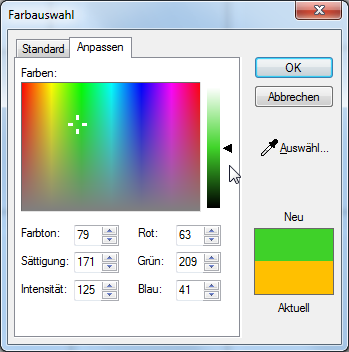
Click on the custom index card Some dialogue windows are too voluminous, therefore the functions are separated into indexed groups. The subgroup names typically appear on the tab of the index card at the top of the dialogue and can be selected by clicking on the appropriate tab. if you want to create your own colour. There you will see a colour spectrum.
- Click in the colour spectrum to select a colour. You can also move the cross line in the colour spectrum by keeping the left mouse button pressed, so you can select the colour desired even more easily.
- A setting option for the colour brightness is available directly next to the colour spectrum, that you change it also stepless by holding the left mouse button down.
- You will see a preview of the colour used last (current) and the colour selected now (new) at the right side of the dialogue.
- You can also set a colour directly, by entering the RGB RBG is the abbreviation for the colours red, green and blue. A specific colour in a surrounding field can be easily described using an RGB-value. For example, a pure red has an RGB-value R=255, G=0, B=0. values into the input fields underneath the colour spectrum.
- As soon as you have created your desired colour, click on the OK button to assume the colour in the material selection dialogue of CARAT.
