The Header and Footer texts
We have combined the description of the indexes Header text and Footer text, because these indexes include the same setting options The word option (from Latin: optio = free will) used in computing means a choice. In CARAT it is normally used with a list box. and are also operated similar. The header text is always printed at the beginning of a form between the reference line and the model description, the footer text is always printed at the end of a form.
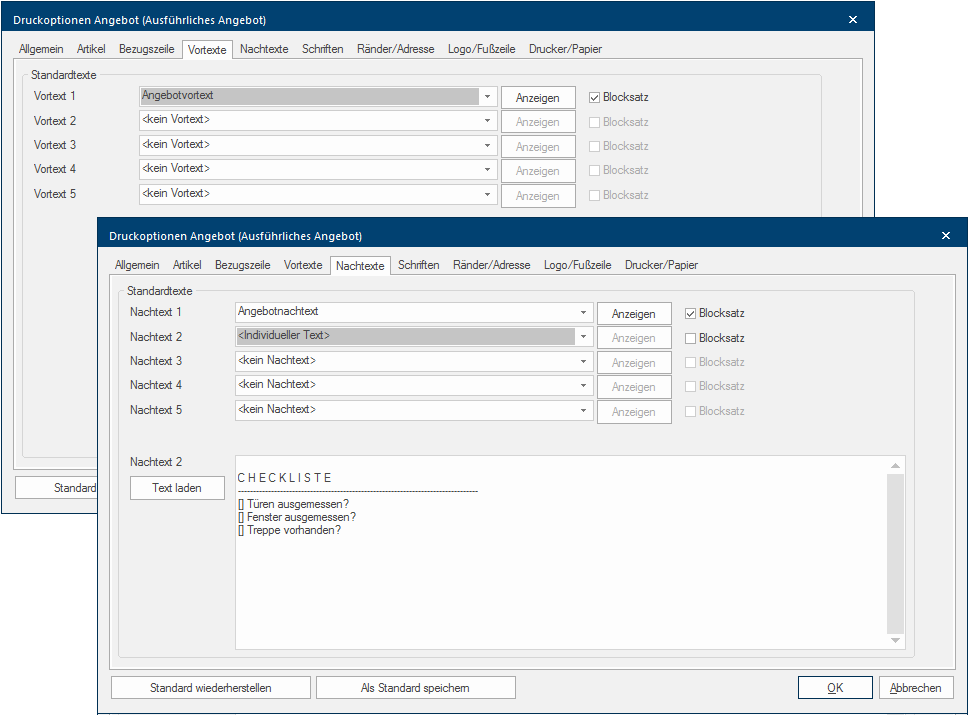
You have the possibility on the indexes Header text and Footer text to document respectively up to five text areas with text modules from your standard texts, this so you are also capable to create more complex header and footer texts for your forms. You can view the already documented standard texts by using the button In dialogue windows you always find one or more buttons that can be activated by clicking on them. Typical functions for buttons are e.g. OK, Cancel, Apply. Buttons are always activated by a single click with the left mouse button. Show. Using the checkbox A checkbox is a standard element in a graphic user interface. A checkbox has, in most cases, two states (set or not set). These usually correspond to a yes/no selection. Justification you can furthermore arrange that the respective standard text is shown left- or right justified. The text will be shown as ragged text (only left justified) if the option is not activated.
|
In case you opened this dialogue Dialogue, dialogue windows or dialogue fields are special windows in software applications. Dialogue windows are displayed by application programs in different situations to request input or confirmation from the user. from the print preview of a planning, two additional Addition (in Latin: addere) is one of four basic operations in arithmetic. In primary school and in common language it is the expression used for the adding of two or more numbers. buttons are at your disposal in the lower edge of the dialogue:
|
The list box If several options are provides for one function provides, are these often shown in a list. Please click on the little black triangle in the right margin to select the desired option. for Header text 1 represents a special feature. If you set a standard or also an individual text for this text area, this text will be printed automatically following the relevant salutation. That is why the text you want to use as header 1 should always start with the second line, thus after the actual salutation. The salutation itself is generated when the customer address is created. See also: The Customers Addresses
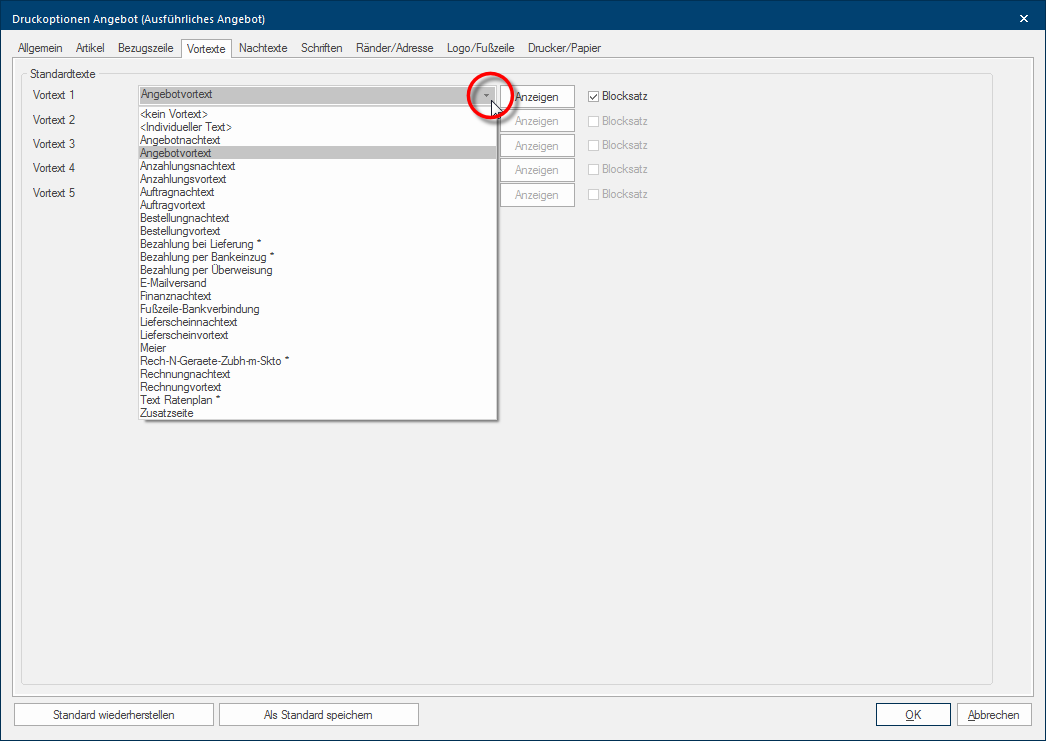
- First click Typically the LEFT mouse button is pressed once quickly, if not specified differently. Clicking will either mark an object, or when clicking on a button, the execution of the desired activity (e.g. OK, Cancel, Close). on the small button of the list box to set a standard text as header or footer text. Subsequently you can select a standard text from the opened list. If you need additional standard texts you can create these at any time using the standard text administration. See also: Standard Texts
In many cases it is surely sufficient to use only standardised text modules for the header and footer texts. Now and then it can occur however that very special, individual information necessary for a customer is needed as header or footer text. For these cases is the entry <Individual text> available to you.
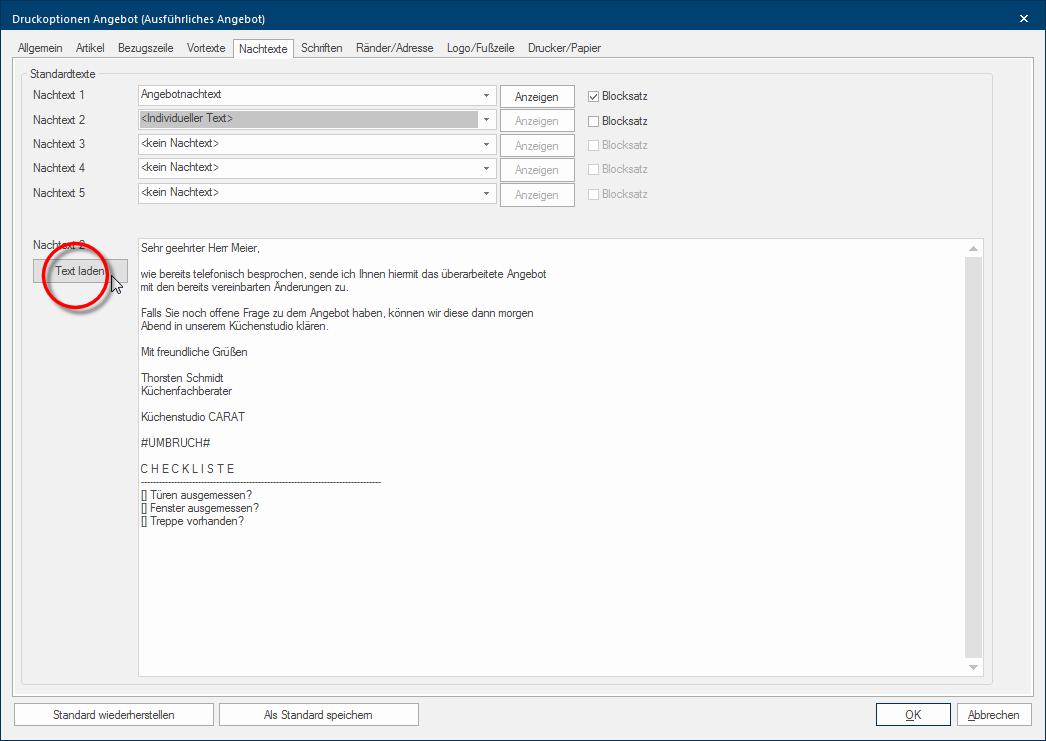
- A big text entry field opens in the bottom area of the index, when you have selected the entry <Individual text>. In this field you can either enter a free text directly or load an available standard text for further editing, by using the button Load text. Because of the resulting combination possibilities basically any length of header and footer text is available to you.


