Creating an addressee
To be able to dispatch data from your head office (maintenance installation) to the individual subsidiaries(branch installations) it is necessary that all subsidiaries are first entered as individual Addressees in the subsidiary administration. New addressees can only be created in the Addressee area of the dispatch dialogue Dialogue, dialogue windows or dialogue fields are special windows in software applications. Dialogue windows are displayed by application programs in different situations to request input or confirmation from the user. of the subsidiary administration.
Click Typically the LEFT mouse button is pressed once quickly, if not specified differently. Clicking will either mark an object, or when clicking on a button, the execution of the desired activity (e.g. OK, Cancel, Close). on the symbol for the subsidiary administration on the Data index card Some dialogue windows are too voluminous, therefore the functions are separated into indexed groups. The subgroup names typically appear on the tab of the index card at the top of the dialogue and can be selected by clicking on the appropriate tab. in the menu ribbon, to open the subsidiary administration.
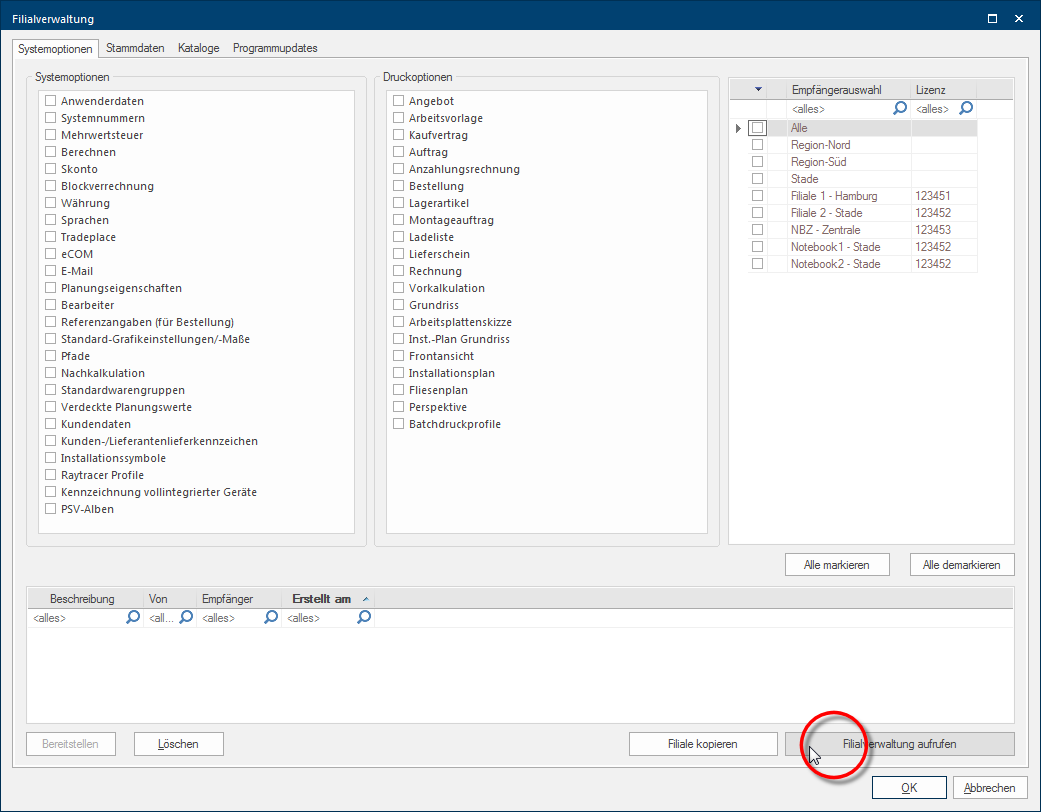
As soon as the subsidiary administration has been started, the selection dialogue, in which you can assemble the data packets for dispatch, appears. To call up the Dispatch dialogue of the subsidiary administration, please click the Open subsidiary administration button In dialogue windows you always find one or more buttons that can be activated by clicking on them. Typical functions for buttons are e.g. OK, Cancel, Apply. Buttons are always activated by a single click with the left mouse button. in the lower right area of the dialogue.
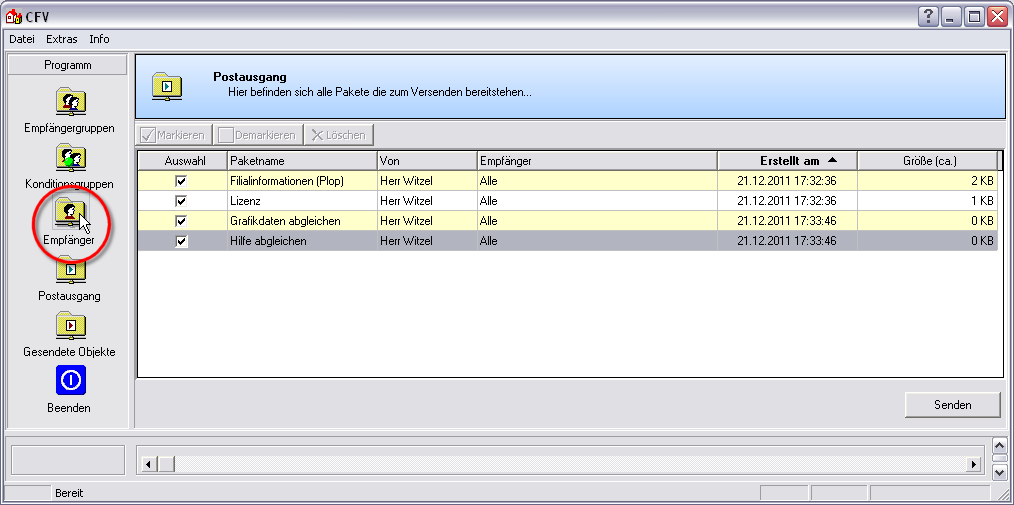
After the dispatch dialogue of the subsidiary administration has been opened, the Outbox will directly be active. In order to create and edit new addressees, please click on the Addressee category on the left hand side of the dispatch dialogue of the subsidiary administration.
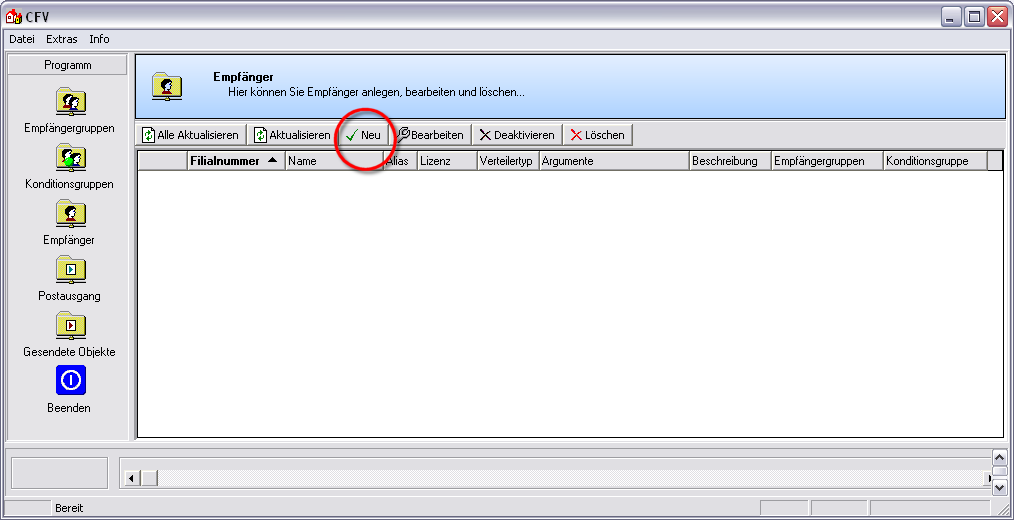
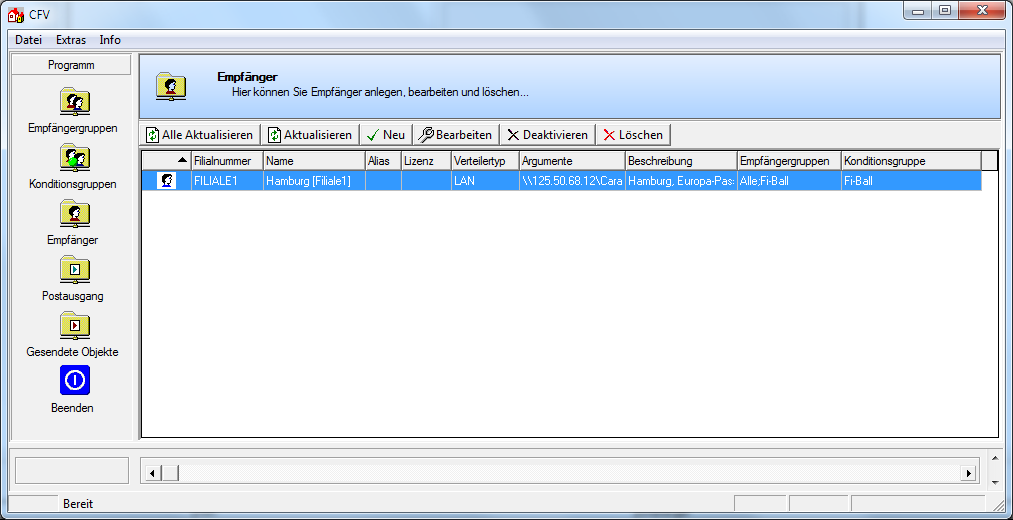
You can add your subsidiaries as new addressees by using the Add New button, above the detail area.
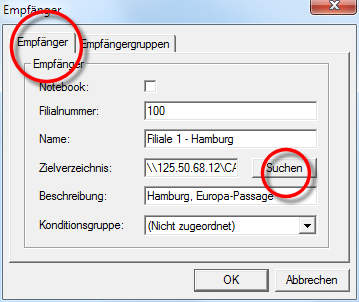
Then, the dialogue for setting up new addressees will open. At first, you should only fill out the information on the Addressee index card. Absolutely necessary are the subs. number, name and target directory input fields. The assignment to an addressee- or condition group may occur later, after you have created separate groups for that.
|
Field: |
Description: |
|---|---|
|
Notebook |
This checkbox A checkbox is a standard element in a graphic user interface. A checkbox has, in most cases, two states (set or not set). These usually correspond to a yes/no selection. only has to be activated if you would like to create a notebook as an addressee that should be directly supported with data from the subsidiary administration. Notebooks usually don't have to be created as addressees, because every notebook can directly be updated An update designates a new version of a base software program, which fixes faults or contains small improvements. from the branch installation via the notebook administration module. |
|
Subsidiary number |
Please enter a clear alphanumeric An alphanumeric character is in the narrow sense either a letter or a number. The term is used in telecommunications and computer technology. string to identify the individual subsidiary of the respective addressee in the subs. number input field. This field is a mandatory field that has to be filled out. Pleas enter here the number that you have deposited in the respective subsidiary in the system options The word option (from Latin: optio = free will) used in computing means a choice. In CARAT it is normally used with a list box.. |
|
Name |
You can enter a description for your respective subsidiary in the input field name. Also this field is a mandatory field that has to be filled out. Please be careful to give every subsidiary a different name since names cannot appear twice. |
|
Target directory |
Please enter the clearance to the Transfer folder of the respective branch installation in the target directory input field. Within a local network you can also set the path In a hierarchically organized file system the path is a succession of listings that one must pass through to get from a determined place in the file system to a determined file, for example C:\sample\letter\business_letter or c:\Documents\Own files\business_letter. by clicking on the Browse button. The target directory input field is a mandatory field. Please be sure to enter also the Transfer folder, when entering the path specifications.
|
|
Description |
You can write a short information in the description input filed, to make the differentiation of the addressees easier. |
|
Condition group |
You can assign this addressee to a condition group, if already created, via the condition group list box If several options are provides for one function provides, are these often shown in a list. Please click on the little black triangle in the right margin to select the desired option.. Via a condition group you can specify which condition pages On a conditions page is the calculation data for all calculation groups and condition schemes entered. The condition page "standard" should always be used for the base calculation. You can however, create more condition pages in order to implement special requirements. will be send to which subsidiaries and therefore can be used.
|
|
Field: |
Description: |
|---|---|
|
Addressee group |
All already created addressee groups are displayed on the addressee groups register. By using this register, an addressee can be assigned to one or more addressee groups.
|
As soon as all the necessary information have been entered, the new addressees can be saved by clicking on the OK button. The new addressee then appears as an entry in the detail area.
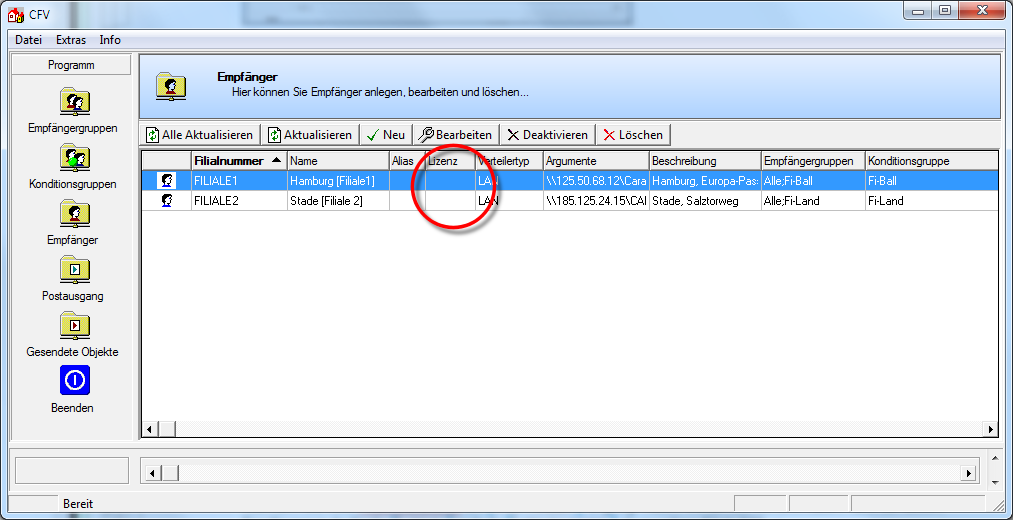
You may have noticed, after you have created new branch installations as addressees, that the license number of the individual branch is missing in the License column.
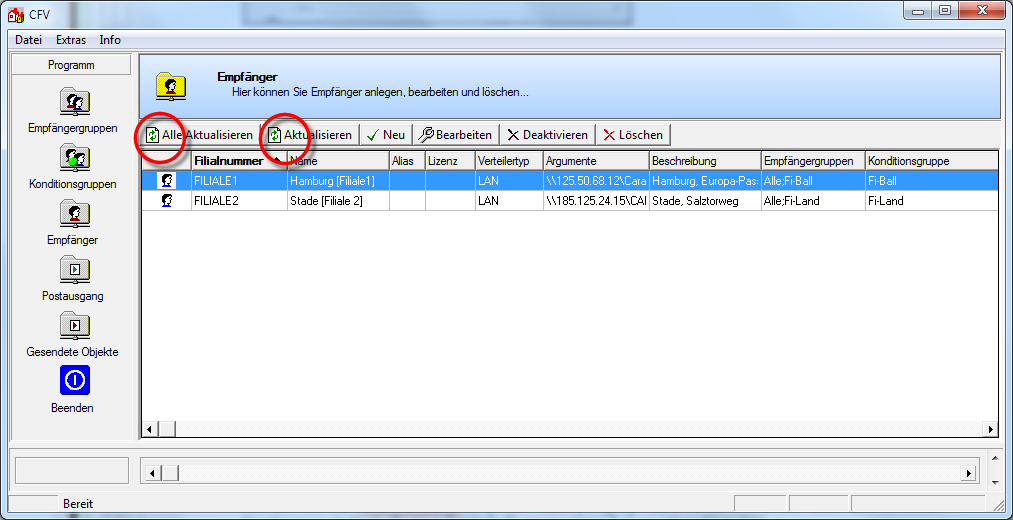
To retrieve the missing license numbers for the existing addressees, click on the button Refresh all. If you would like to refresh only one single subsidiary, select the respective branch in the list and subsequently click on the button Refresh.
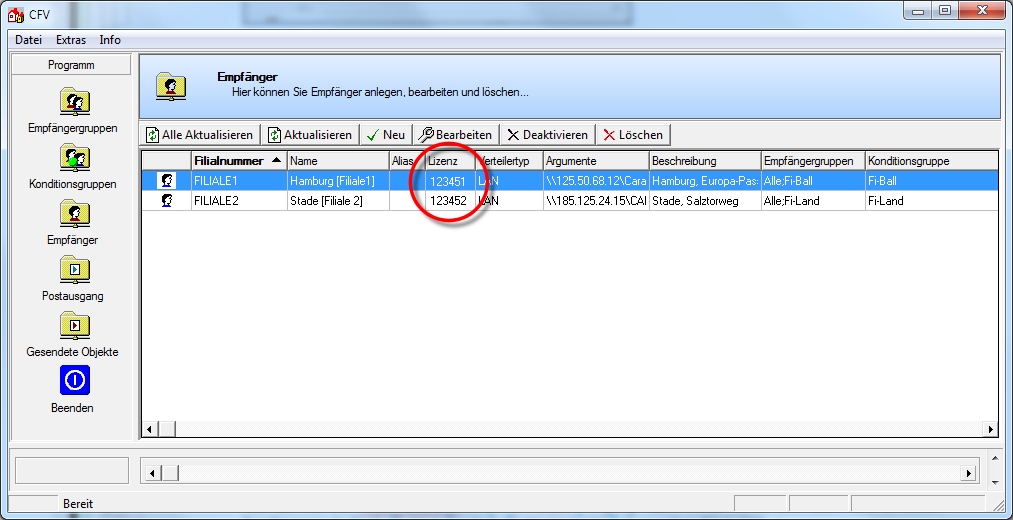
As soon as the head office has reached all subsidiaries via the subsidiary administration and the branch status and the license number have been readout from the respective outbox, the license number will be registered in the respective addressees. The subsidiary administration is now ready to dispatch all head office data to the subsidiaries.

