The Graphic Export
Usually you will print all drawings like floor plan, front views, installation and tiling plans as well as all variations of the perspective display's, that you need for a quotation, order or purchase order on paper, or send them per e-mail E-mail (electronic mail) is a letter like message transmitted electronically over a computer network. or e.COM as PDF The Adobe Portable Document Format (PDF) was developed and perfected in the 80's by Adobe Systems. Adobe PDF files contain data from any application, that can be displayed on every computer, and are suitable thereby to be exchanged with users throughout the world.. But once in a while it can occur that you need a graphic, created with CARAT, also in file format The format or formatting (Latin, forma) is designated in word processing as the design of the text document. In this case meaning the selection of character fonts and character style such as bold or italics. for further processing.
Examples for the use of an exported graphic
- Customer letters
- High quality quotations
- Advertisement in the printed media
- Homepage
- Presentations
With CARAT you have the possibility to export your graphics in file formats suitable for these purposes. In the process you have additional Addition (in Latin: addere) is one of four basic operations in arithmetic. In primary school and in common language it is the expression used for the adding of two or more numbers. options The word option (from Latin: optio = free will) used in computing means a choice. In CARAT it is normally used with a list box. to optimally export a graphic for further usage with other applications. See also: The File formats
To be able to export a graphic, you first have to open the print preview of the graphic (floor plan, wall view or perspective) to be exported, to subsequently retrieve the export via the corresponding button In dialogue windows you always find one or more buttons that can be activated by clicking on them. Typical functions for buttons are e.g. OK, Cancel, Apply. Buttons are always activated by a single click with the left mouse button.. See also: The Print Preview
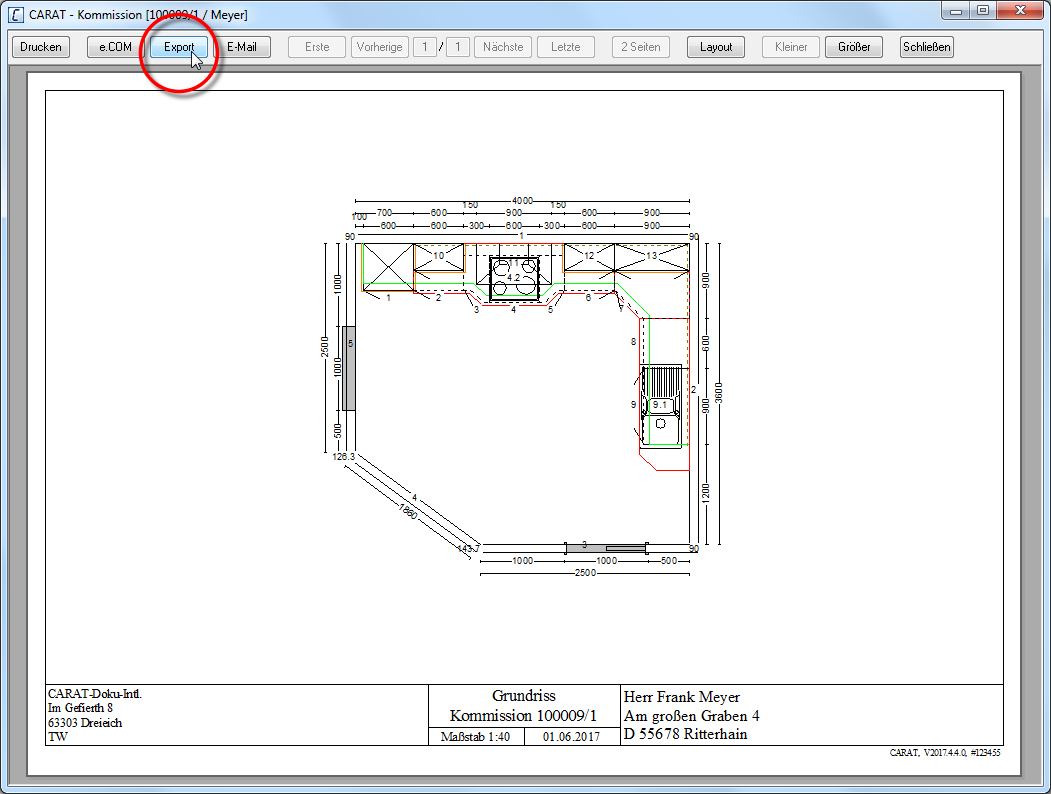
- Open the print preview and click Typically the LEFT mouse button is pressed once quickly, if not specified differently. Clicking will either mark an object, or when clicking on a button, the execution of the desired activity (e.g. OK, Cancel, Close). then on the Export button, to be able to export the graphic.
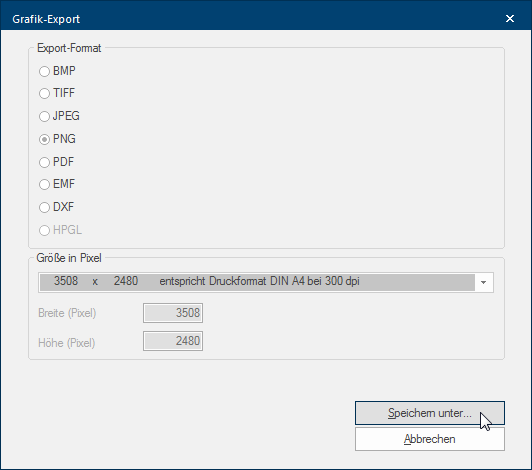
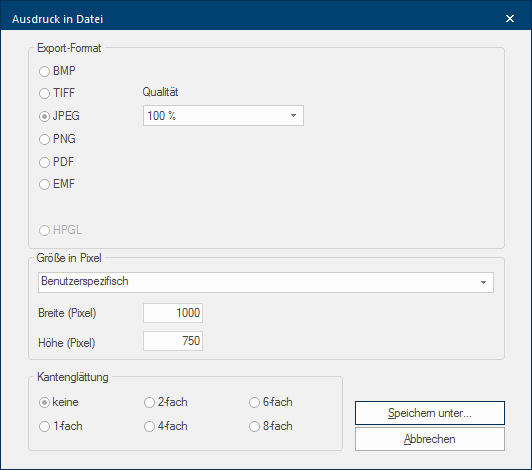
- The Graphic export dialogue Dialogue, dialogue windows or dialogue fields are special windows in software applications. Dialogue windows are displayed by application programs in different situations to request input or confirmation from the user. will open, you can use this dialogue to make the for an export of a graphic relevant settings, like the format or de size in pixels Pixel or picture element identifies both, the smallest unit of digital raster graphics and the display of these graphics on a monitor with raster activation. (resolution Commonly the picture resolution means the quantity of pixels (picture points), which make up a digital image. Normally values are given in width x height.), as well as the storage location.
- You should first select the file format, that is most suitable for the desired purpose of use.
- See also: The File formats
- Set subsequently the size in pixel and additional options like antialiasing Antialiasing refers to, in computer graphics, a technique for reducing undesired effects like saw tooth distortion, caused by the limiting of the separate pixel raster, that can occur by creating an computer graphic. If antialiasing is primarily used to attenuate the edged appearance caused by saw tooth distortion one also speaks of edge smoothing., depending on the graphic format.
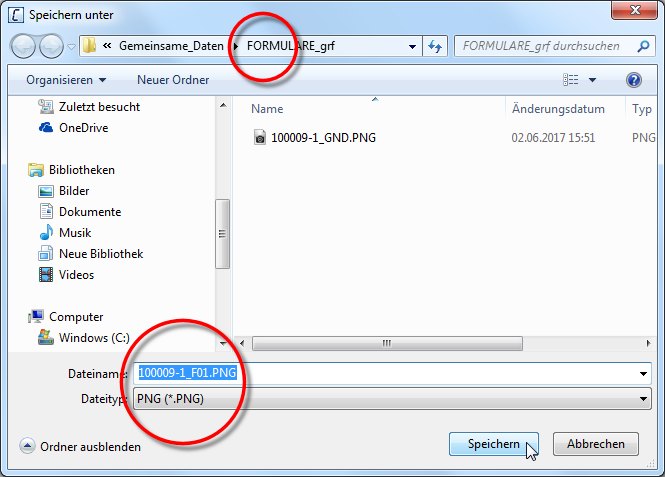
- To finalise, enter the location where the file should be saved.
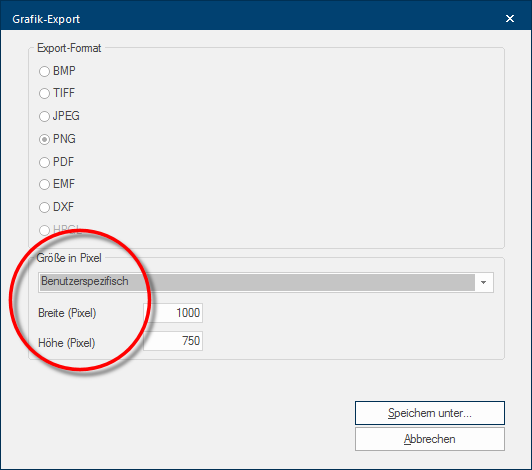
- You can freely define the size in pixels for the graphic formats BMP Windows bitmap (BMP) is a two-dimensional raster graphics format, which was developed for the operating system Microsoft Windows and OS/2, and was introduced with Windows 3.0. The file-extension is *.bmp., TIFF TIFF or TIF (Tagged Image File Format) is a file format for saving image data. The TIFF format was originally developed by Aldus (taken over by Adobe in 1994) and Microsoft for scanned raster graphics for colour separation. or JPEG JPEG or JPG (Joint Photographic Experts Group) is a committee of the International Telecommunications Union (ITU) founded in 1986. In September 1992 the committee developed a standardized procedure for a lossy compression of digital (natural) photographic images, that was subsequently named for them. JPEG is the most common photo format on the Web.. For this purpose, is in the corresponding list box If several options are provides for one function provides, are these often shown in a list. Please click on the little black triangle in the right margin to select the desired option. the setting User specific set and are two input fields for the width and height (resolution in pixels) available.
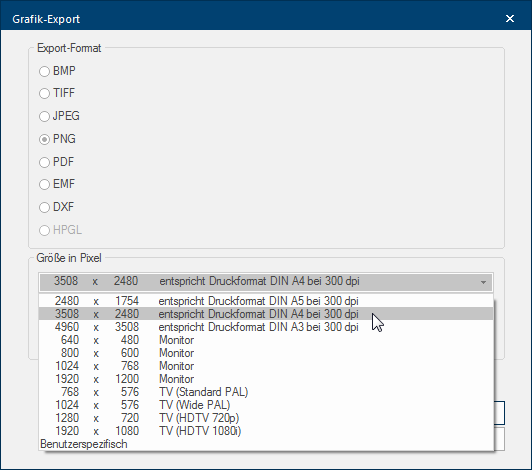
- In case you are not sure what resolution you should set, you can also click the list box for the size in pixels, and select the resolution desired from the list. For a better understanding, we have specified the most common purpose of use next to the resolution.
- You can define how strong the saw tooth distortion of diagonal running lines should be corrected when exporting a perspective by using the option Antialiasing. The picture looks more natural because of the smoothening, but can also appear somewhat blurred with a too strong antialiasing.
| Without antialiasing |
|
With antialiasing |
|---|---|---|
| Diagonal running lines exhibit a stark Saw tooth distortion without antialiasing. A graphic without antialiasing looks quite edged and coarse, especially at a higher magnification. |
|
To moderate the Saw tooth distortion and therefore to create a smoother transition and a flowing shape additional pixels are calculated with antialiasing. |
|
|
|

|
- Click on the Save as... button to export a graphic finally. Thereupon, the dialogue with the same name to save files opens. In this dialogue you can now select the desired storage location as well as assign a file name for the file to be saved. The file will be saved with one click on the Save button.
